- November 4th, 2014, 2:31 pm#4817571
Hello,
I found out I had been approved for an electronics panel for a con over Halloween. I thought it would be a good idea to try my hand at a "cheap" electronics solution and finally get around to some sort of proton pack. Long story short...my original amp and sound solutions failed and the more I worked on it the more detail I tried to fit into it the night of the con.
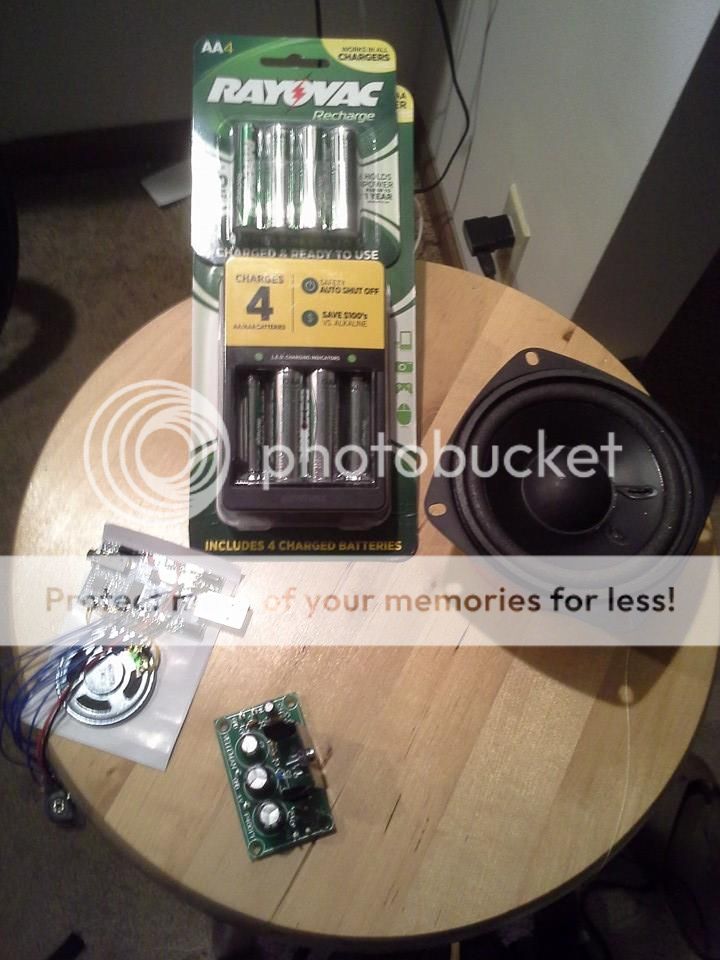
First, the sound and power options I had wanted to try: I used a USB 300 second programmable soundboard, a 7 watt amp from the same site, and the two 8 ohm speakers that are frequently mentioned. Unfortunately, the amp caused some terrible feedback and static issues and the soundboard didn't produce high quality sounds.
At some point, the soundboard ceased to work at all and I had to give up the idea of a cheap electronics solution and by a HeavyProps kit and ck153 7 watt amp.
I used both Stefan Otto and Norm Gagnon's plans as those were the first I found.
Motherboard cut from 1/8" mdf:

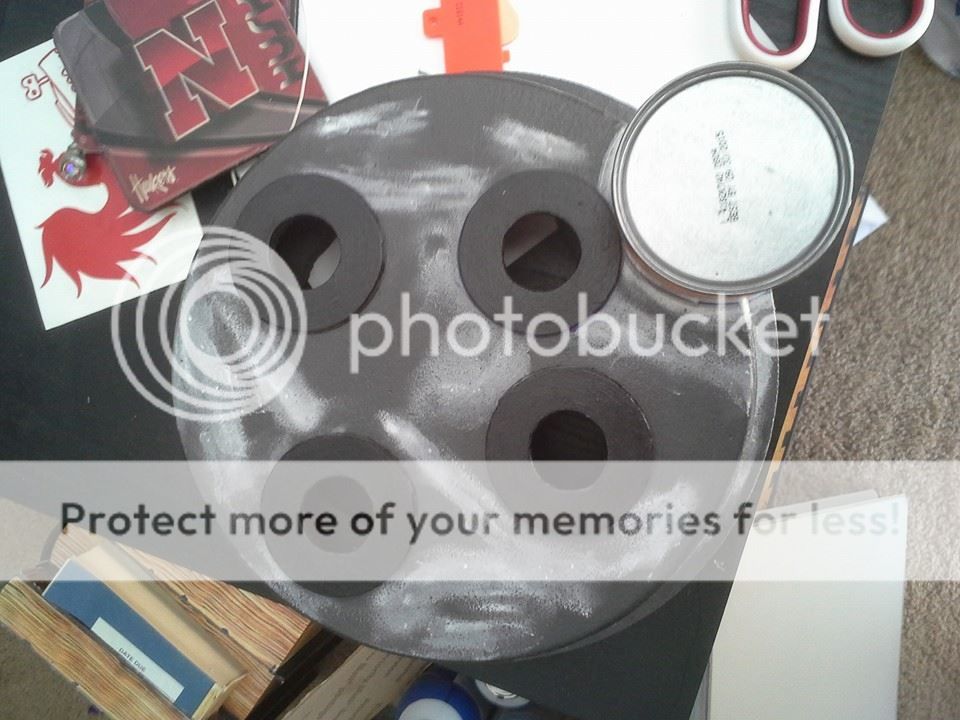
I bought some cheap foam from Harbor Freight and it ended up having some severe holes and defects. Figuring it would be an ideal time to try out paintable caulking, I attempted to fill holes and seams on the cyclotron:
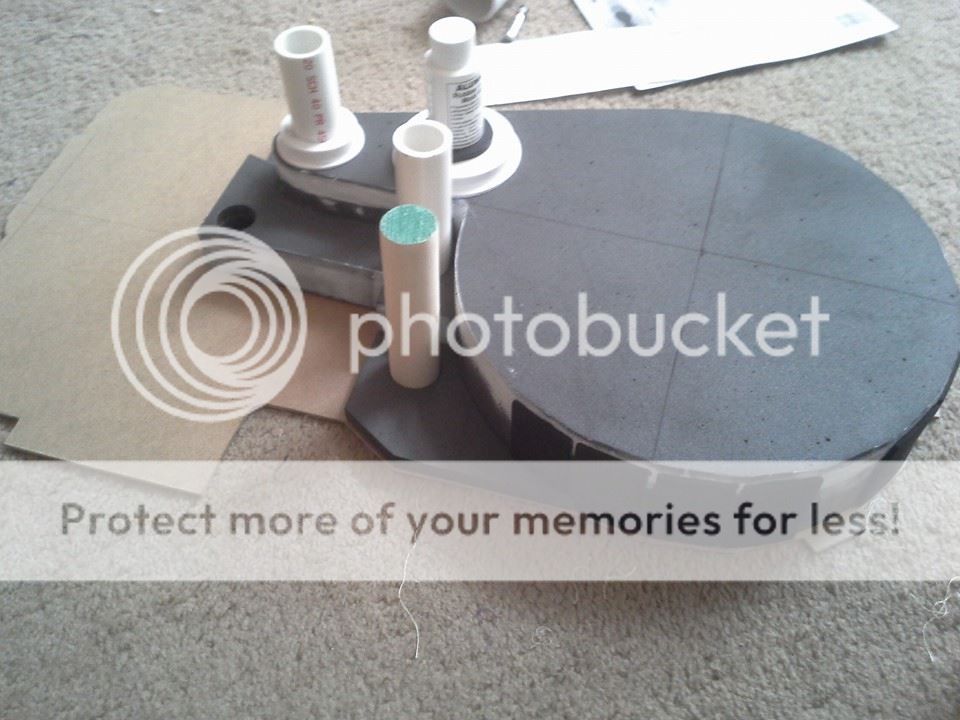
The goal was to go cheap and fast so I tried to stick with foam where possible and pvc everywhere else:
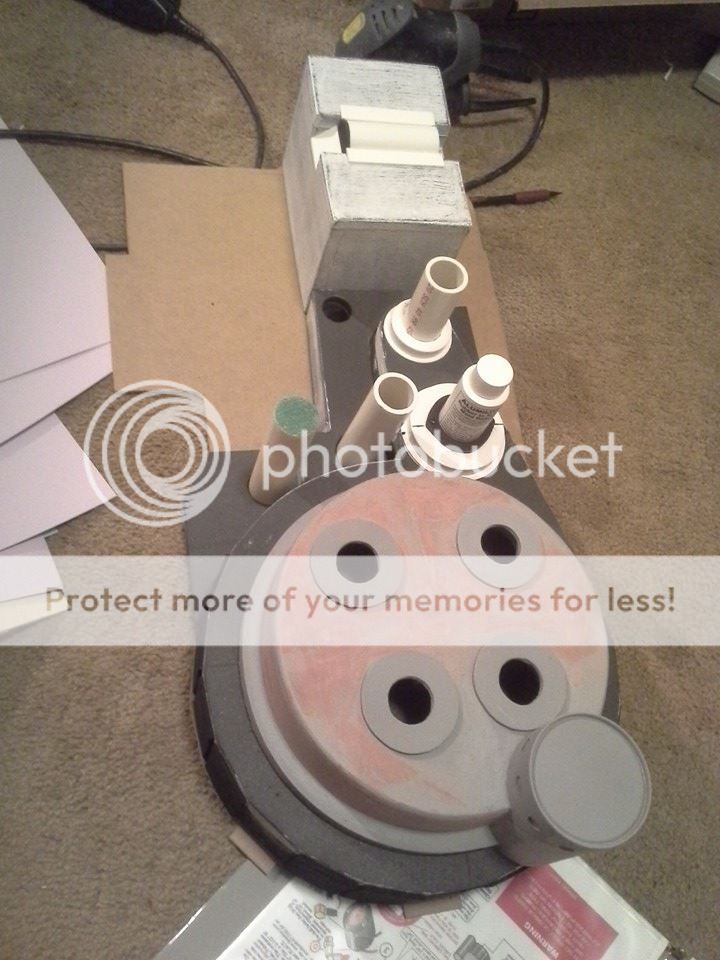
The gearbox was next and instead of waiting hours for the silicone to cure I tried mod podge. Unfortunately, mine appeared to have been left slightly unsealed so it went on thick and wouldn't wet-sand very well. For that one part I also used gesso:
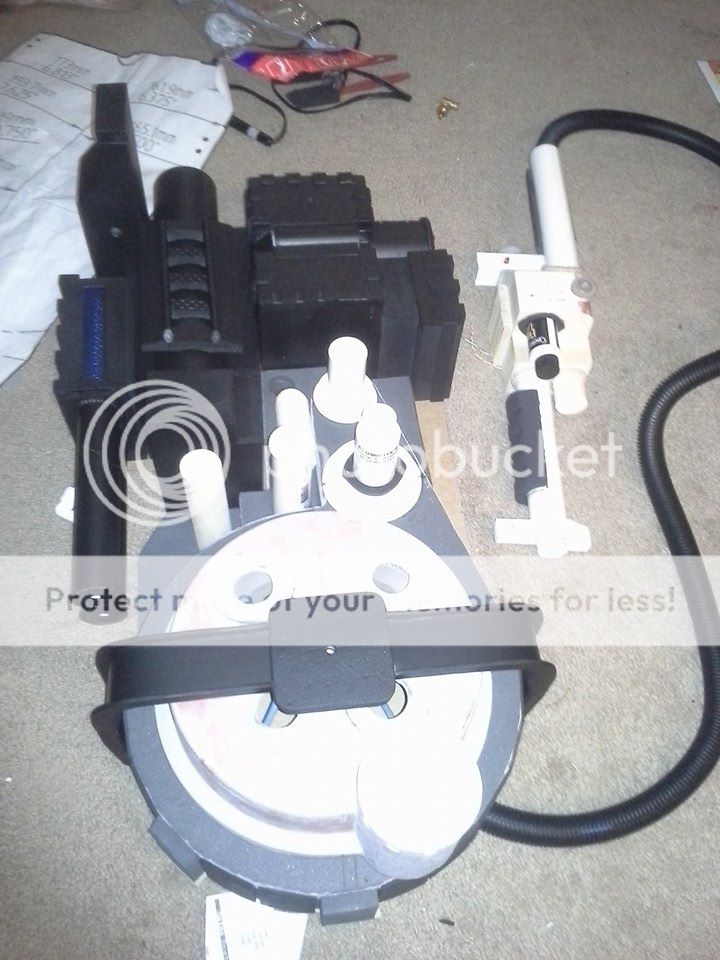
I was perhaps a week and a half from my deadline and started cranking out parts as best as I could (booster, power cell, gun mount, etc):

In between waiting for contact adhesive to set, mod podge and silicone to dry, I built the thrower. I tried bicycle grips not realizing they were too small for the pvc I used and ended up sanding down eva foam for the grips. The gun was made of basswood, some extra sintra I had lying around and random other parts:

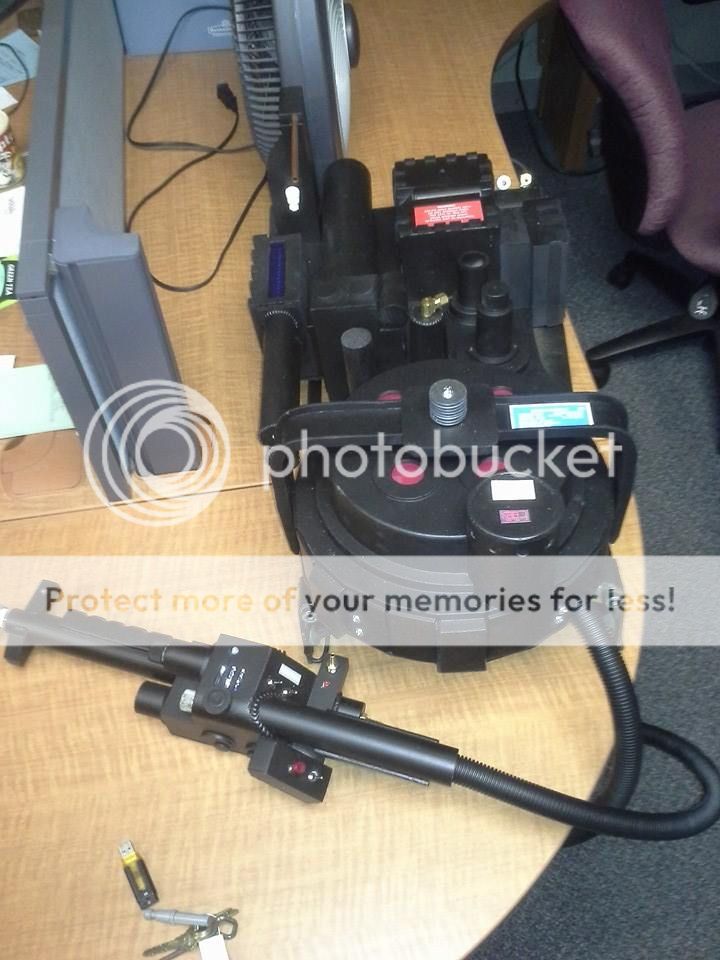
By the end of the day Sunday, less than a week from Halloween, I realized I didn't have time for the paint job I'd wanted so I had to settle with Plastidip and a bit more mod podge where possible to smooth out some areas:
Here it is at work on Halloween (the electronics panel would be that evening) and attached the the ALICE frame I'd found online. The stickers were printed on the least adhesive sticker paper we had and I didn't have time for tubes or wires:
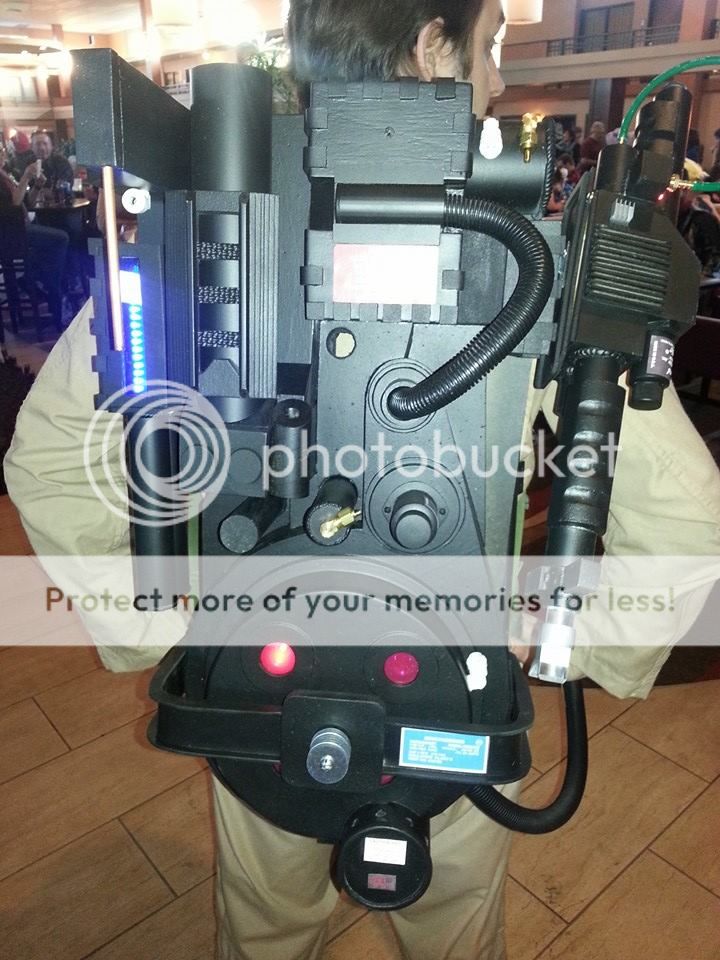
Here I am wearing it the day after Halloween, still no wires, hoses or cables and no weathering. I did get the electronics to work, more on that when I have more time to post:
I found out I had been approved for an electronics panel for a con over Halloween. I thought it would be a good idea to try my hand at a "cheap" electronics solution and finally get around to some sort of proton pack. Long story short...my original amp and sound solutions failed and the more I worked on it the more detail I tried to fit into it the night of the con.
First, the sound and power options I had wanted to try: I used a USB 300 second programmable soundboard, a 7 watt amp from the same site, and the two 8 ohm speakers that are frequently mentioned. Unfortunately, the amp caused some terrible feedback and static issues and the soundboard didn't produce high quality sounds.
At some point, the soundboard ceased to work at all and I had to give up the idea of a cheap electronics solution and by a HeavyProps kit and ck153 7 watt amp.

I used both Stefan Otto and Norm Gagnon's plans as those were the first I found.
Motherboard cut from 1/8" mdf:

I bought some cheap foam from Harbor Freight and it ended up having some severe holes and defects. Figuring it would be an ideal time to try out paintable caulking, I attempted to fill holes and seams on the cyclotron:

The goal was to go cheap and fast so I tried to stick with foam where possible and pvc everywhere else:

The gearbox was next and instead of waiting hours for the silicone to cure I tried mod podge. Unfortunately, mine appeared to have been left slightly unsealed so it went on thick and wouldn't wet-sand very well. For that one part I also used gesso:

I was perhaps a week and a half from my deadline and started cranking out parts as best as I could (booster, power cell, gun mount, etc):

In between waiting for contact adhesive to set, mod podge and silicone to dry, I built the thrower. I tried bicycle grips not realizing they were too small for the pvc I used and ended up sanding down eva foam for the grips. The gun was made of basswood, some extra sintra I had lying around and random other parts:

By the end of the day Sunday, less than a week from Halloween, I realized I didn't have time for the paint job I'd wanted so I had to settle with Plastidip and a bit more mod podge where possible to smooth out some areas:

Here it is at work on Halloween (the electronics panel would be that evening) and attached the the ALICE frame I'd found online. The stickers were printed on the least adhesive sticker paper we had and I didn't have time for tubes or wires:

Here I am wearing it the day after Halloween, still no wires, hoses or cables and no weathering. I did get the electronics to work, more on that when I have more time to post:


 - By Threadender
 - By tylergfoster