By Peterson
#4808319
I'm getting the hankering for a GB2 suit, and would like to try to put together a GB2 Belt Gizmo. Lots of good info on here, and some outstanding examples (fan-built that is, the originals be downright fugly)! I still have a couple of questions, though:

-I see some nice templates one can just print out on here. Any recs on what kind of material to attach it to, or what kind of glue to use? Also, about how thick should the base be?

-For protecting the board, maybe hit it with some clear coat?

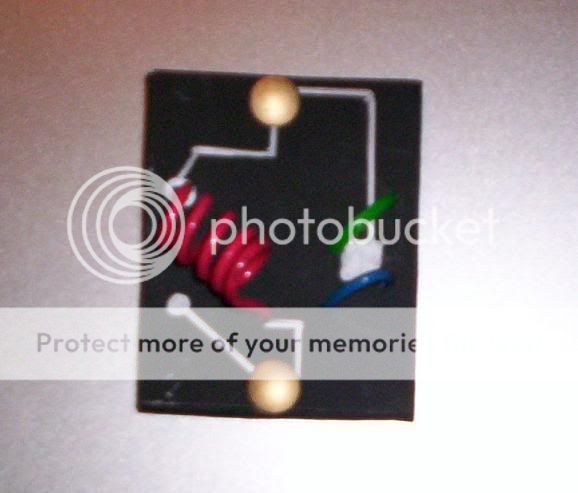
-Where can one find the coiled red cable? For the heck of it, I'm actually running a small "experiment" right now with weed-eater string to see if I can improvise something like it by coiling it around an old Sharpie marker, taping the ends so they stay, and heating it up to see if it'll hold the coil shape (I actually just stuck it in the back of my car...).

Actually, the blue wires on JoeLuna33's daughterboard look very much like the same weedeater string I was working with today. Yes, REAL work too, not just GB costume stuff. :p

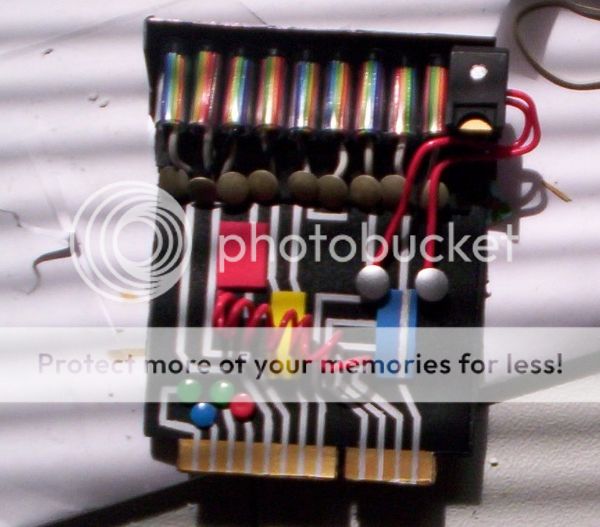
-Also, the thing that really makes the GB2 style "pop" to me - how about the colored cable in the tubes on top?

-The tubes themselves. I was thinking something solid like a disposable pen body would be ideal, but not sure if they make them totally clear. The ones we use at work all the time are frosted. Nebulizer tubing comes pretty cheap, but is very flexible.

-For the belt clip for the daughterboard, I'm thinking maybe a Dollar Store tape measure?
Last edited by Peterson on September 28th, 2014, 9:50 am, edited 1 time in total.
By Mat
#4808359
For the coiled red wire, just use some heavier gauge wire and wrap it around a pen, dowel or chunk of round bar and slide it off; it'll hold it's shape. :-D
By Peterson
#4808392
Roger that. Been way too long since I've been to Home Depot (at least not on a specific, non-prop mission), I guess I can get wire there...

How about the assorted doo-dads on the daughterboard? I'm thinking I may have to rig up my own, but would a place like Radio Shack have some?

Also...about how long should the "nixies" be?
User avatar
By Demon Vice Commander
#4808406
Not to toot my own horn, but you might want to check out my thread on the GB2 belt and gizmo that I made:

http://www.gbfans.com/community/viewtop ... =4&t=28707

Peterson wrote: ...how about the colored cable in the tubes on top?
Just use some basic rainbow ribbon cable that you can find at most electronic supply stores.

Peterson wrote: -The tubes themselves. I was thinking something solid like a disposable pen body would be ideal, but not sure if they make them totally clear.
For the fake nixie tubes you can use short lengths of clear vinyl tubing that you can find at most hardware stores. I think it's about 3/8" OD, but don't quote me on that (my gear isn't on hand at the moment).

Peterson wrote: -For the belt clip for the daughterboard, I'm thinking maybe a Dollar Store tape measure?
A tape measure clip will work just fine, but the screen-used daughterboards were attached to a leather strap (similar to the GB1 belt fobs).
User avatar
By jackdoud
#4808409
I built mine the same way as DVC: http://www.gbfans.com/community/viewtop ... =4&t=33292

If you don't already have plastic you can get a large for sale sign at any hardware store that will work. Most of the electronics you can get close enough at Radioshack.
By Peterson
#4808420
I've checked out both of y'alls builds, they look great! :cool:

So, I've been a busy boy at the stores today!

I think I found my red wire on the cheap at Wally: http://www.walmart.com/ip/36141658?wmls ... 12&veh=sem

Also got some Kiwi black shoe dye....I'm almost certain that's what I used on my first Gizmo and it worked great. Though unless I'm blind, I didn't see any tape measure holders there. Have to hit the local hardware store for them,

Let's see...got a fine silver and a chisel gold paint pen, some assorted foam for the boxes and the boards. Got some white thumb tacks (that or silver was all they had), and some colored push pins for the round doodads. Also found on clearance some round colored things called "Plugz" for bracelets. The bigger side has letters but the smaller side is blank. For a buck I grabbed them too.

For the backing, I first got a small black chalkboard at Walmart. Sucker seems very durable. But I had to hit the Dollar General for the cheapo tape measure, and found a $2 plastic ice bin. Somewhat less durable, but also looks like it'd be a good deal easier to cut.

All the pens I could find were either not round but polygonal, or round but frosted. I found some at the DG that aren't quite round, but the polygonal shape is far more subtle than the Bics. I'm gonna look into tubing as well.

The gold (or yellow) bits at the bottom look to be a PITA, but I really like the extra splash of color. If I can get it printed out it'll be less of an issue, but otherwise I'm thinking of making a stencil.

I may start plugging on the DB later today. Tomorrow, off to Radio Shack. Hope they have some ribbon cable, but I've found some online otherwise.
By Peterson
#4808606
Found a printer!

Yeesh...the only ribbon cable at Radio Shack was gray. Called the local PC-fixer place, he didn't even know what rainbow ribbon cable was.

On this thread here I read in passing of a clean method of getting the rivets out of the tape measure ..."using a combination of drill bit, small flat screwdriver and pliers." Ummm, I can haz more detail?

Also, what methods do you use to affix the motherboard to the holster? Used Goop on my original. Very, very good hold. But also very, very hard to remove without damaging the board and/or holster...
By ImLost3
#4808608
Peterson wrote:Yeesh...the only ribbon cable at Radio Shack was gray. Called the local PC-fixer place, he didn't even know what rainbow ribbon cable was.
Don't sweat the ribbon cable. I've made a few "knockoff" nixies lately. on one I used the spectra strip ribbon cable ( the stuff used on the GB2 proton packs, and on another I just shoved a few multi colored wires up in the clear tubes.
Peterson wrote:On this thread here I read in passing of a clean method of getting the rivets out of the tape measure ..."using a combination of drill bit, small flat screwdriver and pliers." Ummm, I can haz more detail?
Actually on all the tape measures that I bought from my local dollar store the belt clips are held on by a basic phillips head screw.
Peterson wrote:Also, what methods do you use to affix the motherboard to the holster? Used Goop on my original. Very, very good hold. But also very, very hard to remove without damaging the board and/or holster...
Heavy duty velcro. Hold great and is easily removable.
By Peterson
#4808612
Actually on all the tape measures that I bought from my local dollar store the belt clips are held on by a basic phillips head screw.
Shoot, I meant the tape measure *holster*!
Heavy duty velcro. Hold great and is easily removable.
I was wondering if that would be a workable idea. Guess I'll give it a go!
Don't sweat the ribbon cable. I've made a few "knockoff" nixies lately. on one I used the spectra strip ribbon cable ( the stuff used on the GB2 proton packs, and on another I just shoved a few multi colored wires up in the clear tubes.
Yeah, I just really like the look of the wire on the film ones and most of the replicas.

So I'm gonna get a couple of the "Version 2" and "Stantz variant" templates printed out...they don't do poster board so I guess just on glossy paper and glue it to a piece of plastic. They offer lamination, sure if I should go for it or if it would mess up the look of the board.

To all, thanks for the replies!
By Mat
#4808619
*mentally notes the velcro idea* :-D

I bought a roll of ribbon cable 12 years ago (it was cheap!) but for the life of me can't remember where I got it from; I stumbled across it while rummaging through my old art supplies. That being said, I have extra! PM me your mailing address and I can throw about two feet or so into an envelope and send it your way! (I'm not in this hobby to make money; if you want 2' or so, it's yours!) :mrgreen:
Image


When I made the nixies, I used 3/8" clear rubber hose for the exterior of the "nixies" cut about an inch long. I cut the ribbon cable to around 1 1/4" and trimmed from there as needed so I had overhang to go into the nixie holder. The 3 wires going into the bottom of the tubes run up the center of the ribbon cable and snug everything up internally. I had to remove the green, yellow, orange, red and brown strips from the left side of the cable to get everything to fit without a fight; depending on the wires you use though, you may or may not have to do this!
Image


I'm looking forward to following your build! (I've developed a bit of a gizmo obsession of late) What do the rivets in your tape measure holder look like? It seems to me that you could just center punch the center and run a drill bit the same size as the rivet (not the rivet head) through the thing and it should come apart.
By Mat
#4808664
No worries! One more thing out of the "pile-o-fun!" :mrgreen:
Image

Rivet-wise, I found this video on youtube and figured it might be helpful! It's basically the same method, only with nippers instead of a drill to remove the rivet head.
By Peterson
#4809236
Thanks, I managed to get em out without much damage to the leather. The one holding the strap in place I just ended up cutting out.

I trimmed some of the front strap, but decided to wait and see what the finished board looks like before making the final cut (to see if I wanna show off more, or hide my work ;) ).

I worked some with one of the "Stantz variant" boards from Demon Vice Commander I had printed out on the glossy paper. I found a silver Sharpie and used it rather than the silver paint pen for the lines (even with the fine tip, the Sharpie was much better for precision work like this.

For the contacts on the end I went with gold paint. After some not-so-good results with a stencil I cut out, I just decided to freehand it. Thankfully the boo-boos were minor...

ETA: The tops of the colored push pins snip right off with my Leatherman Wave, and are about the perfect size for the round bits on the board.
By Peterson
#4809316
Image
Daughterboard pretty well finished. It's kinda spartan, but I'm afraid I'll screw something up if I try to add more flair to it.

It's high-gloss paper painted matte black (leftover from the template prints) painted matte black, on a sheet of foam board. It'll be attached to a piece of plastic with another sheet of foam board in between (to give room for the belt clip).

I don't PLAN on being in any rainstorms, but wonder what, if anything, anyone here has done for weatherproofing?
By Peterson
#4811043
I haz a progress:
Image

I did hit it with some clear coat, after testing one one of the spares I had printed. Gives it a neat texture, I think, Still need to work on the error box and wires, attach the "nixies" and make the top and side covering for them, do the wires coming out of the bottom of the nixies and add the "capacitors," and cut and attach the main base of the board out of plastic.

I'm still debating on what to do for the coiled cord, but I have a decent at-least-temporary solution at hand that can easily be swapped out.

I may try to jazz up the DB some more too, I dunno.

...I felt like I was farther along until I typed all that out. ;)
jackdoud liked this
#4811692
And here she is, ready to attach the coil cable and mount in the holder (after I fix that thumbtack "capacitor" second from the left). I used black and white wire running down from the tubes, it's hard to tell with the lighting/my standard photography):
Image

A big thanks to you for the rainbow ribbon and DVC for the template, and everyone else for sharing their builds and tips!
    Reboot Proton Pack build 2016

    Hi Y'all! :) I am resurrecting this thread because[…]

    Did it come out today? Ugh the art is so bad tho[…]

    Hasbro Ghostbusters

    I thought 6 inch was 6 inch.. I just looked the m[…]