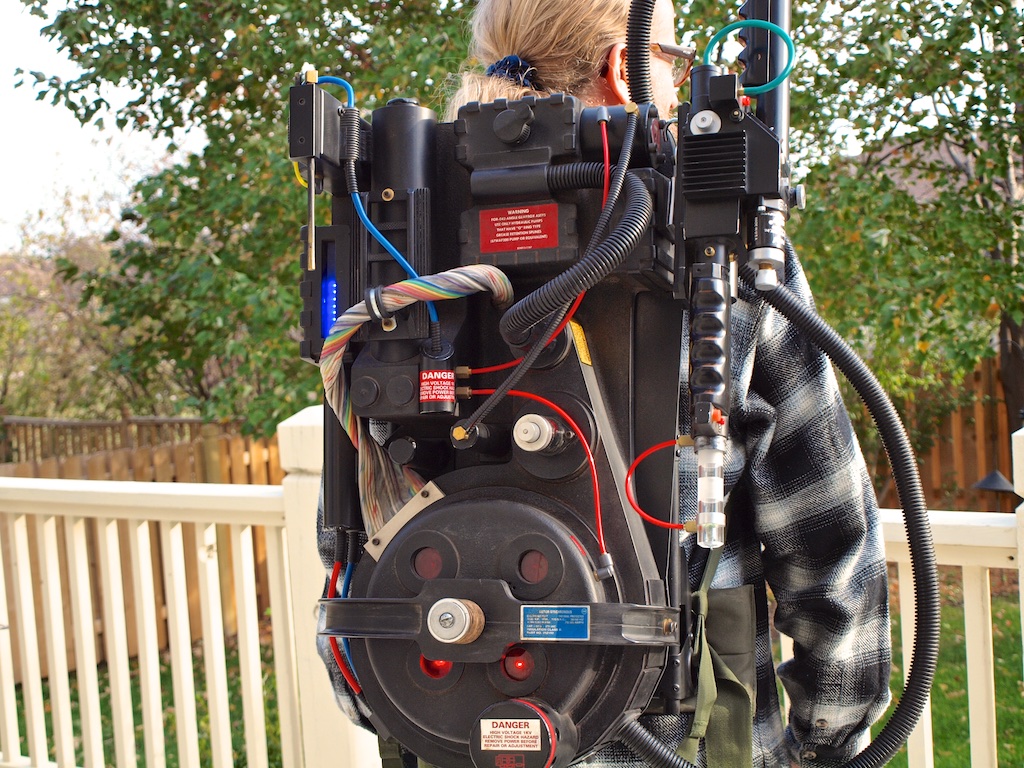
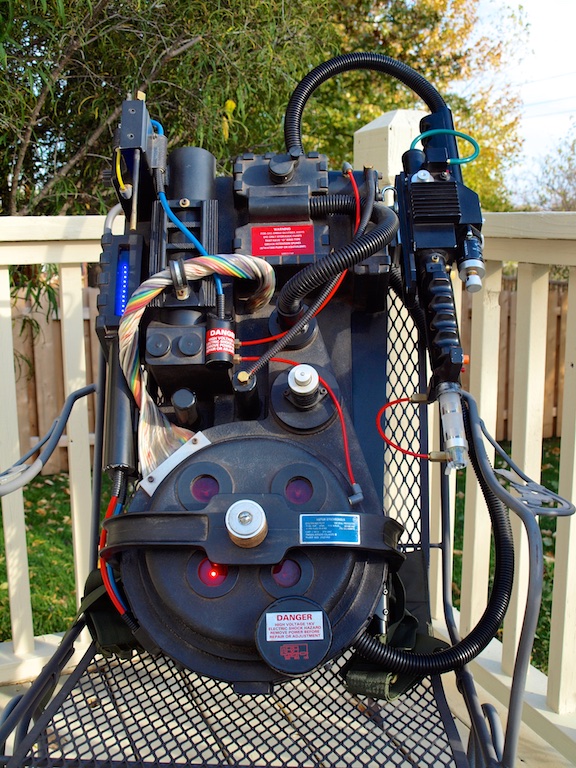
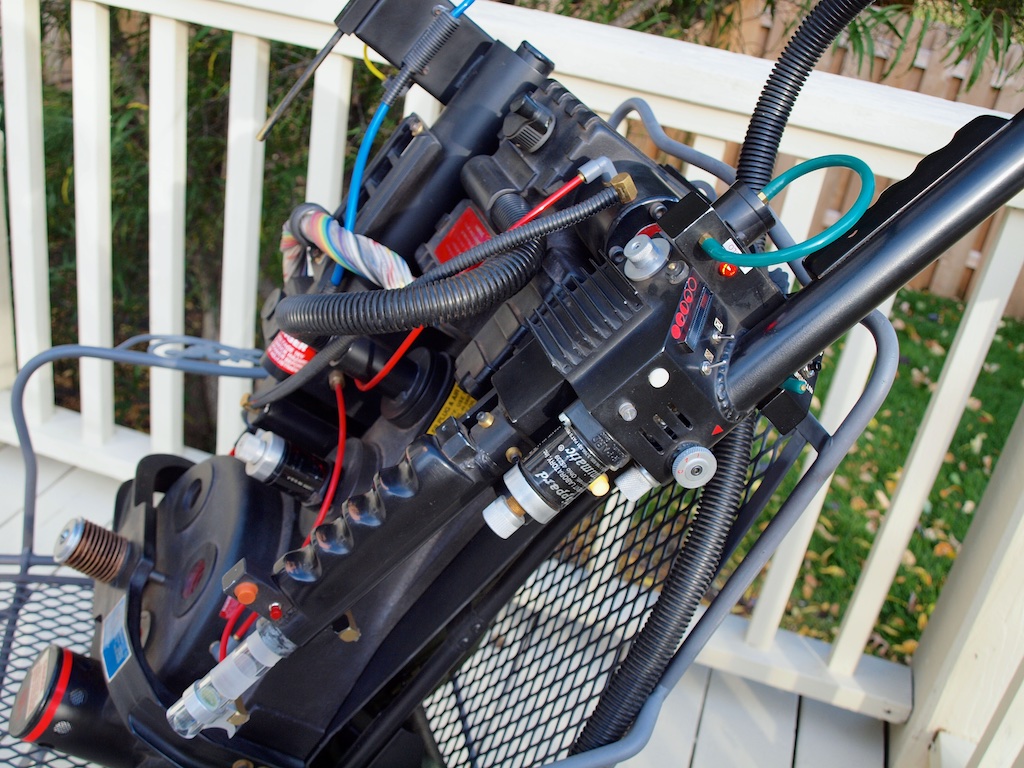
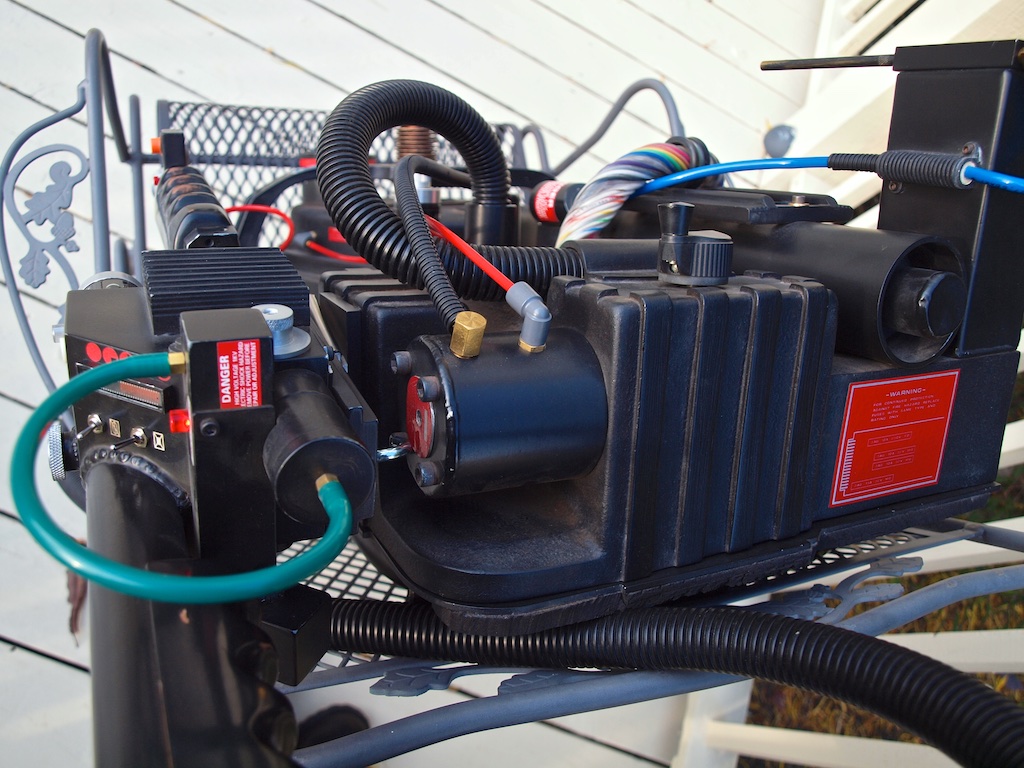
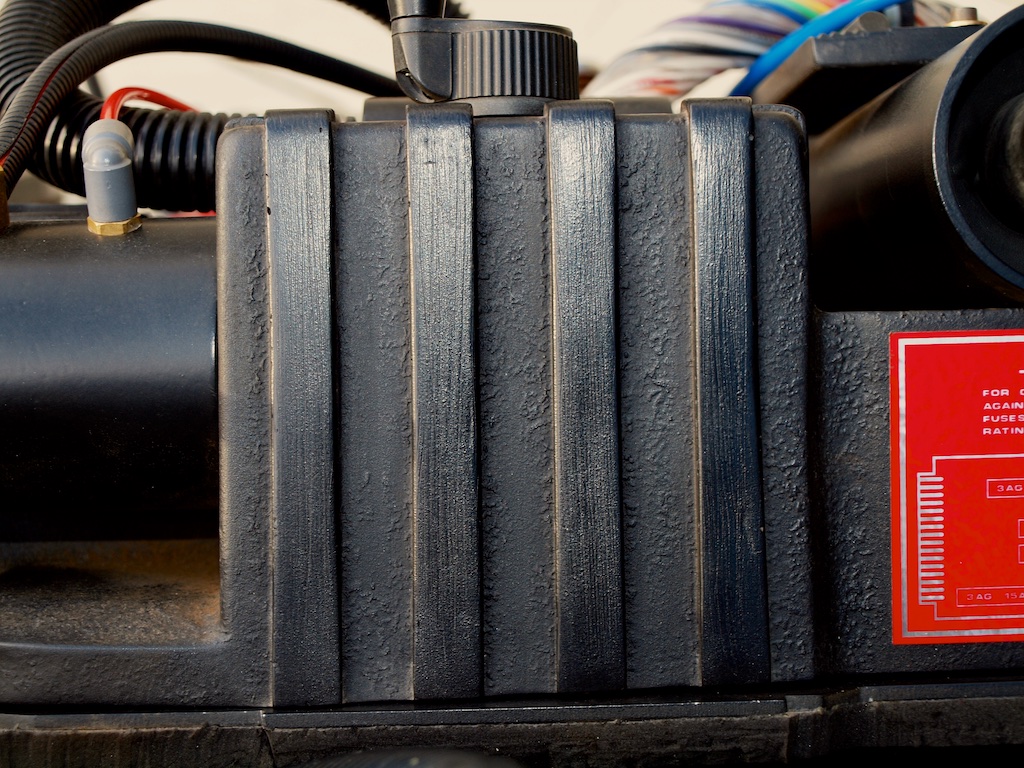
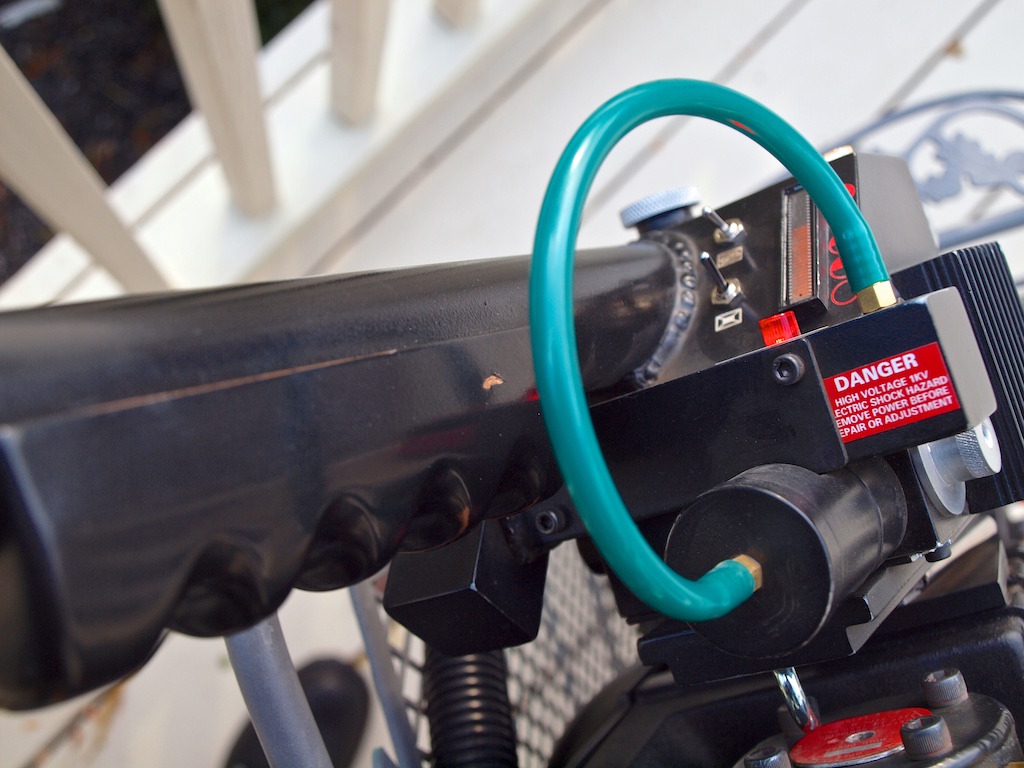
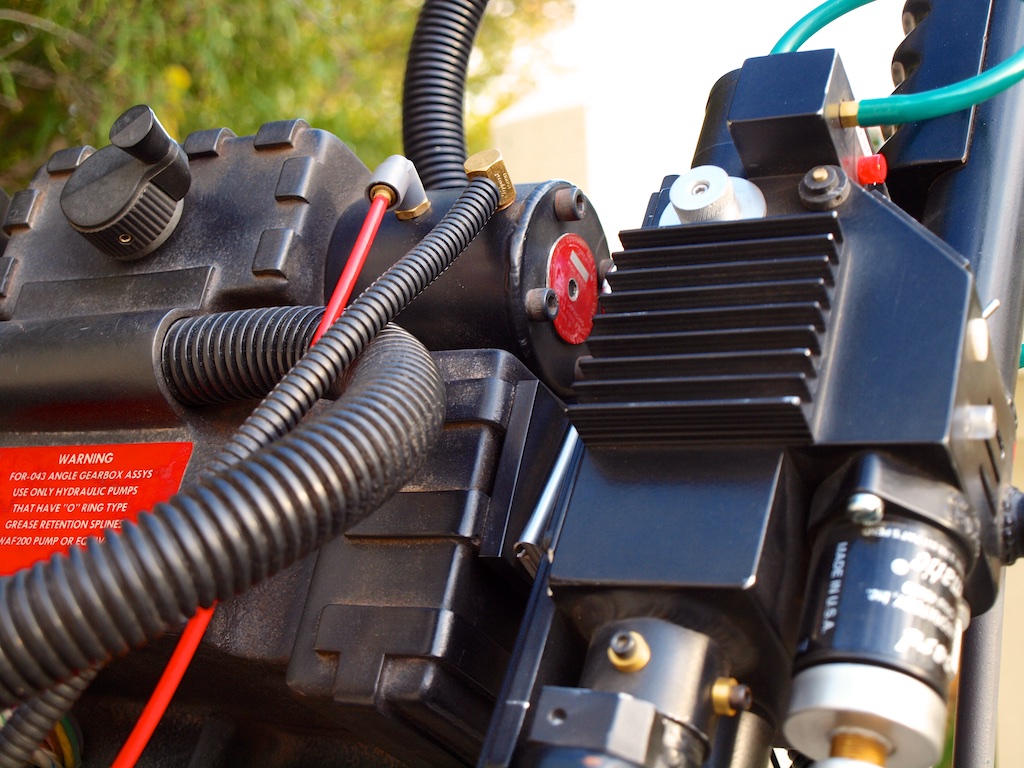
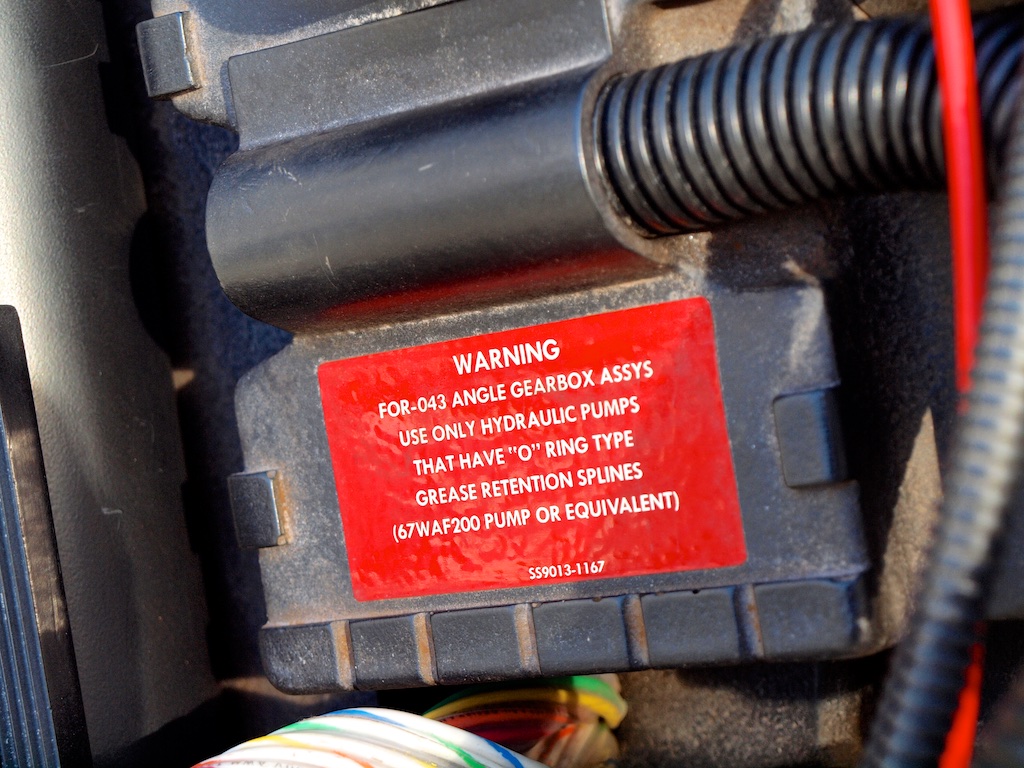
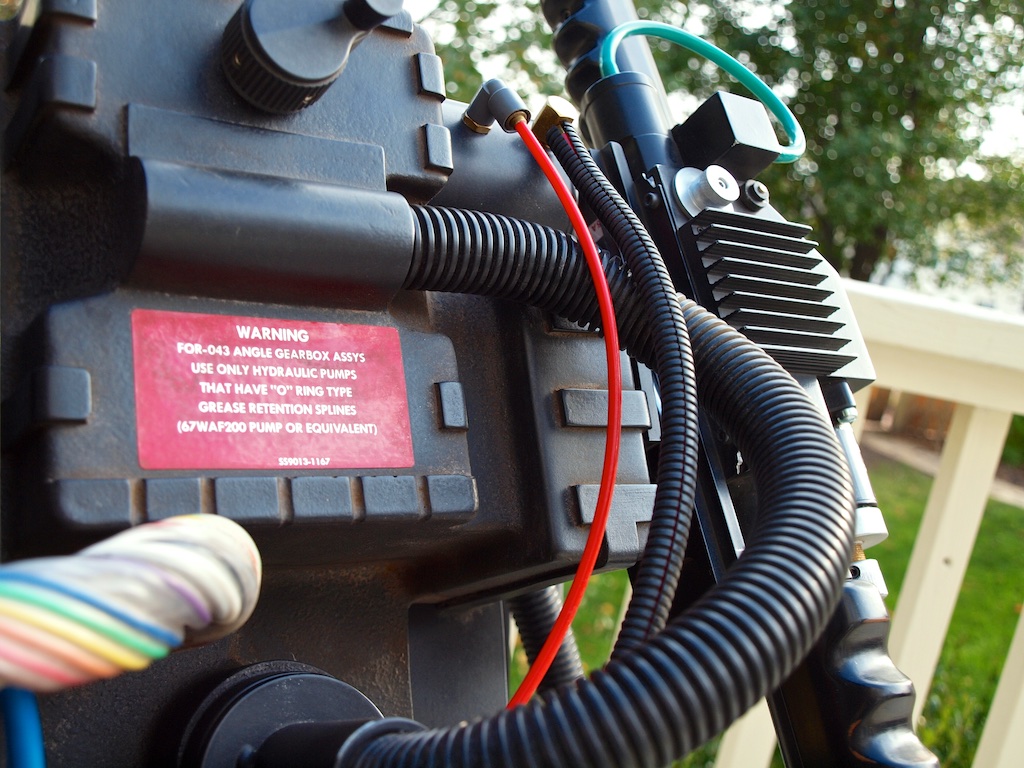
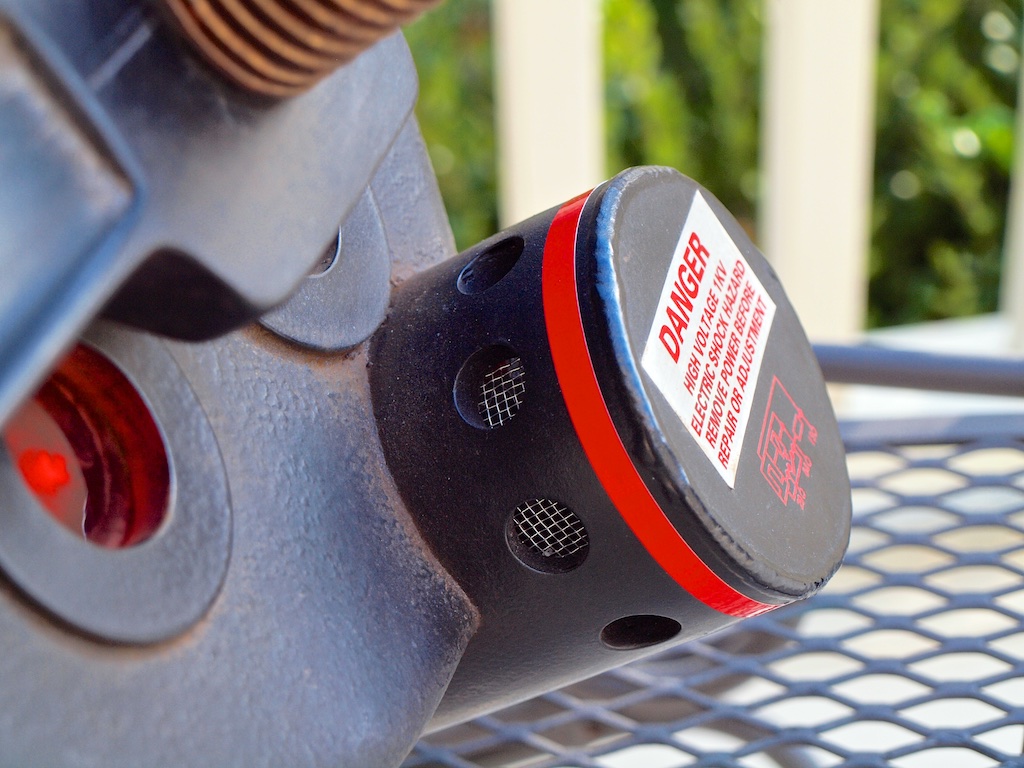
#4817278
That's definitely something that I need to learn how to do: Wire up the XLR. *sigh*
Excellent work buddy!
bishopdonmiguel liked this
#4817296
bishopdonmiguel wrote:Here's a small addition. The XLR connection for charging the internal batteries. I wrapped the cable and chargers in split loom. I still have (3) unused pins for future expansion if necessary...
I'm doing the same, taking after what Jimfin did with his XLR... however, I will wire mine to a project box... considering I will not be able to paint due to the weather, I will have lots ofbtime to work on my motherboard layout...
#4817324
pyhasanon wrote:I'm doing the same, taking after what Jimfin did with his XLR... however, I will wire mine to a project box... considering I will not be able to paint due to the weather, I will have lots ofbtime to work on my motherboard layout...
I'm not familiar with Jimfin's XLR. What is the project box for? Sounds interesting.
#4817325
Had an opportunity yesterday to get the pack outside for some shots in daylight. My next addition will be to build out the vapor kit for the vent sequence...

Image
Image
Image
Image
Image
Image
Image
Image
Image
Image
Image
Image
Image
Image
Image
Image
Image
Image
Image
Image
Image
Image
Image
Image
Image
Image
Image
Last edited by bishopdonmiguel on September 20th, 2018, 8:02 am, edited 1 time in total.
Grimmy GB liked this
#4817338
Words cannot describe. Congrats, bro... that pack is one of the best.
bishopdonmiguel liked this
#4817344
bishopdonmiguel wrote:I'm not familiar with Jimfin's XLR. What is the project box for? Sounds interesting.
Nothing too special, project box is just a plastic box to keep everything neat... Here's a photo from his vent thread... it will be similar to the box that has the letter "S/L" on it...
jimfin wrote:Below is an example of where we placed the charging connector and battery switch on my son's pack with a Mighty controller

Image
#4817390
Looks absolutely amazing! Makes me sad that I went a little too heavy on my texturing. :(
What did you use for the dirt/dust? Looks great!
bishopdonmiguel liked this
#4817458
Thanks guys. For the weathering, my approach was to treat the pack as a prop that had been lost in a warehouse, not a real world item. No silver peeking through fiberglass and not too much damage from use. Just layers of dust from years of storage.

To get this dirty look, I used fuller's earth. I had not previously worked with this material and didn't know where to find it. I asked around localy and some guy at the hardware store showed me the pet isle and said kitty litter was fuller's earth... yeah, not happening but thanks dude. Online search led me to eBay and a seller who offers a $10 three color set for making sandtrooper armor look desert weathered. Sounded promising so I ordered.

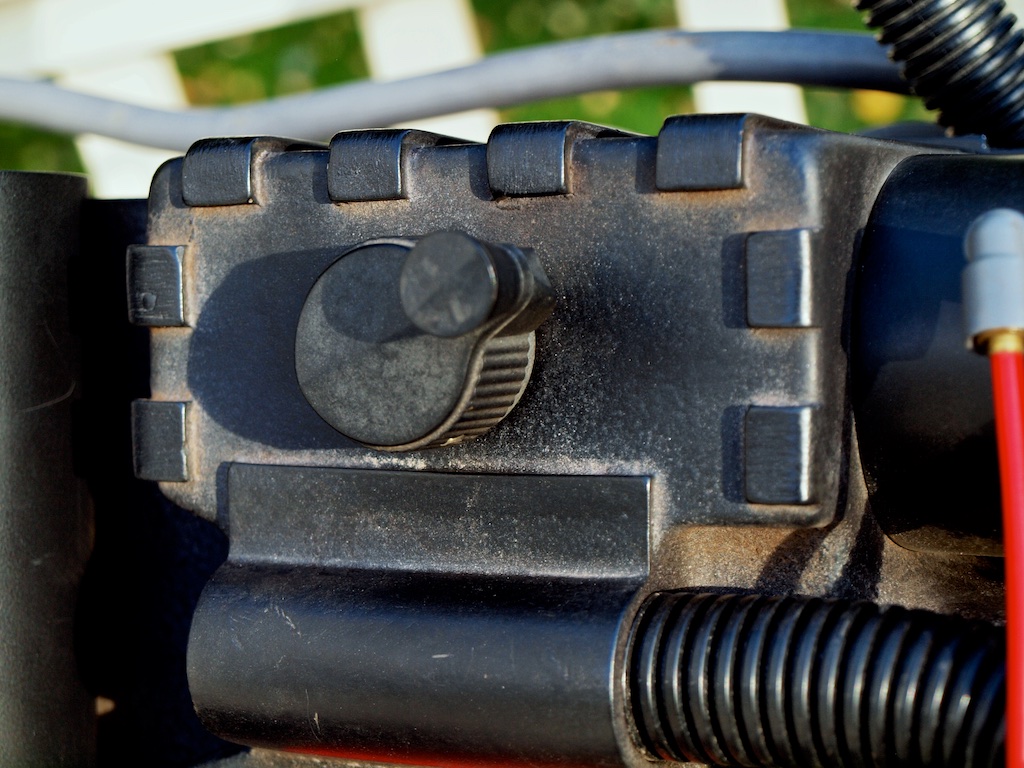
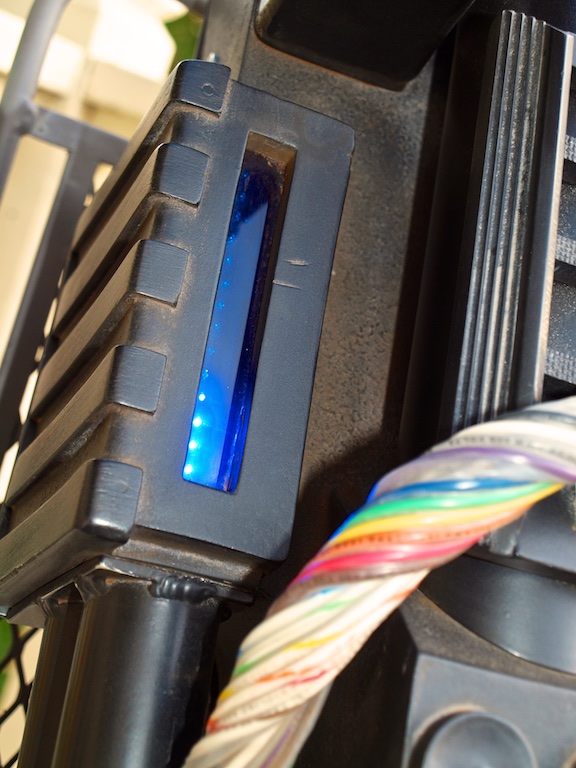
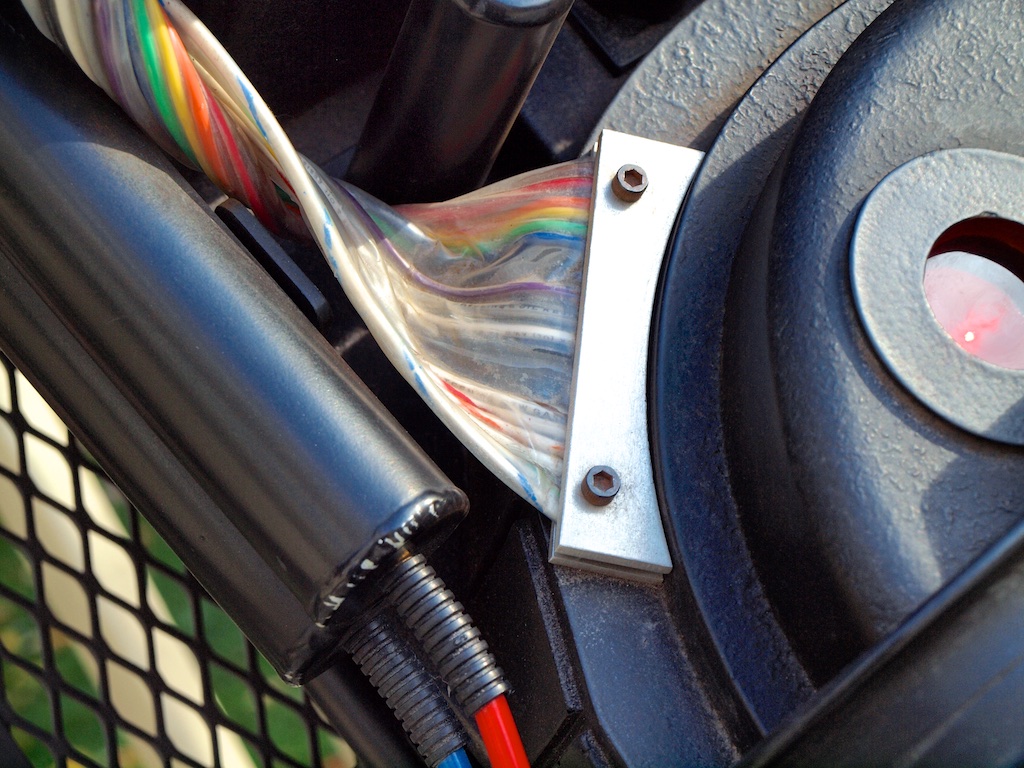
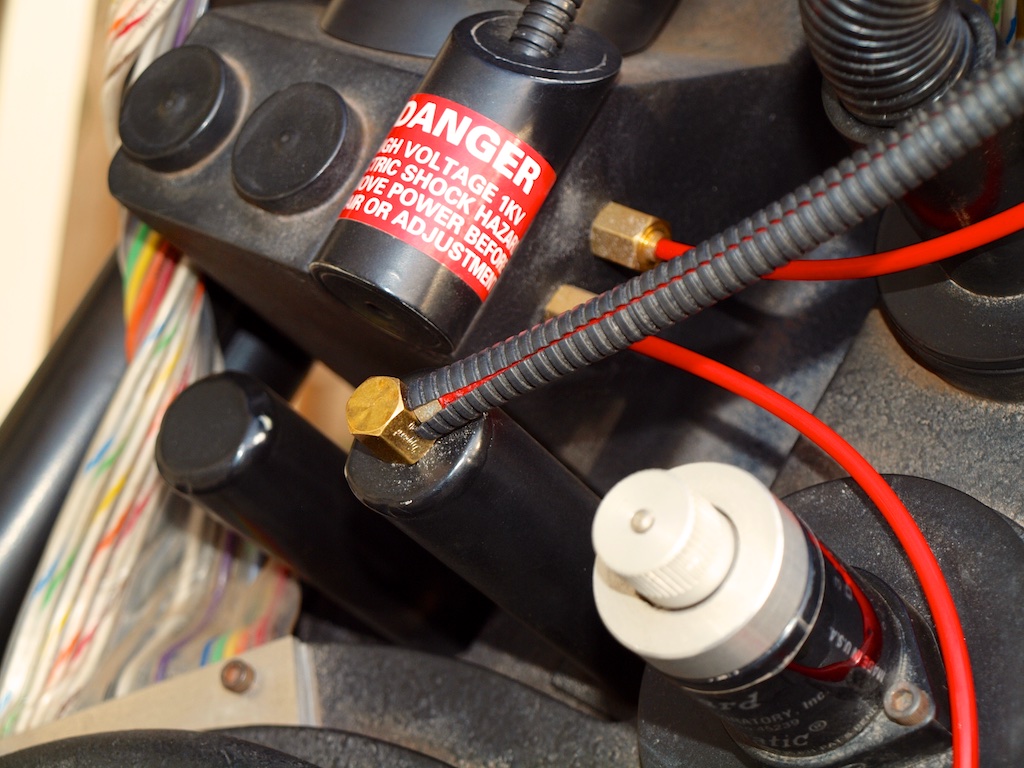
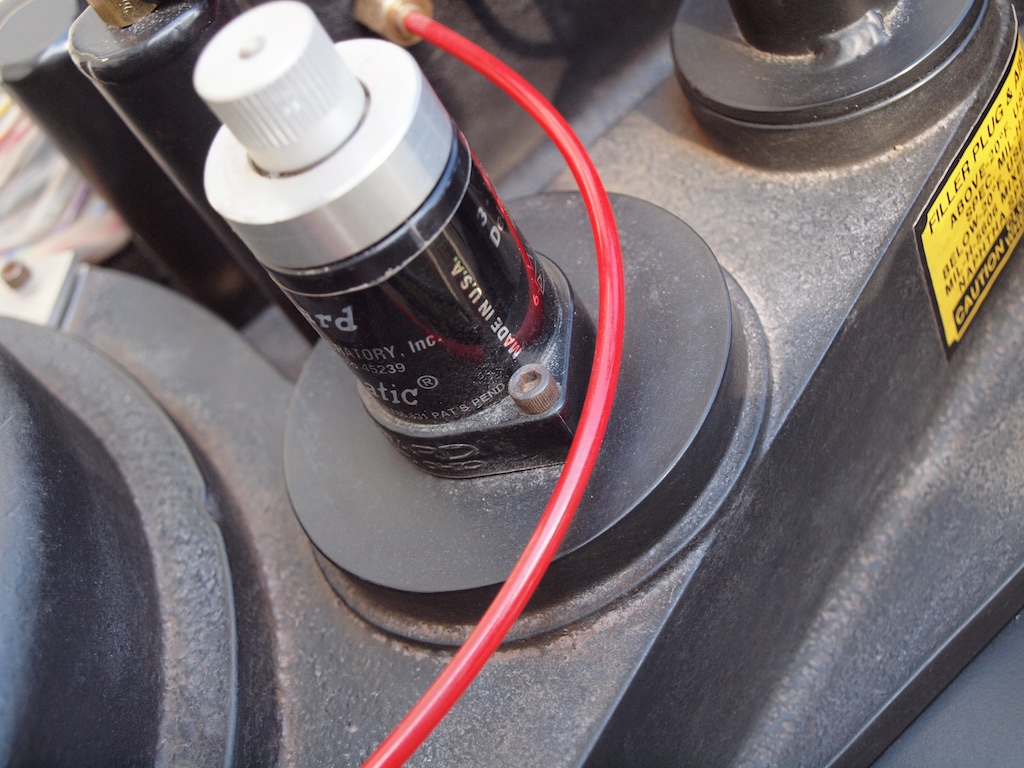
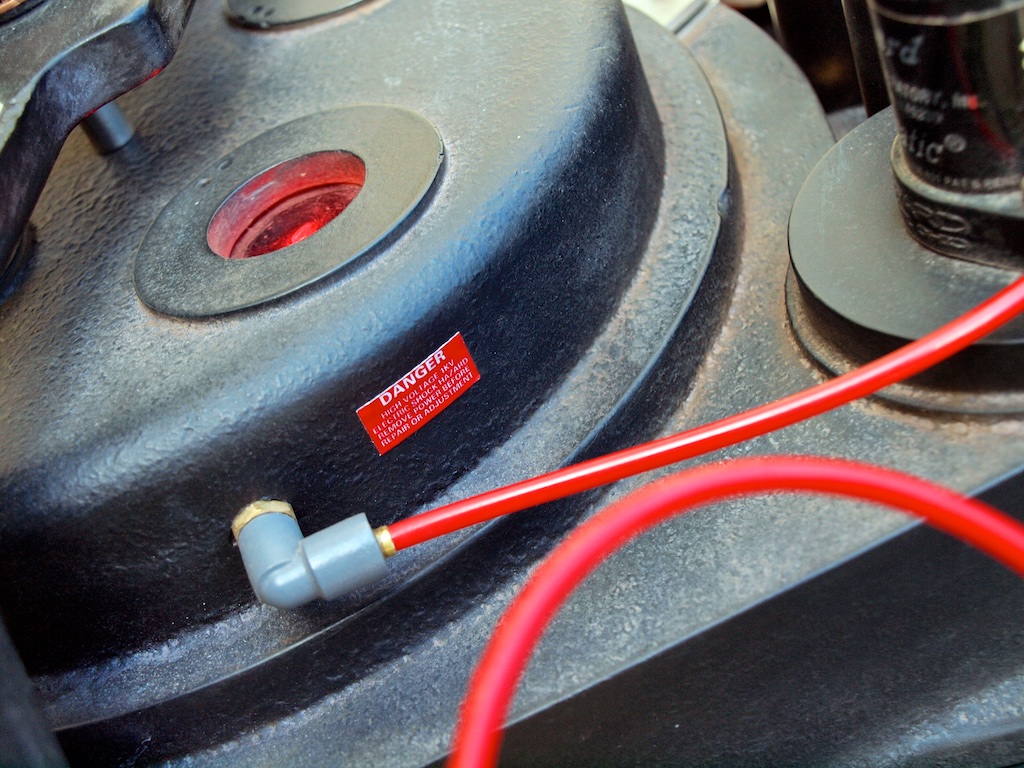
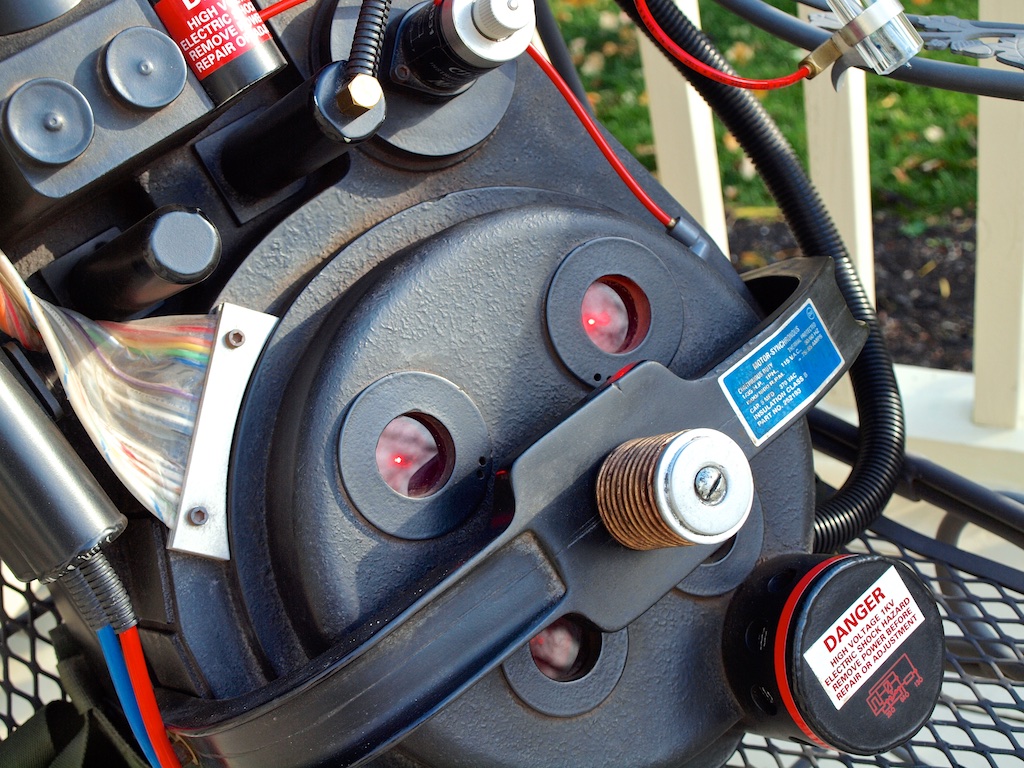
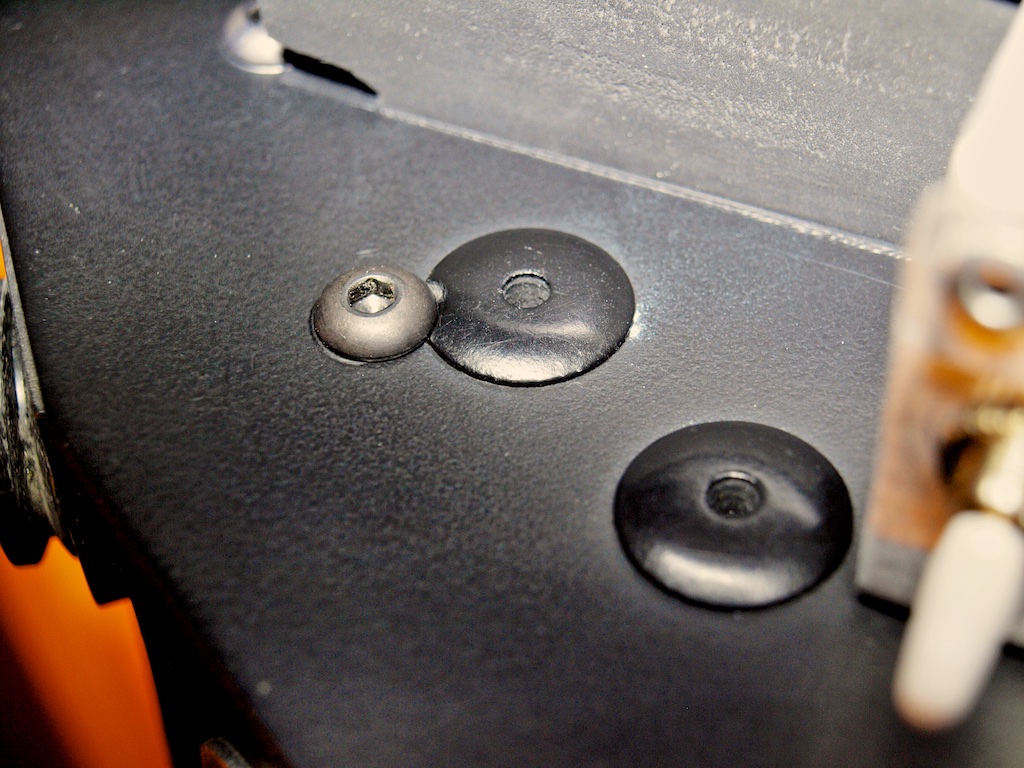
A week later, I got 3 small packets of very fine powder similar to talc: grey, tan and dark brown. I have no idea if this really is fuller's earth but it seemed like it might work. I "borrowed" a pair of nylons from my good lady friend and cut off one end to use as a dusting pouch. I filled this with a mix of colors, mostly grey and sand, and dusted the entire pack. EVERYTHING. I also used a soft paintbrush to get into all the nooks and cracks like the loom and lenses. Then I rubbed it in hard, wiped it off and then applied more. The fuller's earth sticks easily because of a slight static charge on the fiberglass. But it also wipes off very easily and gets on everything. I needed to get this stuff to stay put so I applied another layer, mostly dark brown this time, then lightly misted with water using a very fine sprayer. Lightly & indirectly by sprayng above the pack and letting the mist settle. Repeat, lightly. I left this to dry for several hours. This time it stuck. Very well in fact. Where some excess did not easily wipe off, I used a firm bristle brush to break it up and blend it in. After that, I used an air hose to blow off the excess.

My first thought was, "What did you do, Bish? That clean pack looks like crap now." But after a good night's rest, I saw the pack in a different light and thought, "Ya know, pal, this just might be okay." So if you try this, just be prepared for that moment when you think you might have ruined everything. When you feel this, stay calm and carry on. It probably looks fine, your brain just hasn't caught up with the changes.

Hope this proves useful.
#4817480
The dust makes the detail work stand out; I noticed the other day that proton packs are basically dust magnets! What you did, you just bypassed the natural process and the result looks great! On my pack, the injectors are starting to show rust and the natural dust is starting to collect in the nooks and crannies; it bugged me at first until I thought about it; each pack that everyone on this site builds has it's own unique traits and characteristics that set them apart! :mrgreen:
bishopdonmiguel liked this
#4817496
Yeah Bish, you did a phenomenal job weathering it! You accomplished your goal here as, in my mind, that's what a pack would look like if it were sitting in the corner of, say, the warehouse in Indiana Jones :)
I think I'm going to keep mine "new" looking at first and let the cat's and our dander take it's course lol.
bishopdonmiguel liked this
#4817526
This is the kind of pack build I LOVE seeing! Someone who will invest in the parts, who is dedicated to making it look good, and who takes and seeks advice! And who comes out with an incredible product in the end! I absolutely love it! Great job on everything! Amazing looking pack!
bishopdonmiguel liked this
#4817547
Mat wrote:I noticed the other day that proton packs are basically dust magnets!
This! So this!
Grimmy GB wrote:that's what a pack would look like if it were sitting in the corner of, say, the warehouse in Indiana Jones :)
Wow! That reference calls to mind such great imagery. Awesome! It also reminds me that I'm an old fart because people from my generation would have said "the warehouse in Raiders." Funny how the time one lives in frames one's POV.
Grimmy GB wrote:I think I'm going to keep mine "new" looking at first and let the cat's and our dander take it's course lol.
"Factory fresh" is always nice... but don't be too surprised to find yourself with a change of heart. That was my original plan too... but once I found my backstory, that this could have once been among the originals but doesn't match any screen used equipment (because I'm not sure I could pull off a true replica), the look had to follow suit. When you find your story, let it take you to where it needs to go.
Grimmy GB liked this
#4817548
Lewis Tully wrote:This is the kind of pack build I LOVE seeing!
Thank you sir!

Speaking of seeking advice, I have two questions about my "Made in China" Alice pack.

1) I noticed the quick release clips are plastic. Anyone have issues with those breaking? Any simple replacements?

2) Any suggestions for beefing up the shoulder padding like GB2? These puppies are thin and my shoulders are aged. Need relief!
#4817549
bishopdonmiguel wrote:
Lewis Tully wrote:This is the kind of pack build I LOVE seeing!
Thank you sir!

Speaking of seeking advice, I have two questions about my "Made in China" Alice pack.

1) I noticed the quick release clips are plastic. Anyone have issues with those breaking? Any simple replacements?

2) Any suggestions for beefing up the shoulder padding like GB2? These puppies are thin and my shoulders are aged. Need relief!
Nickatron has a padded strap service. You send him your straps and his seamstress adds the padding. They look amazing once done
#4818038
To commemorate the near completion of my pack build (will be adding an aluminum thrower), I acquired a special painting. This thing is huge (4x7 feet!). Gotta find a good place I hang it as soon as I get moved!

On a mountain of skulls, in the castle of pain, I sat on a throne of blood!...

Image
Last edited by bishopdonmiguel on September 20th, 2018, 8:03 am, edited 1 time in total.
#4818100
How is the quality? I guessing it's the same one I see on that auction site. Just haven't pulled the trigger. I have seen a half size for sale on there too which might be easier for in my house and then a big one for cons if we start doing a table.
#4818101
PssdffJay wrote:How is the quality?
Got this off Etsy. I'm no expert on this stuff but I am very pleased. Much better than I expected. Looks to be printed on a reinforced vinyl material. Reminds me of the large banners you might see at a movie theatre but not as thick.
#4818880
Very cool poster, Bishop. Hope to see a picture of it mounted and framed someday :)

But I really came here to say that those out-of-doors pics of your Proton Pack just look perfect. The weathering is amazing and really brings out the details. Excellent job!

BTW, did you get around to trying a fix for the overlapping large head rivet and the loom clamp bolt?
bishopdonmiguel liked this
#4818889
GohstTarp wrote:Hope to see a picture of it mounted and framed someday :)
Definitely gonna hang it in my new workshop as soon as I get moved.

GohstTarp wrote:BTW, did you get around to trying a fix for the overlapping large head rivet and the loom clamp bolt?
My fix was to embrace the overlap in all its glory. A bit of Dremel work makes room in the large flange for sharing space with the loom clamp hardware. Do this before you paint the motherboard!

Image
Last edited by bishopdonmiguel on September 20th, 2018, 8:03 am, edited 1 time in total.
GohstTarp liked this
#4818907
bishopdonmiguel wrote: My fix was to embrace the overlap in all its glory. A bit of Dremel work makes room in the large flange for sharing space with the loom clamp hardware. Do this before you paint the motherboard!
It looks great. Thank you for sharing that :cool:
Always nice to see how other workaround things.
bishopdonmiguel liked this
#4819478
This is a master class!

Thank you so much for sharing this build. I just discovered it today and read through all 17 pages of posts.

As someone who is contemplating my first proton pack build, this thread showed me how much can be done if I take my time and think things through.

Hope you have fun with your new toy! :-D
bishopdonmiguel liked this
  • 1
  • 15
  • 16
  • 17
  • 18
  • 19
  • 20
The Video Game Lifegard

Chris Hunt in the Facebook Group 3D Printed Ghostb[…]

We're bringing you the latest updates to the GBFan[…]

The amount of people participating in the milest[…]

This is awesome, One time. I love reading explanat[…]