#4825031
Thanks for the kind words guys, it really does help to keep my motivation going.

It's been hard going lately as the weather has been in the high 30's (Celsius ) with humidity around the 80-90% mark. Hopefully it cools down a bit before I get into the next round of welding.

P.
#4826970
Time for an update.

I have been working on the spacer in my limited spare time over the last couple of weeks. Still more to do on it, but it is coming along well. At least its a recognizable shape now.

I have followed a similar construction technique as CPU64 did on this piece. But if I was to do it again I would make the side walls separate (folded fir the multi side section) and weld them to the top to get a sharper top edge. Although the soft corner is growing on me.

Anyway photo time.

Sheet cut out ready to fold.
Image

Folded test fit.
Image

Multi sides welded up.

Image

Image

Pieces so far sitting together.

Image

That's all for tonight. P.
#4827047
Thanks for the kind words guys, it helps keep the motivation up.

Grimmy, I plan to try and make as much of the pack body and thrower myself, however I have already purchased the GB shop Metal Bellows and gun track as these would be a bit too difficult to make to a high level of precision. I have also purchased the various thrower knobs for use down the track. I don't think the overall weight will be to excessive, otherwise I might have to put in a few gym sessions before I wear it ;)

Cheers Pete.
Grimmy GB liked this
#4832458
Hi everyone.

After a break for a few weeks to let the weather cool down to something reasonable to work in, I'm back into working on the pack. Well actually the first thing I decided to do was make a sheet metal roller to roll the body of the cyclotron and curved piece on the spacer. I had a go at bending the curved spacer piece by hand but wasn't happy with the quality of the curve so I built this little roller out of scrap bits and pieces I had laying around.

Image

It's not the sexiest roller in town, but rolls aluminum fine.

Anyway, on to the build. I finished welding up the outer walks of the spacer and tidied up the facets. I then moved on to the cyclotron. After the problems I had with the curved corners on the gearbox I decided to try hammer forming the cyclotron lid. So I made a buck out of mdf and tapped out the cyclotron lid with a nice rolled corner.

Image

Image

Image

Image

Then I cut and rolled the cyclotron side.
Image

And this is what it looks like with a dry fit on the spacer. I'll weld it up next weekend if all goes to plan.

Image

Image

Image

Well that's all for tonight.
Kingpin, Sephiroth, Glenn Frederick and 1 others liked this
#4832467
I...I....no words.
#4832675
propcicle wrote:I would really think twice about painting this. Great craftsmanship on a beautiful pack.
Agreed. I'd keep it in raw aluminum form. When people ask you could always say "it's a prototype pack" or "this one is for a scientific research setting as opposed to a commercial setting" or some other nerdy excuse lol.
#4832688
Lovely work lad, I agree with some of the others, it's a shame to paint it! Mines needs paint to hid all the grinder marks and dents :lol:
#4832836
galeap wrote:Thanks again guys, but this one will be textured, painted and weathered.

Maybe I will make a second and leave naked except for the stickers/labels. I've learnt a heap in this build so far, so I should be able to do a better job on a second.
I'll take your first pack off your hands for you. Or the 2nd one. I'm not really picky.
#4833712
Hi all,

Not much progress to show for last weekend. Basically I made the half inch wide ring to go around the cyclotron pan. I made this out of solid square bar that I bent around a wooden form that I made. I can add some photos of the form if anyone is interested.

I've welded the ring closed and this is a photo of the test fit. Image

My next task is the washers for the cyclotron lights. I have been reading across heaps of posts about opinions on the inner and outer diameter of these. From what I have worked out there is reasonable opinion that the washers are sized at:
Top larger washers 2-3/8 inch OD and 1-3/8 inch ID.
Botton washers 2-1/4 inch OD and 1-3/8 inch ID.

Then I found the following reference photos showing measurements of the Sony Lobby pack:
http://www.gbfans.com/equipment/reference/33/360/

Which from my readings of the tape measure has the top washers at 2-17/32 inch OD and 1-11/32 ID, while the lower washers look to be 2-1/4 inch OD and 1-11/32 inch ID.

I'm now a little confused as to why others are using different diameters to that of the lobby pack. I believe that lobby pack is a semi hero, is this correct? And does the fact of semi hero versus hero have any bearing on the size of these? I'm thinking not because from what I have read the semi's are casts of the heros, but I always stand to be corrected on such things.

Is it a case that washers sized to the measured dimensions don't fit Stefan's plans correctly, which I have based my build off?
#4838800
Hi everyone.

I've been away from the forum for a little while and thought that an update on the build is due. Before any pictures, I need to say thanks to Grimmy for some dimensional help, which helped me get my head around sizing of the cyclotron light washers. I had confused myself up big time regarding sizing of these after reading numerous threads and looking at the reference pics available. In the end I played around with scaled drawings of all the noted sizes and settled on a final size that I think looks ok.

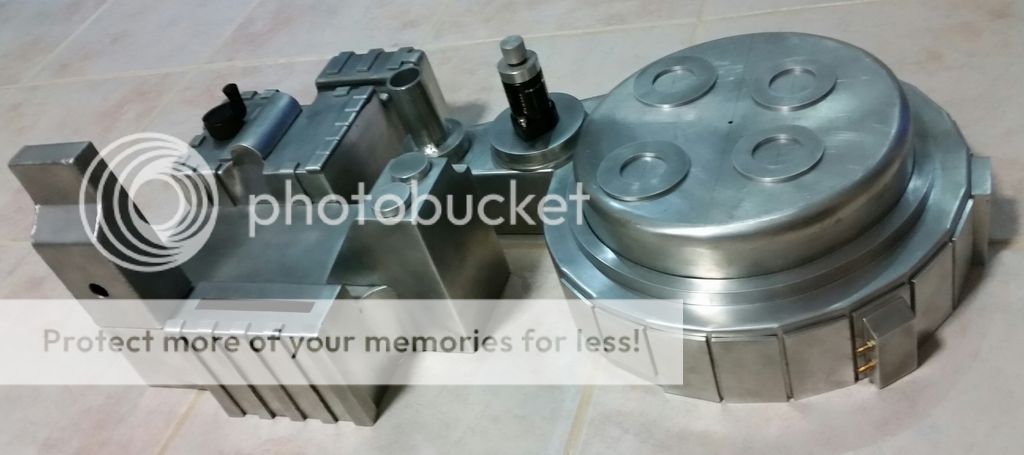
Now for some photos. Joining the cyclotron to the spacer.
Image

Image

Image

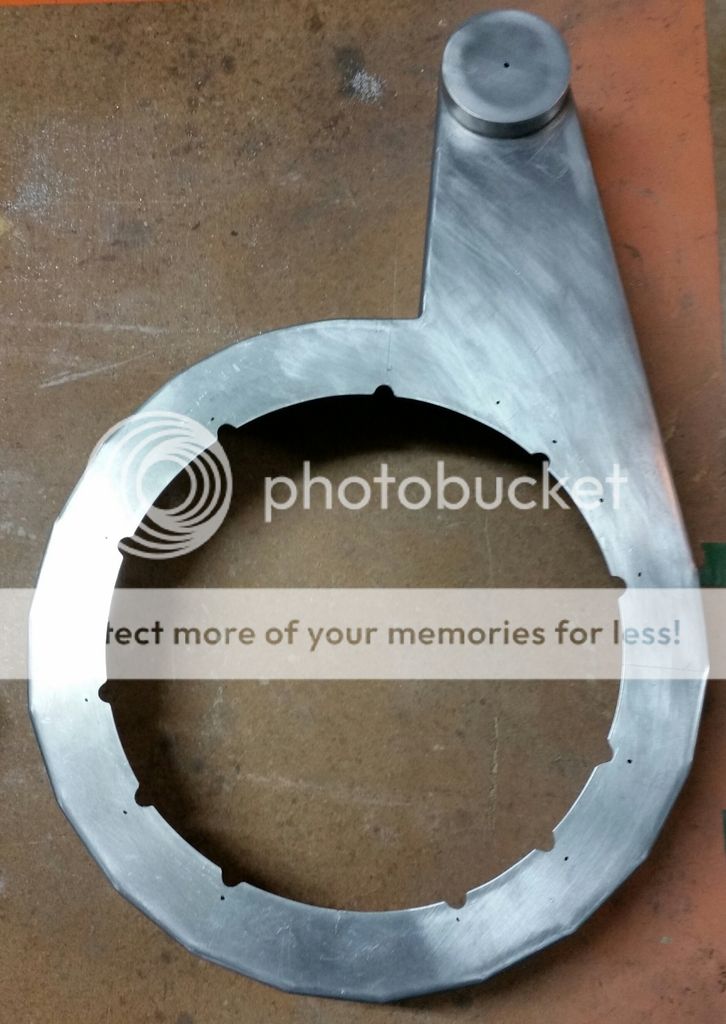
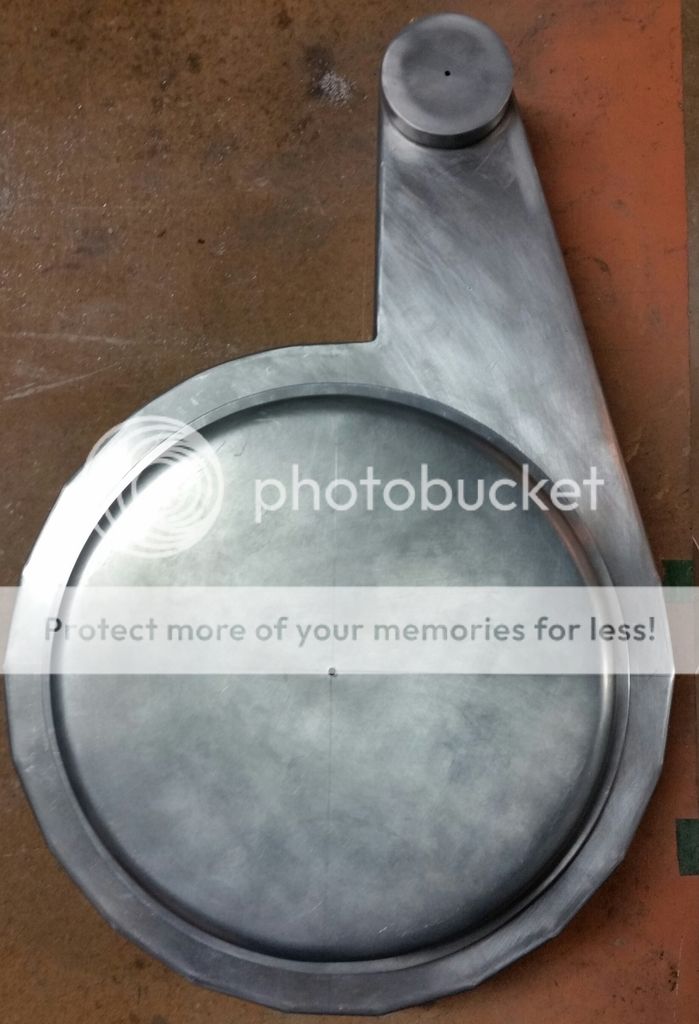
The plan was to weld the two parts together while catching the half inch ring around the cyclotron. The cyclotron and spacer joined up ok (although my weld looks super crappy, lucky it's on the inside), but the weld didn't take into the ring. I think that because the ring is solid aluminium it didn't heat up enough to melt in with the edges of the other two sections. In the end I drilled and tapped the ring, and installed three small screws on the inside to hold it down tight.

Next step was to plug weld on the cosmetic plating. (Photo shows taking the plates on.) Image

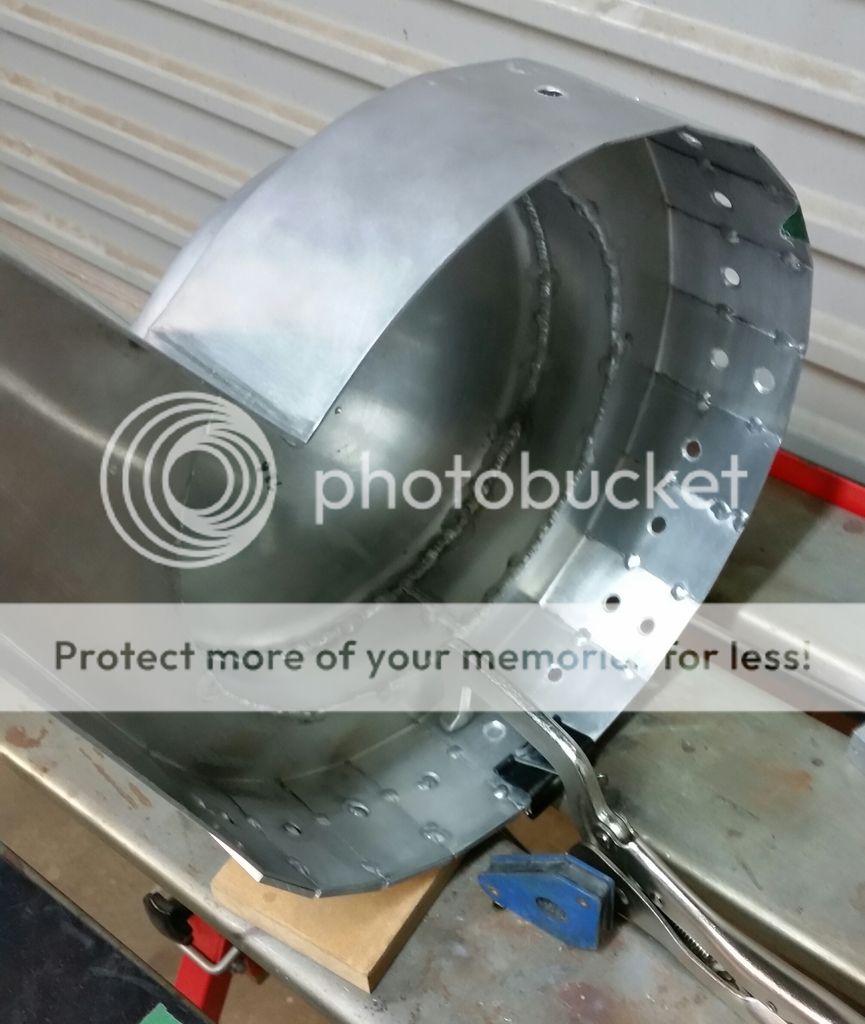
From this I learnt a few things about plug welding aluminium. The most important is that the plug hole needs to be larger than you would think to allow the tip of the tig get in and cast an arc onto the plate below. The holes I drilled (8mm) were a bit small and it made the task really hard. I must have touch the tig tip down a dozen times doing this :(. I think they will hold ok though.

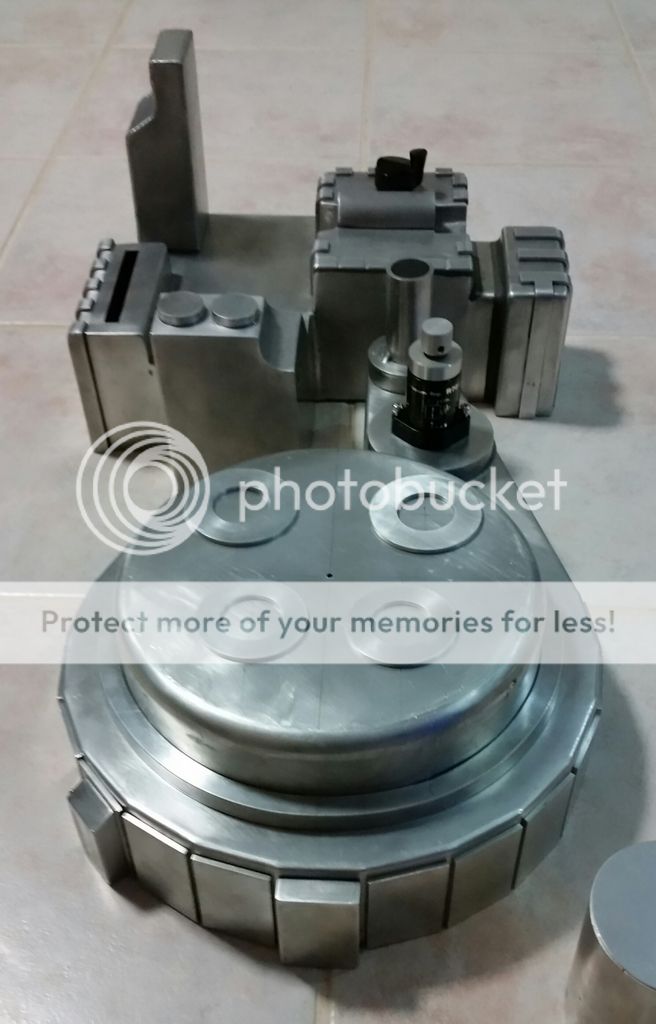
Final step was to mount the spacer that the Clippard valve sits on. (Clippard and cyclotron light washers are sitting lose in the photos).
Image

Image

So... weather, work and family permitting I'm hoping to finish up the lower half of the build next weekend. Then it's on to the N filter.

Cheers
Pete

We're bringing you the latest updates to the GBFan[…]

The amount of people participating in the milest[…]

This is awesome, One time. I love reading explanat[…]

And, lastly, for now, the video that prompted me t[…]