By Smeghead
#4835715
Blimey, I seem to have started some kind of trend! :P
By Smeghead
#4835843
Just a small update this evening, as I'm waiting on a shipment of bolts.

Thought I'd investigate mounting the cap to the ion arm. It's a good excuse to try out the press drill function on the Dremel workstation.
Image

Tool porn. Oh my, this is fun. :D
Image

Mmmmm....
Image

Two lovely holes...
Image

With that done, it's time to try tapping a hole (ahem) for the first time. I held the resin ion arm in a vice, with an old rag to protect it.
Image

Being resin, the tap cut through it with no trouble. Hey, that was easy!
Image

... Too easy.

The bolts that came with my ion arm cap will screw in to the hole just fine, but only after they have gone in a certian distance. Turns out that when inserted through the cap, they aren't long enough to bite the thread.
Image

So I'm going to have to get some longer bolts for it. Remember how I said I've just made an order of bolts? Well the one size I didn't order is M5, and guess what size these are?

*head-desk*

Well, to finish up today, I drilled a couple of pilot holes for the resistors, as Nick's ion arm has helpful dents to mark the right place for them (don't worry, I checked the resistors would match them). Mainly because playing with that drill is just sooooo fun. :)
Image

I've noticed a drawback though: the Dremel is very limited in what size bits it can take. I wonder if there is some kind of chuck attatchment that will accept a wider range of sizes?
By Smeghead
#4836000
Well, today's update definately lives up to the "idiot" name of this thread. *sigh*

Yesterday my bolts turned up, so I decided to sort through them while watching a certain film we all know and love. It was far too hot to do any real work.
Image


Anyway, back to today's fiasco-fest. First thing I did was go back to the ion arm holes I pre drilled last time. Of course, I'd drilled them one size too big, hadn't I? The bolts fitted in perfectly before a tap had even seen the hole.

Bugger.

Let this be a lession, kids: Never drill a hole before you have the bolt in front of you!

Right, out with the Milliput, fill the smeggers in!
Image

Image

OK, so that will have to set before I can try again. While I had the putty out, I touched up that nasty chip beside the n filter hole.
Image

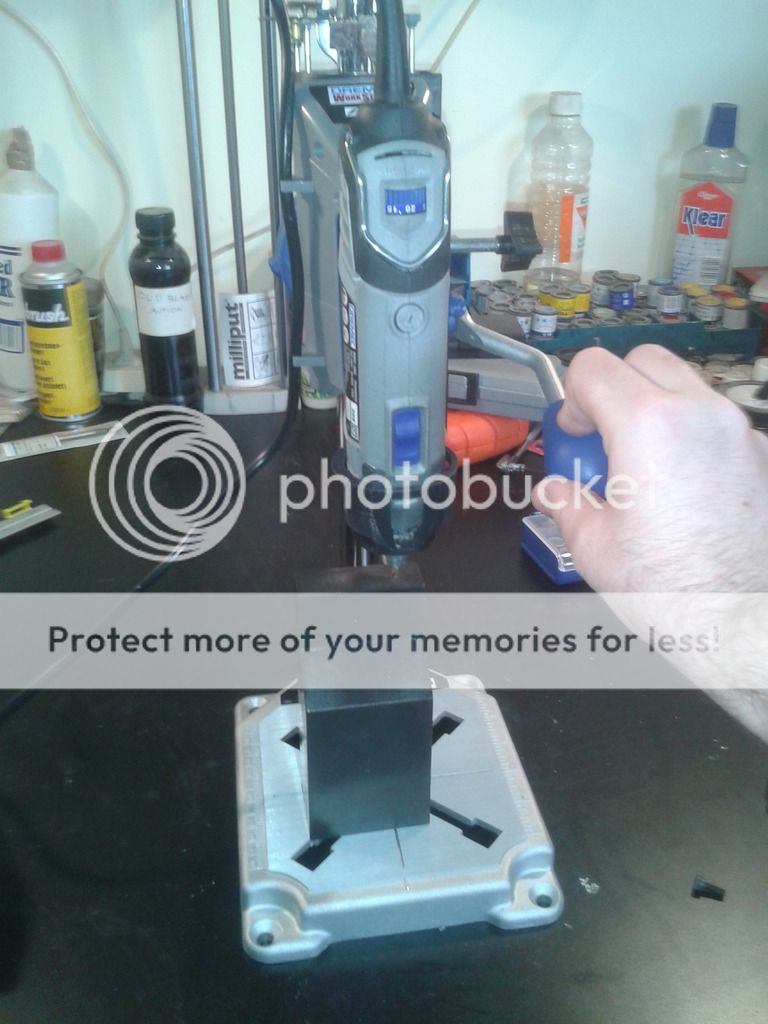
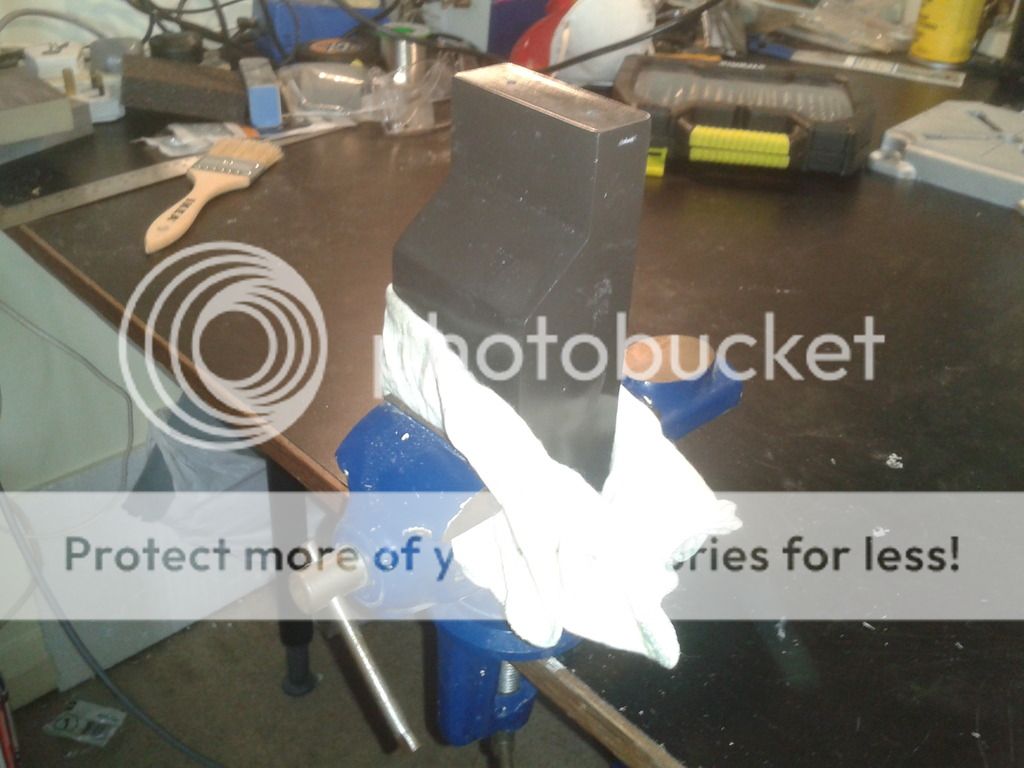
Let's do some nice easy decorative bolts that don't have to hold anything. That's can't go wrong, can it? Four holes drilled in the HGA...
Image

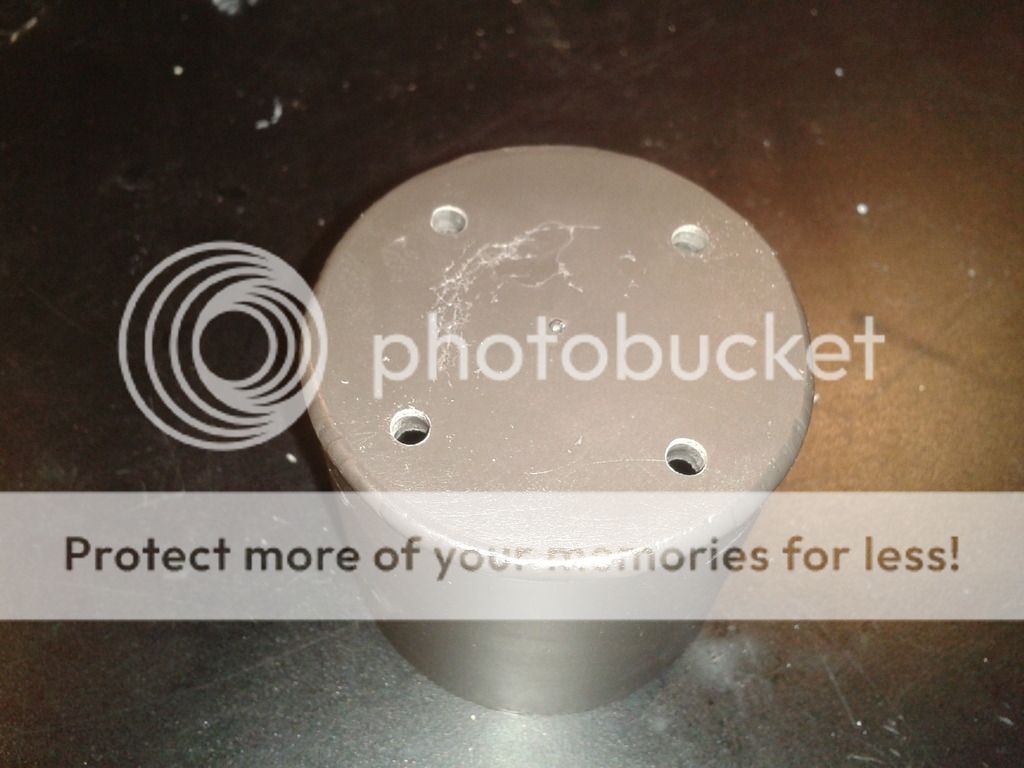
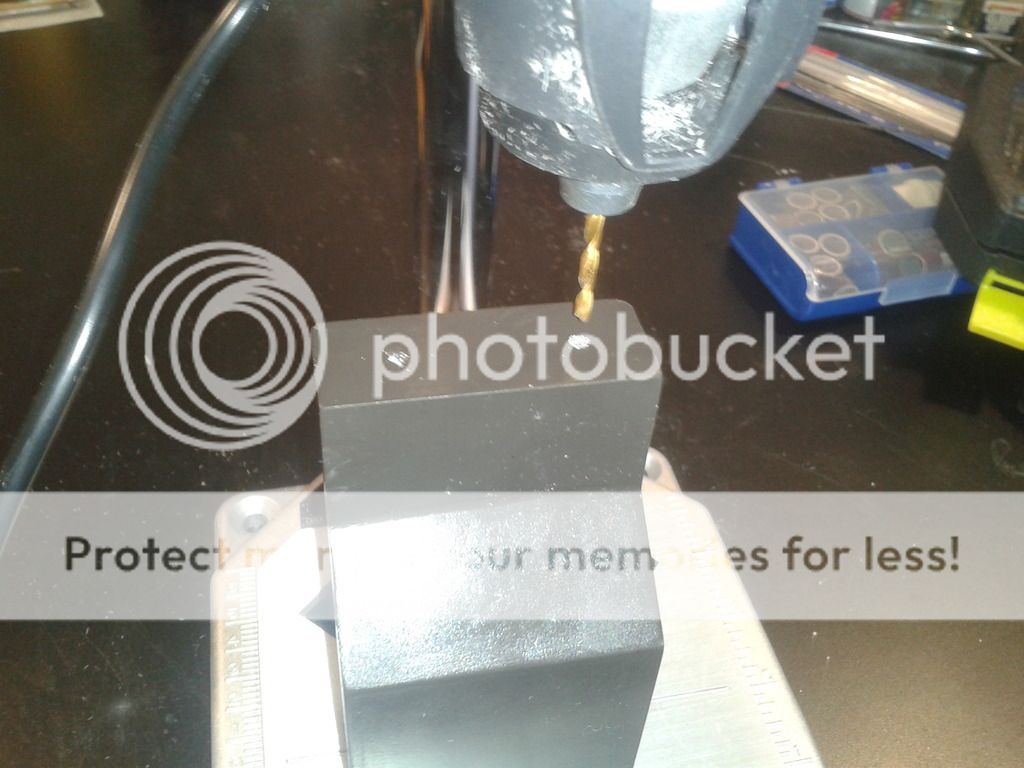
Let's tap some threads!
Image

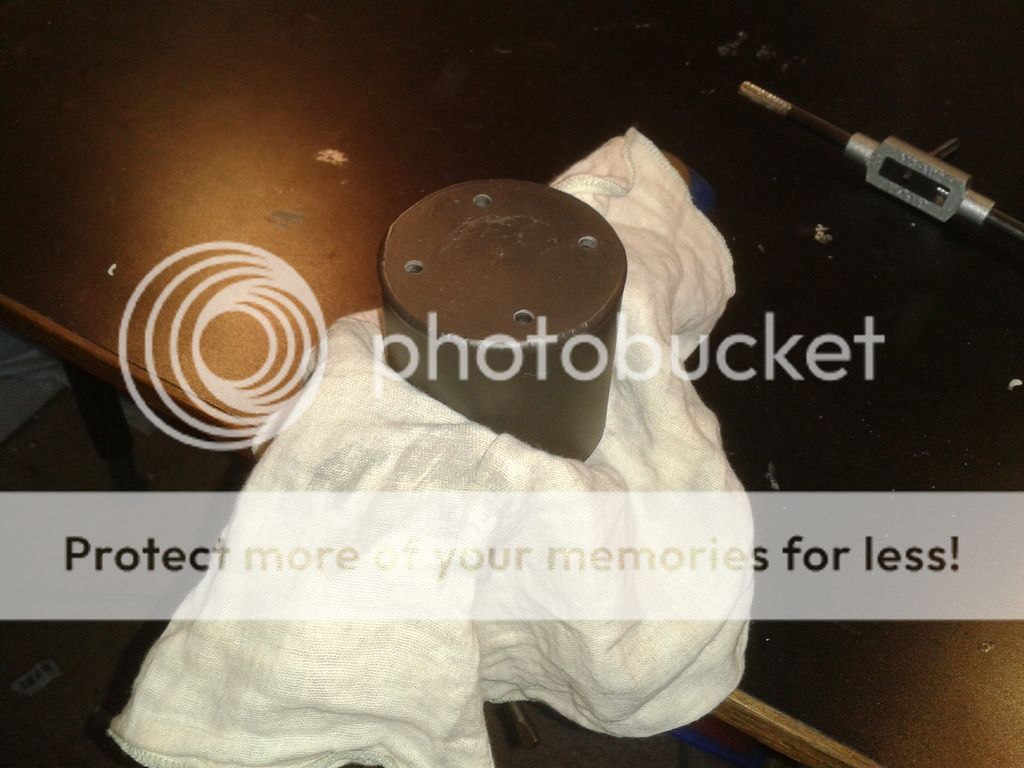
... So there I was, tapping away, when suddenly with a worrying CRUNCH sound, the tap went straight through the resin. The part is not damaged, thank smeg, but it stripped all the thread and widened the hole to the point the bolt slides through without gripping. This happened on two of the four holes.

Image

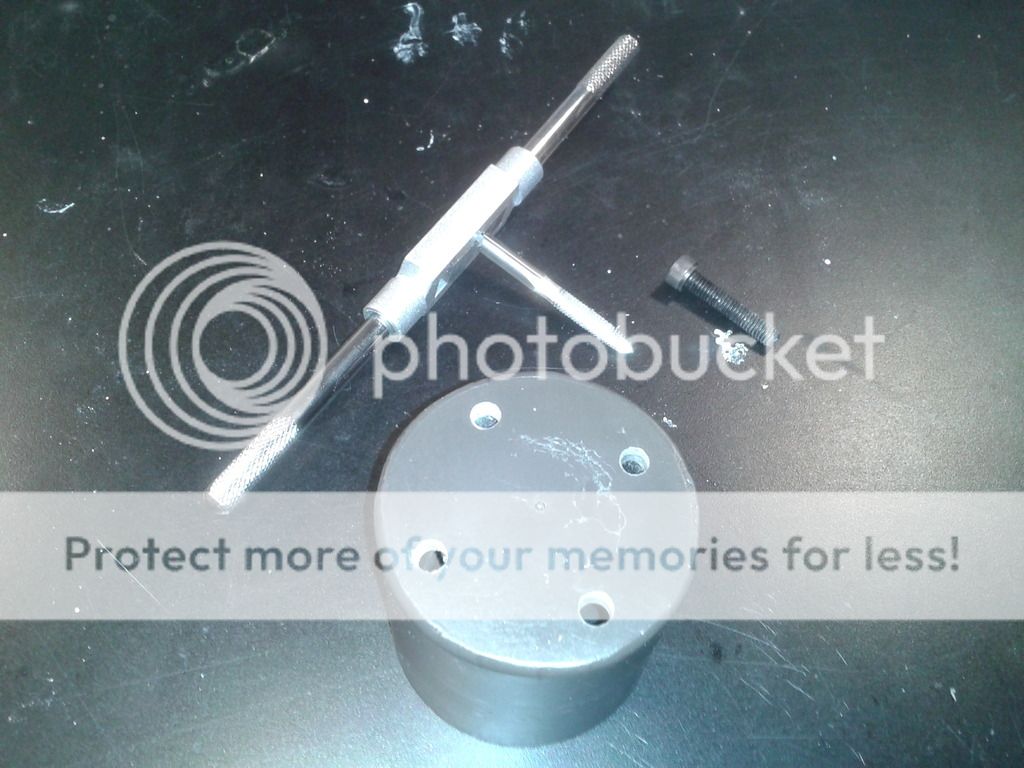
I'm starting to come to the conclusion that tapping threads in resin is not going to work. Might have to try a diferent method. But hey, I'm learning!
... Learning exactly why I've always stuck to plastic aircraft kits or Lego. I suck at this.

But this is what is would look like if I hadn't ballsed it up:
Image


With the shell being left alone while the Milliput sets, and reluctant to ruin any more of the resin parts until I can rethink my stratagy, I turned my attention to the motherboard.

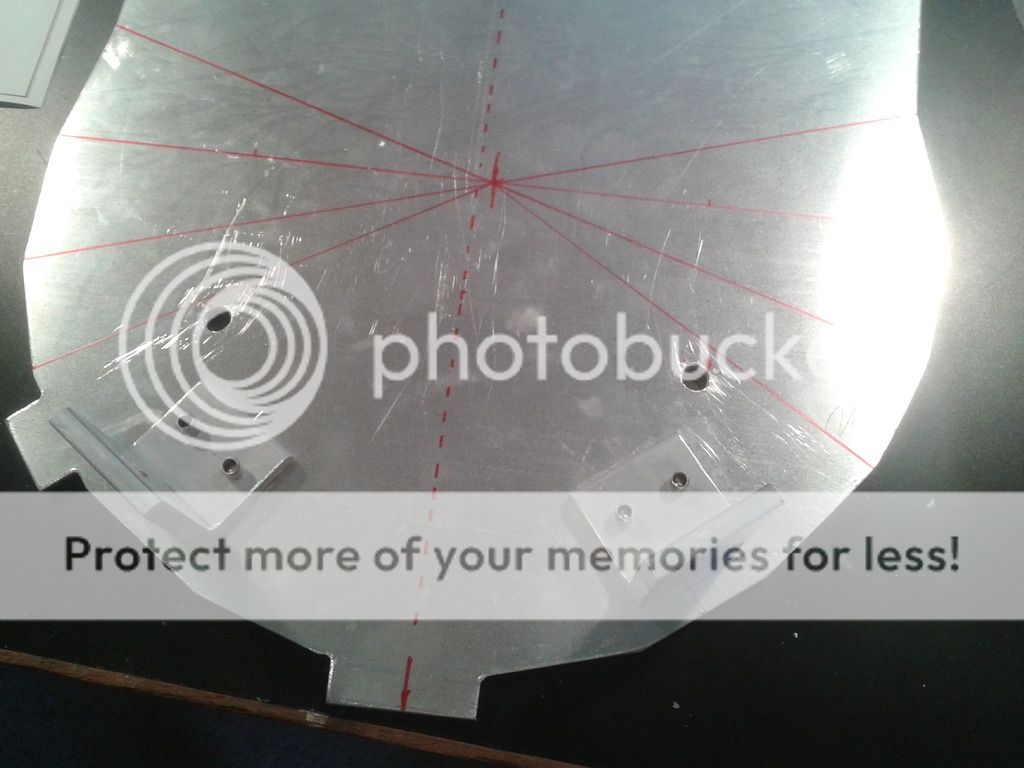
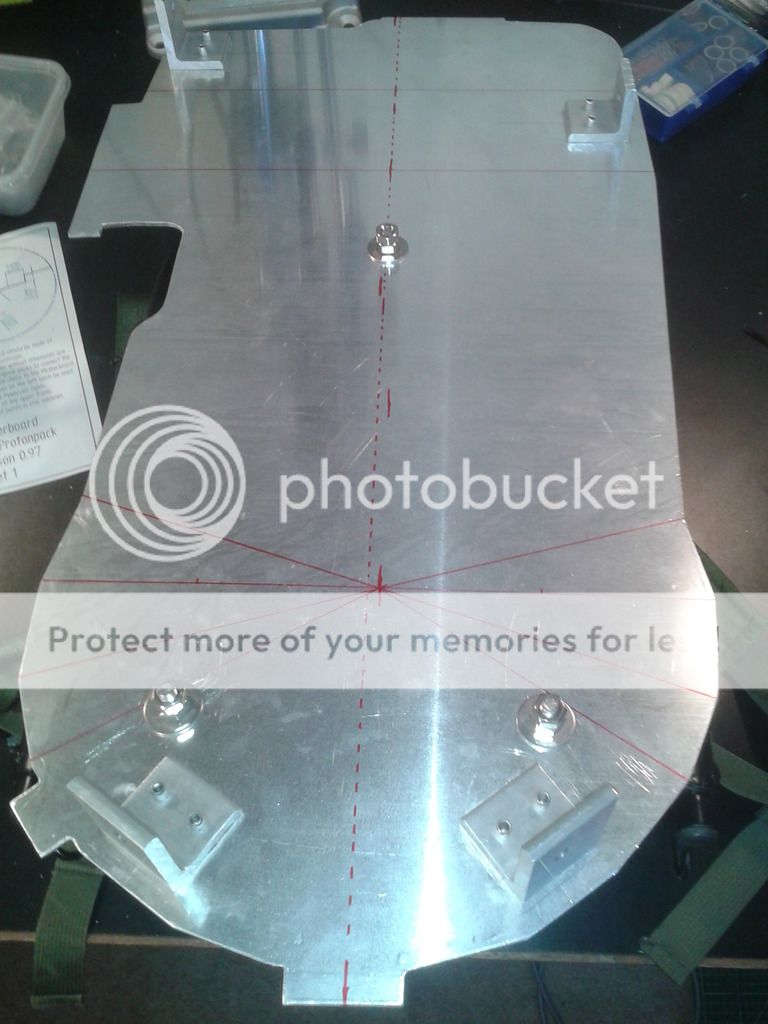
Sooner or later, I'll need to start making holes in it. But first, I'll have to find the centre line. Armed with Stephan's plans, a steel rule, and a sharpie, I started marking things out.
Image

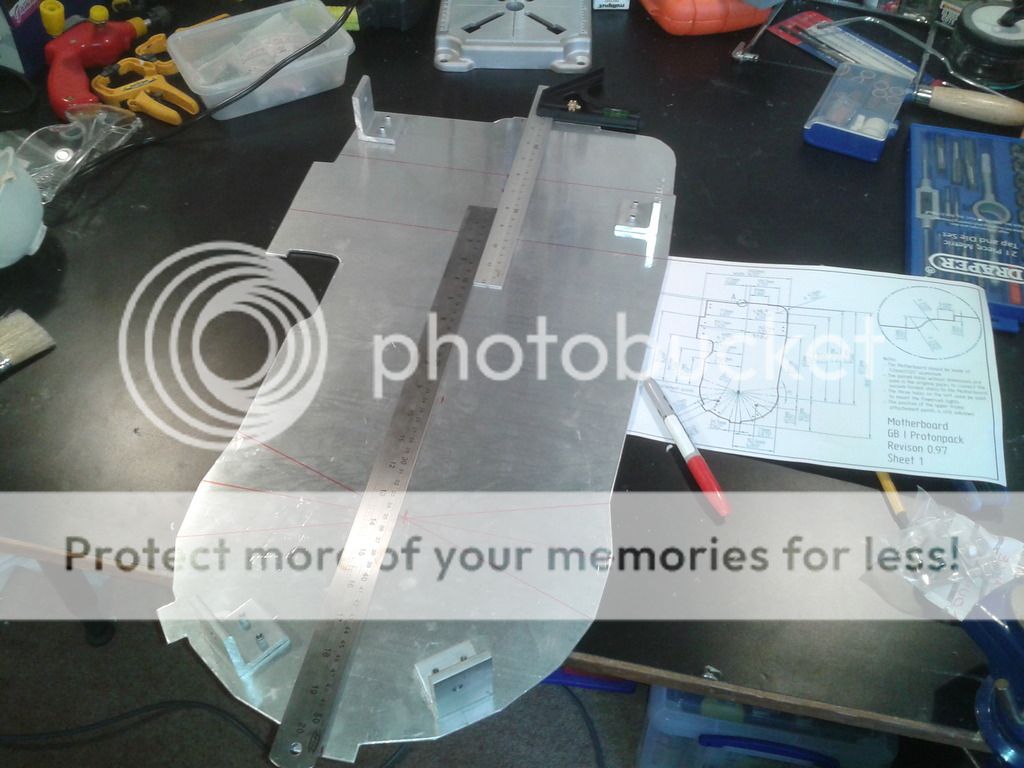
Now naturally, there will be a few differences between the plans and Nick's mobo. Some of the measurements line up, some of them don't... None of them look even remotely straight to the eye. I have no doubt that this is a cock up on my part somewhere, so before I go drilling, I thought it best to show what seems to be the best compromise. Does this look even close to right?
Image

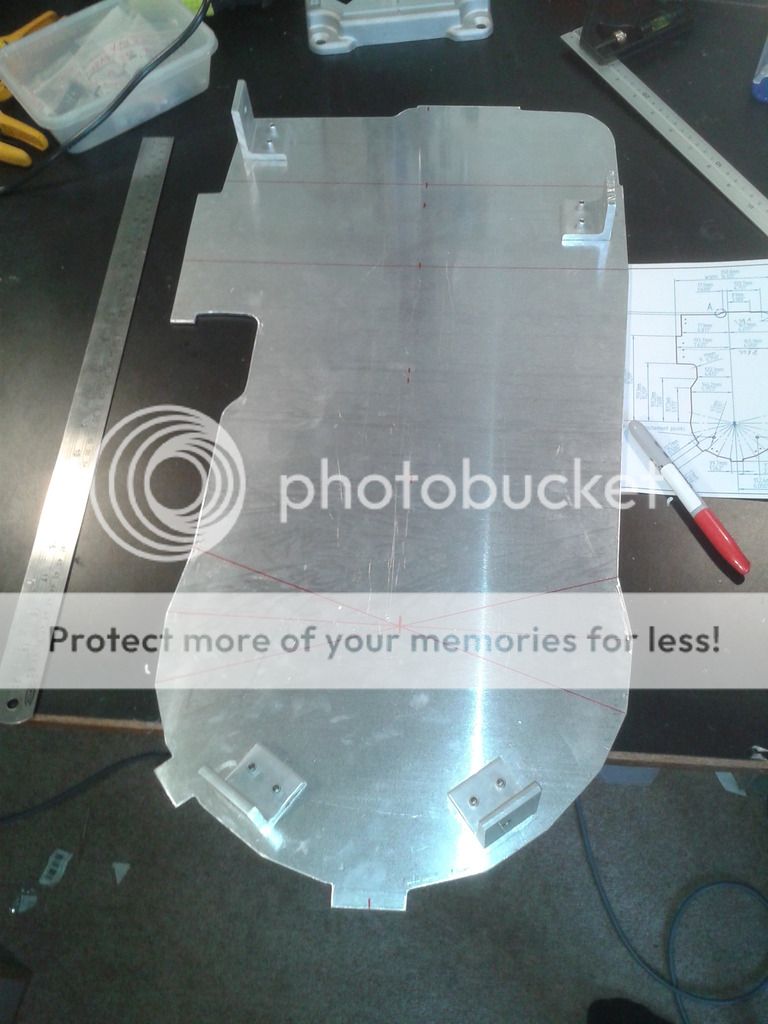
The longer lines are the measured "middle" points. Dotted line seems to be the best fit. (Apologies for the flash flare).
Image

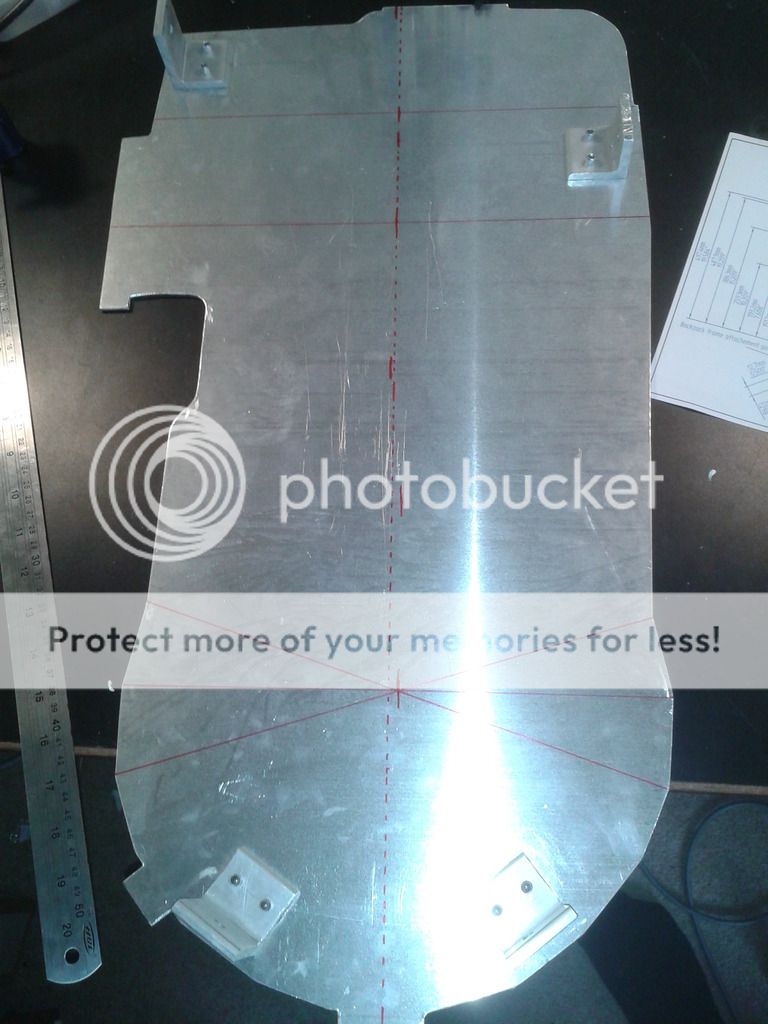
Based on those measurements, I figure the bolts for the A.L.I.C.E. frame go here (X marks the spot).
Image

What do you experts think? What are the key points to use when finding the centre? What am I doing wrong? What is the answer to the great question of life, the universe, and everything?What exactly was the point of typing those numbers in to the computer in LOST? ... Why am I sitting here worring about this at almost 8pm on a Saturday night? AAAAARRRRGGGHHH!

You know, this project could drive a guy to drink... Hey, there's an Idea...
By Smeghead
#4836206
After a couple of days staring at it, I decided the centre line is "close enough". Time to mount it the mother board to the frame! I went with the ebay frame rather than the GBF one.

First I drilled the bottom two holes in the mobo.
Image

Next I drilled the top hole in the A.L.I.C.E. frame.
Image

Then used it to mark the point I'd need to drill on the mobo.
Image

Before I knew it, I had it all bolted together! :D
Image

Nick's rubber spacers really are perfect for the job.
Image

Image

Of course, this means that another milestone has been reached: the pack is now wearable! Image

(Please excuse the face)
Image

(Please excuse the bald)
Image

(Please excuse the belly)
Image


... "Boy, this equipment's heavy"
By Smeghead
#4836515
Praise from the master! Cheers! :D

Unfortunately it's just too damn hot to do anything at the moment. :( I want to move to the Arctic.
By Smeghead
#4836690
Today, I have been mostly attatching the bumper.

As I said, it's been far too hot to do anything more active than sip cold beer lately. We've had some of the best lightning storms I've ever seen in the UK, so while it's cooled down a lot today, the humidity is still unbearable. As Hunter S. Thompson once said,
I have never been able to properly explain myself in this climate.
With that in mind, apologies for the image quality on some of these pictures... I think the lense of my phone's camera was misting over in my pocket!

I made some holes in the bumper to start off.
Image

As well as the bellows.
Image

Then it was time to try and find the right place to put the bumper. I tried my best to learn from Jay's build on this, but the idiot factor crept in slowly. Just trying to get it horizontal was a challenge. I'm slowly realising that nothing is quite straight on a pack, so it's hard to find a good reference point to line things up to. :P
Image

After a long period of faffing and swearing, I got it in a position that looked about right, marked through the holes in the bumper, and drilled away. I soon had it bolted on, so I popped the long bolt through the bellows and marked the top of the cyclotron, before removing the bumper to drill that hole.

Image

Hmmm... That's a very funny looking "Centre".

But anyway, I popped it all back together, only to find that the hole was not quite in the right place. Image 
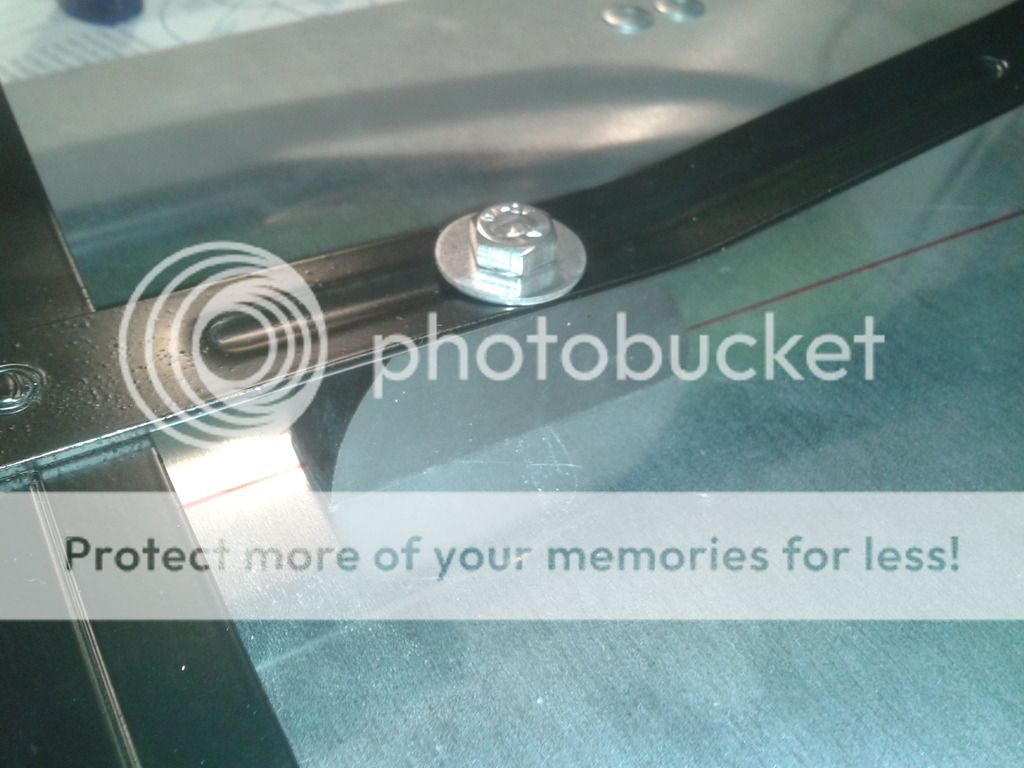
But with a little bit of persuasion in the form of brute force, it popped through.
Image
Still need to find a spacer to cover the bolt.

But now I look at it, I can't help but feel it's not in the right place. It looks like it's slightly on the wonk to anticlockwise.
Image

Other than that, I'm reasonably happy with how square it is from the sides.
Image

Image

And a final wide shot from an angle that hides my stupidity.
Image

******

Regarding how to bolt on all the solid resin parts (as I've found that the resin is a bit too brittle to tap threads in), I'm thinking the way to go would be drill bolt sized holes in them, then open up the top of the hole and epoxy a nut in there. Then they should be easy to bolt through the shell from the inside. Does that sound like a good plan?
User avatar
By pyhasanon
#4836694
It's never gonna really "look centered"... I think you're good, nobody is going to criticize your build for being a few millimeters off, no point in stressing yourself over it, I think it looks fantastic already!

As for bolting resin parts, I have no experience with them, so my apologies for not having any advice on that...
Smeghead liked this
By Smeghead
#4836698
Cheers buddy. I know The real packs were't "perfect", but naturally, you strive to make it as good as you can. ;)
By rays_occult
#4836722
Looking good mate, its coming on nicely! What you could do is get some push in brass inserts for plastic/ resin. They give you the thread you need so you can bolt parts to the shell.
You just drill the hole required and then push the insert in gently using a vice. Much easier than trying to tap it or glue a nut in there.
User avatar
By pyhasanon
#4836723
Smeghead wrote:Cheers buddy. I know The real packs were't "perfect", but naturally, you strive to make it as good as you can. ;)
I think this was the best advice I ever followed... At first, I struggled to get the pieces mounted PERFECTLY, but after fiddling with the Booster Tube for 4 hours, I was getting frustrated, and it wasn't "fun" anymore... But once I told myself, "Hey, stop it, the originals weren't perfect either, and nobody is going to fault you for being a couple of mere millimeters off!", I felt the stress go away, and I started to really enjoy the build!
By Smeghead
#4836724
rays_occult wrote:What you could do is get some push in brass inserts for plastic/ resin. They give you the thread you need so you can bolt parts to the shell.
You just drill the hole required and then push the insert in gently using a vice. Much easier than trying to tap it or glue a nut in there.
Ooh, these mystical items you speak of intrigue me. *quick search* Do you mean this kind of thing?
By Smeghead
#4836730
Sounds good to me then. Do you recomend any particular place to buy them from? (The site I lfound is the manufacturer and they don't seem to sell directly).
By abaka
#4836738
I've never had a problem with threading resin pieces, I would always recommend securing everything down with epoxy / glue as well as a thread though.

Are you going excessively fast. I find I have to thread the resin pieces more slowly as opposed to aluminium. Resin can be more sturdier than the aluminium parts at times so going slower is a more effective method.
By Hijacker
#4836747
I've threaded resin no problem in the past as well. You just have to back the tap out to clean the cutters more often as the resin tends to clog them easier than metal. The friction from the resin is a lot higher than aluminum as well, which slows the tap down. Just gotta be slow and steady. But anytime you tap a blind hole, be it resin or metal, do it by hand and do it slowly.
Smeghead liked this
By Smeghead
#4836783
Thanks for the advice guys, really appriciate it. :) I shall have a bit of a think on the morrow (just got in from an evening of fine dining.)
User avatar
By GohstTarp
#4836858
Smeghead wrote:I'm slowly realising that nothing is quite straight on a pack, so it's hard to find a good reference point to line things up to. :P
That has been a challenge for me too and I ended up just eye-balling some things on the GBFans shell... a genuine prop builder experience :)

Your bumper looks great, BTW. It's inspiring me to finally get mine attached ;)

Looking forward to seeing more.
Smeghead liked this
By Smeghead
#4837401
Curse you, Hoot. Now I've got that stuck in my head... as sung by Randy Marsh!

There may be a short interlude before the next update. I have a never ending string of friends staying over at the moment (I live in a rather useful location for people to crash when they need to be in London). And next week I'm off on a short but intense road trip round Germany and The Netherlands, squeezing 3 theme parks and 2 Kermis in to 4 days.
...Provided the French don't strike and shut down the tunnel again.

I may have ONE free day in the first half of next week, but I will probably be too busy with other mundane things to do any pack stuff. :(
ieatmousetraps liked this
By Hammer
#4837429
Enjoy the break, recharge your batteries then get back to this. It's looking great!
Smeghead liked this
By Smeghead
#4837431
Cheers... but I'll probably need another holiday after to recover from the madness of this trip.

Though I'm sure a few steins in the beer tent at Düsseldorf kermis will keep things relaxed... ;)
ieatmousetraps liked this
By Smeghead
#4841333
My apologies for the lack of updates on this build. Our German road trip turned in to a train trip when our car broke down near Koln, resulting in a whole lotta faff... Long story short, I have every intetion of getting right back on to this .... but in the meantime, I have purchased a genuine geiger counter, that while it is a funky gadget in it's own right, might just fit in on a GB belt. :P
Image

Image

Now I just need to get used to what counts as "background radiation". The generic "clicks" I'm hearing are enough to make a guy paranoid....

RE: the rest of the build: "please hold the line, caller".... ;)
By Smeghead
#4854023
I'm afraid I haven't had time to touch it for months. Being an adult with respolsibilities (if not actually responsible) sucks. :(
But I do plan to get right back on it as soon as I can... Honest, guv'!
GBFANS Ghostlabs light kit

When you say you only have the proton pack light k[…]

I'm not familiar with this one (is it a model?) […]

Also somewhat related question...I don't see giz[…]

Ghostbusters Day 2024

Even if Frozen Empire somehow made a billion dol[…]