#4842291
First I want to say that this is going to be a slow process, but wanted to document the process since I have appreciated the build threads that others have posted.

There are photos available from packs that are supposed to be used in the upcoming movie and since the movie is not out yet, I am sure to violate future defined accuracy, but am just in the mood to make something in my spare time and I also want to use my 3D printer.

Also note I love blinky lights and sound, so this is going to include those!

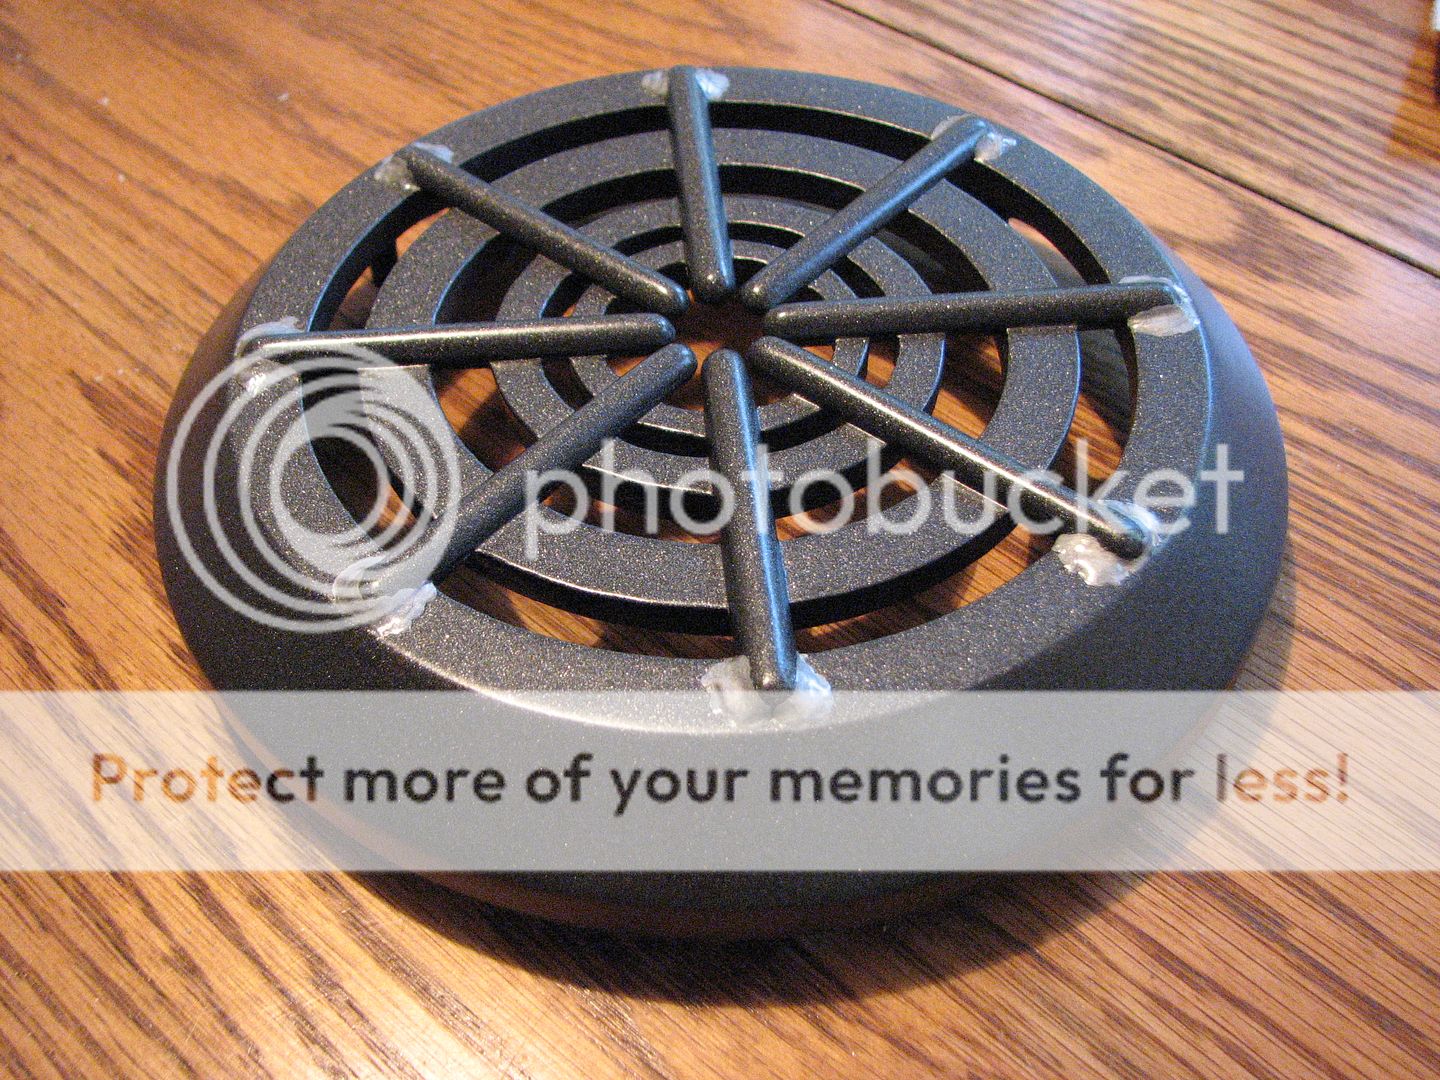
For the main dome, I want something interesting to look at even if you cannot see it very well in the photos so I designed this:
Image

The dome and rings need to be nearly 12" in diameter, and I have Flashforge Dreamer 3D printer and it has a build volume of 9.1" x 5.9" x 5.1", so it won't fit in one piece... :(

I am choosing ABS since it is the strongest and is not water soluble. I use a lot of black, so why not start with that. Currently I am using Hatchbox 1.75mm ABS filament and it is working fairly well. I tried Octave and the layer-to-layer adhesion I just couldn't get dialed in.

Lots of 3D printing trials and errors, that I won't go into here, but lets just say it is not plug and play and I spend a lot of time just trying to make the printer output something usable.

So I cut the model into 5ths due to the symmetry of the design and that will just barely fit on the printer.

Here is one part:
Image

And another angle showing the inside:
Image

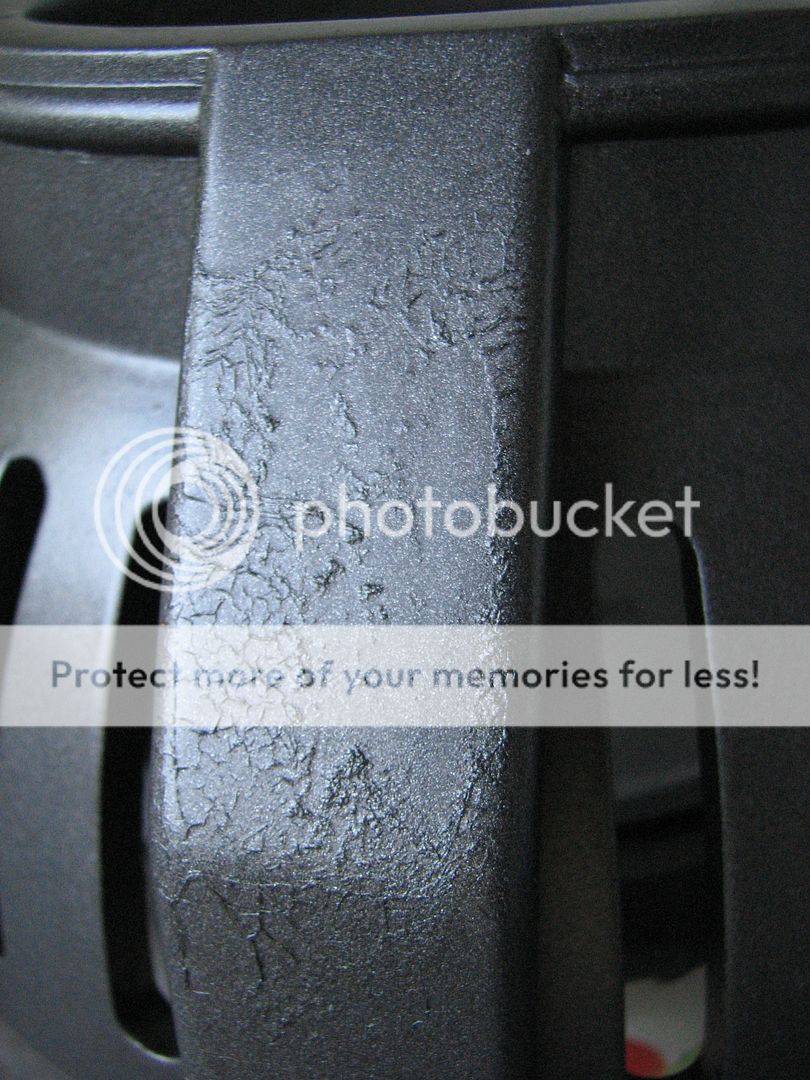
It takes 11 hours to print this, so it would take 55 hours if I could print the hole inner dome on a bit printer? This is a part I have redesigned multiple times - each time I print it I think of some change I want and I finally just had to say close enough and time to print up lets get this thing printed!

I added holes through the part that are just slightly larger than the filament so I could thread the filament through and use it align and hold the parts together.

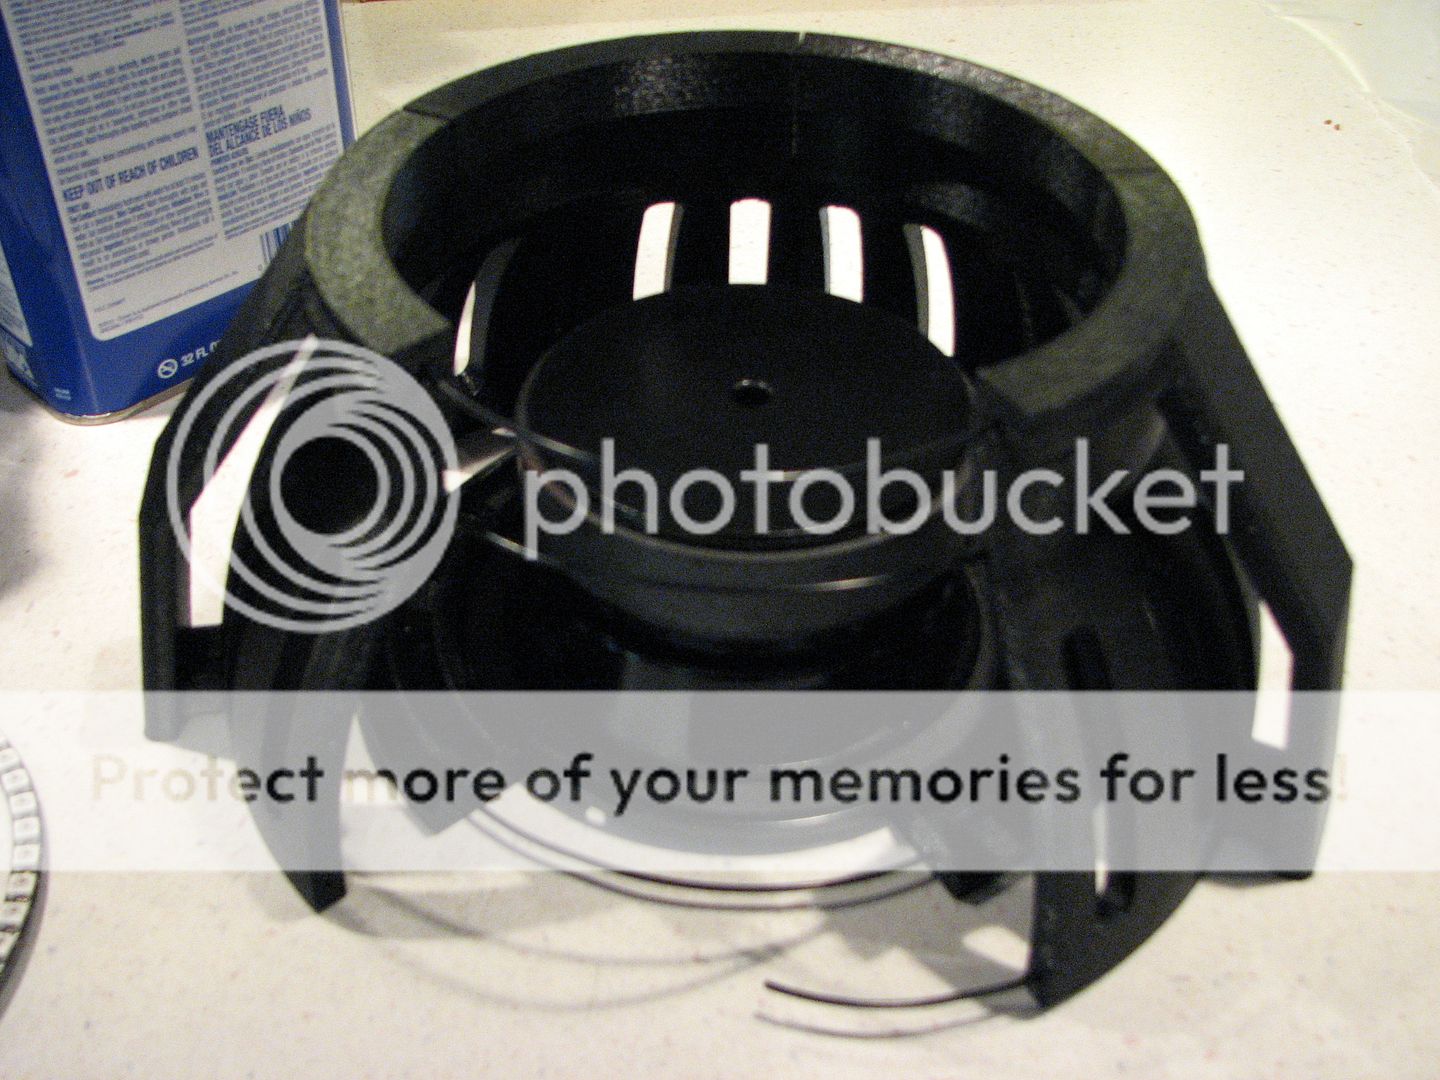
After days (and days) of printing, here is the test fit of the 5 parts with filament threaded through them with enough space between the parts that you can see the 4 lengths of filiment threaded through the pieces:
Image

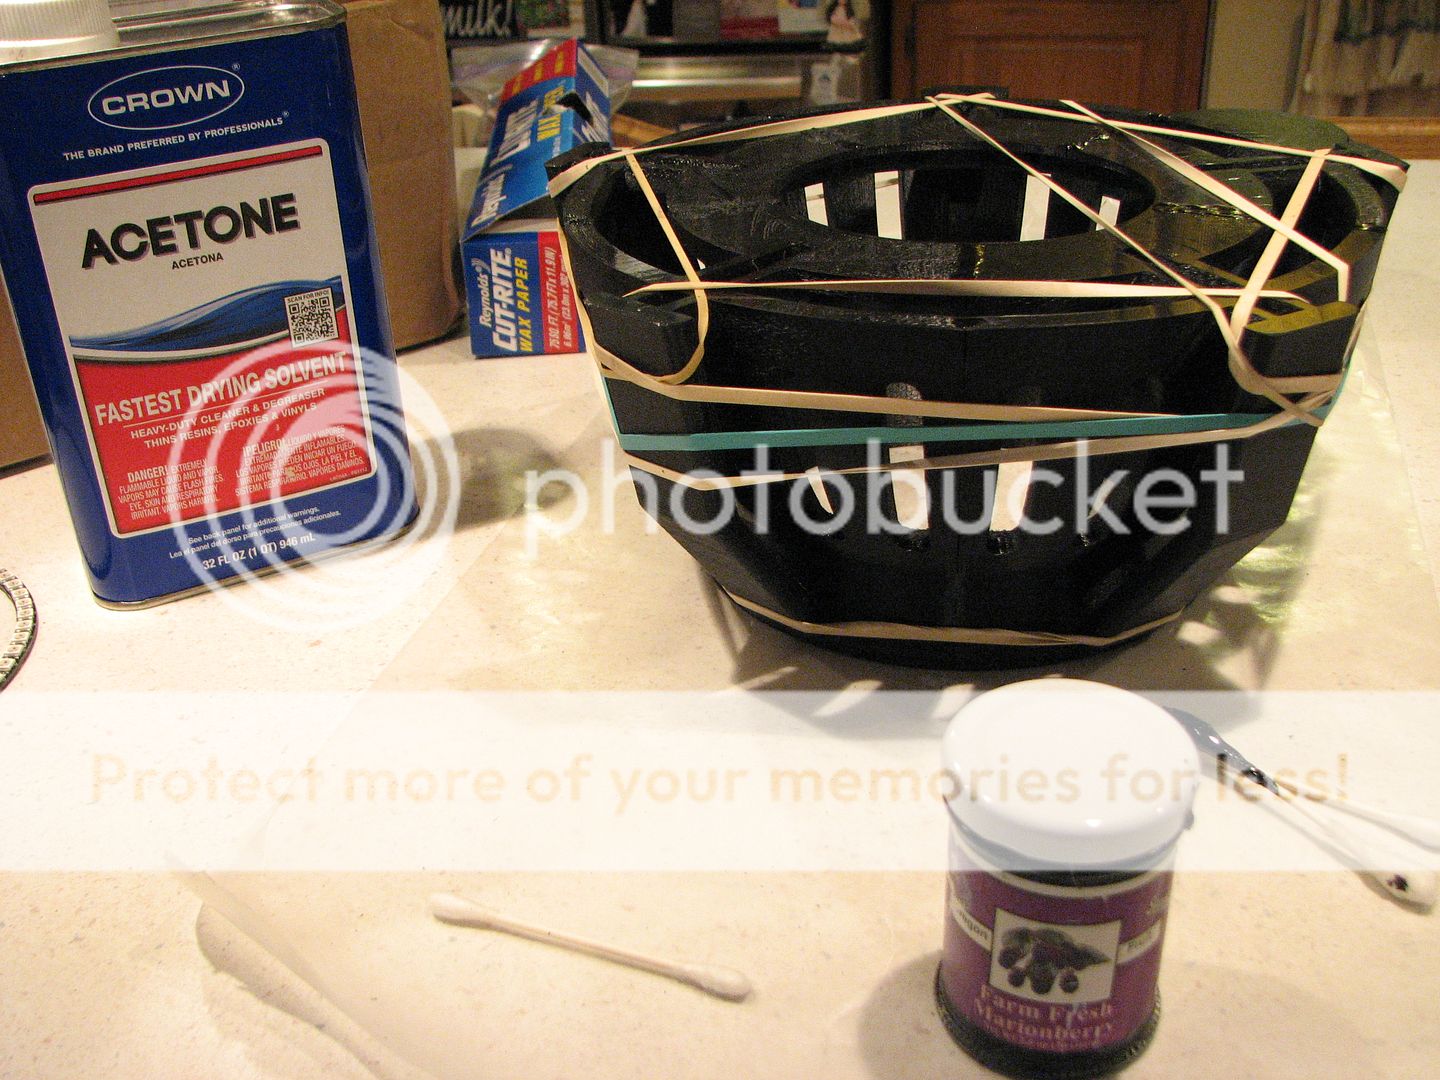
Here is the test fit with the pieces pressed together closely and also a trial fit of the LED ring.

I really want to have it in one piece so gluing will be the next step. One fun note: the LED ring has a larger diameter than any opening in the dome so this will be something to resolve later - just minimize the pain, not a show stopper and I am not willing to wait to figure that out...
Image
PssdffJay, JoeLuna33, Skully and 1 others liked this
#4842298
This is awesome work. I can't wait to see more.
Skully liked this
#4842370
Cole Funstuff wrote:Awesome stuff!
Thanks - I appreciate the encouragement...

What layer height are you using for the parts? Also, have you had any warping issues with ABS thus far?
I use the default of 0.20mm layer (and a first layer of 0.30mm). I tried the "high res" option that sets the layer height to 0.15mm and though it did have bit finer lines, the shrinkage in some mid sections was noticeable. The 3D printer is enclosed and that is supposed to help by slowing the cooling but on certain shapes the ABS shrinkage it is obvious. The dome pieces have a lot of curves, so it is tougher to tell if there is an issue. It is not very noticeable to me, though there is plenty of texture. This will mostly be under the wire mesh so not sure it is worth smoothing out.

The heated bed really helps with end-to-end warping. On a few occasions, the heated bed has just decided to turn off and the part lifted completely from the bed and then the interesting (kind-of) cotton candy blob of filament was generated for the rest of the print.

When I move on to the top piece I will want that to have a smooth surface since it is a very visible part of the pack, so will see how painful and successful I am at smoothing that out.
#4842373
I use a product from Smooth On called XTC-3D to smooth some parts. It's basically brush on resin and it works really well. Strengthens the parts a lot too. I got it for somewhere around $30 shipped from Amazon (a little cheaper than the smooth-on store).

I don't know about your printer but I print on a pane of glass coated with a glue stick. ABS parts stick pretty well to it..
Spongeface liked this
#4842374
LandoSystem wrote:I use a product from Smooth On called XTC-3D to smooth some parts. It's basically brush on resin and it works really well. Strengthens the parts a lot too. I got it for somewhere around $30 shipped from Amazon (a little cheaper than the smooth-on store).

I don't know about your printer but I print on a pane of glass coated with a glue stick. ABS parts stick pretty well to it..
Do you sand the printed part before you brush on the XTC-3D and/or after it drys?

Thanks for the suggestion. I have tried Spackle and also just sanding and was planning on trying bondo next, but now Amazon prime says the XTC-3D can arrive by Monday, so I will try it out and report back on how it works. I have plenty of "scrap" parts to play with, so can also try sanding portions and see if that is needed or helps out.

My 3D printer has a heated glass bed that is covered with capton tape. Works pretty well when clean and the heat stays on...
Some filaments (ninja flex) melts permanently to capton so you have to cover with blue tape or you get to replace the capton and toss the part (experience, not hearsay!)
Also, newbie move, don't use a metal spatula to get parts off of capton, especially when the plate is heated. I am getting pretty good at replacing the capton tape... :oops:
#4842375
No, I don't sand or really do anything to the parts before I add the XTC.

It can drip and run a little. It's kind of hard to tell when it's pooling or dripping because of the color. But a little bit of this stuff goes a long way.
It's easy to sand. I think bondo is easier but there it's much of a need to sand it, to be honest.
It doesn't have any noxious odor and it's easy to prepare and fairly easy to clean up (just a bit sticky... clorox wipes work well).

I've used it to save some really terrible prints. I had one print that was falling apart and crunched like an old wicker basket. After a few coats of this stuff, I can throw it against a wall and it would be fine.

I did ruin a big piece by leaving it outside to cure. It had some really bad runs and ripples all over. I wouldn't set it outside on a 90 degree day to cure.
#4842376
The speaker arrived today!

So excited to see if it fits perfectly...
Image

but it doesn't quite fit... :evil:

OK, measure the speaker - it is fine. Measure the hole - too small by a few mm?!?!?
Go back to the model and it calls out the correct dimension, so I try changing it and nothing happens. I forgot to use that dimension and the model was built based on the LED ring and some arbitrary widths of supports and ledges around the ring. I now modified the model to actually care about the diameter of the speaker and it now shows that I should be off a couple of mm.

No way (at this time) I am going to toss this and reprint, and the speaker is here, so bring out the dremel and go for some subtractive construction. The wall thickness is less than what I need to remove so widening the inside edge does remove the face and reveals the inside honeycomb structure. Not really visible with the speaker installed and does not have to support any weight, so should not be an issue.

In preparation for the gluing I tried several different glues last night on some scrap 3D prints and let each dry for 12 hours before testing and here are the results:
  • Gel version Superglue: works too well on perfectly flat surfaces. Working time is under 1 second, fantastic bond
    Gel version Superglue: not very good on the textured surfaces such as the sides of the dome, can easily break the bond
    JB quick Weld: not too strong: parts just break apart and the JB weld only sticks to one side
    Barges cement: stayed kind of gummy: Probably good if you need something a bit flexible, but could be pulled apart
    Acetone filament sludge: works great!!!
I read about the sludge and since several others had success I figured I would try the strange concoction. Get a small glass container that you can seal and fill it half full with acetone. I used a small jam jar and no one could mistake the contents as edible. Probably need to peel the label off anyway. Then add scraps of your ABS filament (or thin parts printed like the rafts and scaffolding) until the acetone + scraps reaches 3/4 full in the container and then seal the container. I had to add more scraps after an hour since once the scraps really started melting, the level was not where I thought it was going to be. After 24 hours, the sludge was about the consistency of Elmers glue (maybe a bit thicker). I used a q-tip and that wasn't too bad of an applicator.

So after a lot of dremeling, I glued up one surface at a time and put the five pieces together while the glue was tacky since getting the last piece in requires spreading the other parts out a bit. Rubberband the contraption up and will let it set until tomorrow. I also tried filling the seams on the bottom of the dome to see how that looks in a place that doesn't show. It does raise up the area a bit so will have to sand it down. Didn't see an easy way to just fill the seam (with the q-tip!). Maybe some type of dispenser that could survive acetone could apply the sludge in a more controlled way.

I'll probably have to dremel some more to get the speaker in, but it was pretty close in the dry test fit.

Image
#4842378
Wow, cool thread. I'm also constructing a Feig pack, and what's funny is that I have done almost all of the pack except this part. I have the mesh, but nothing is underneath it. So, it's almost as though we are working from opposite ends. I have a friend in my group that is also printing up a lot of the parts on his 3D printer. So far, he has the middle top of the Faraday cage (stovetop burner), and the two black boxes which have the notched angle in them.

If you ever plan on offering this part up, I'd be down for one, obviously.
#4842485
Oh, another thing about using the XTC is that I would suggest using a small / medium sized paint brush and not the sponge brush they provided.
The paint brush helps prevent over saturation and dripping. Smoother application, less pooling and helps preserve detail in smaller pieces.
#4843096
I am having issues with the XTC... :walterpeck:

Either too much or too little. It worked fine on my small test pieces and the "heart" of the pack. Then I worked on the main dome and could not do much right.

The working time was probably 20 minutes, and I was slow enough that the inside and outside took me about 4 -5 mixes of XTC. I stirred way too vigorously and have a lot of air bubbles that I really didn't notice until it was too late. Then lint and dust particles from who know where attacked with a vengeance. I decided to buy a pack of cheap brushes so I didn't have to worry about cleaning them, and they left bristles all over... Doh!

I used the supplied measuring cup to make sure I had the 2:1 ration of mixture. I tried cleaning the cup since it was very hard to see the level marks after the second set of mixing. I cracked the cup. Grabbed another one from some cough syrup and it worked fine and I decided to use Acetone to clean it out since that was recommended to clean the brushes. Yup, Acetone eats those little measuring cups.

So I eventually got every thing coated and I will let it set for a day or so and go back to sanding to see if I can get it look better before I go to paint it.

The top I just sanded forever, then used a couple of coats of primer filler, sanded a lot more and had much more success. Probably could have used another coat and sanding, but I wanted something done this weekend so close enough.

Blinky Lights!
Then I tried to get one of the Adafruit neopixel parts up and running. Wired it up, downloaded the Aduino library, changed one line of code to indicate it had 7 LEDs and ran the example code. Worked first time!!!!!

The top parts is printed in glow-in-dark filament and was originally flat. Looked too plain, so I added the coil and cover piece. From above I don't think the seam will be visible. XTC coating on the middle to outside parts and left the inside set of parts uncoated.
Image

Here is the view from above:
Image

And here is a video of the lights. Really hard to not saturate the camera. Really nice affects in person.
Kingpin liked this
#4843597
I really dislike painting...

The main inner dome was pretty good, but there were a few spots I felt like sanding down and adding another coat of paint to... Big mistake. Went and purchased another can of the Rustoleum and tried to paint after I got it home and the store closed. 2 squirts and then it clogged and could not be coaxed into working. Went back to the store today and exchanged it for another can. Same thing. 8-(
I was tired of this so tried swapping the sprayer nozzle out with one of the cans that did work.

This almost worked then the can went "sploosh" and spewed all over my part.
Image
I now have to wait 24 hours and then sand that all off and try again with a new can of rustoleum from a different lot/batch. Wish me luck!

At least the top part turned out fine:
Image

I used milliput for the fake welds and then painted it silver with a tiny brush and model paint. I may try adding some rub'n buff silver over the top of the silver paint but I am a bit intrepid after all of the problems I have been having getting the inside dome painted, so may just leave it alone.
#4843598
I had similar issues with that paint. I was able to get it to work by swapping the nozzles, but it still didn't work great. I think the sparkles in the paint clog it up. :(
#4844235
Finished sanding and repainting. A different batch of the rustoleum paint worked fairly well.

So on to the wire mesh and frame. The top worked out well, the bottom, well, not so well. There was enough pressure trying to wrap the mesh around the frame that I broke the pieces where I glued them together and it also snapped the filament used to align the parts. So I ended up drilling the ends out and using a toothpick to hold them together. It ended up much stronger than before.

Lesson learned: don't count on the filament in a hole to provide much strength. It would be better to use a toothpick or possibly copper wire to get the parts together with additional strength.

Image

And combined:
Image

I also found some larger white multiple conductor cable that will be ideal to run along the legs of the domed part, though it may be a while until I have time to work on this again. sigh...
#4844239
Sorry to hear you were having trouble with the XTC. I hope my suggestion didn't cause you too much stress.

I've found it pretty difficult to work with in recent weeks. I've started using much less of it with smaller brushes, and applying 2-3 coats until the part is smooth. It can be a real pain sometimes but I think it works.
#4844366
crydrk wrote:What did you use for the cage mesh?
I purchased a sample of the 8 mesh from TWP: http://www.twpinc.com/wire-mesh-materia ... luminum-36
Very nice material, price is $5 per sq ft.

Something very similar with just a bit thinner wires: Amaco WireForm Metal Mesh aluminum expandable Modeler's Mesh - 8 Mesh, pack of 2 sheets, 16"x20" so 4.4 ft^2. Purchased mine from Amazon (Blick Art Materials) for under $18 shipped. It should be enough to do the dome and hopefully enough left over for the side meshes, but I am not sure about that yet...

Here is a picture of the two meshes, TWP on the left and AMACO on the right:
Image
#4848151
A couple of small updates.

Working on the 6 and 4 digit displays and the boxes that hold them. First round of electronics are working fine (finally), and I am having some help writing Arduino libraries so these displays can be easily controlled and changed with just a few lines of code in a controlling Arduino.

I also have an optional built in controller for stand-alone (no Arduino) control, but haven't even started that since I am not sure that will be needed.

Here are a couple of the parts for the 6-digit display:
Image

And then put them together and set on the Hammond 1590N1 box:
Image

The first prototype parts for the 4-digit display box - I'll probably wait until the next round of circuit boards come back before I finalize the 3D printing:
Image

Image

And a comparison shot to make sure the dimensions are about correct:
Image
#4848538
Finally found some wider spacing white ribbon cable that looks to be pretty close to the size of the cable in the reference packs.
Rainbow ribbon cable; 7 conductor, Blue to Black
White ribbon cable; 4 conductor
Magnet wire: 28AWG, maybe a slightly thicker gauge would be more accurate,

Image
#4854286
I finally have an update on the seven segment displays.

The promo poster shows a Blue display for the main display?!? And looking at the digit spacing ("1" should have a much larger space to one side for a 7 segment display digit), so at this point I am assuming that is just a marketing poster and may not accurately reflect the pack displays in the movie. Maybe some clarification next month with the release of a trailer...

At this point I am still going with Green displays, but have added a smaller 4 digit display for the center display that shows up in the promo poster. The smaller display is also green, but a different green than the main displays (it does look yellow when next to the main display and green when the main display is not in view).

Image

The arduino is now controlling the 3 displays through a single I2C interface.
It uses 4 wires: +5Vdc, Ground, SCL and SDA.
Library support work is ongoing, but the plan is to support easy settings for dimming, any number, full control of which segments are lit and also easy scrolling of messages across any of the displays.


I have been waiting for the waterjet cut motherboard (at least as an excuse) before I work more on the main dome and surrounding boxes...
It is so hard to be patient!

I cut out the middleman and sprayed my pack and ba[…]

I'm hoping we'll see another set when the next F[…]

Hey, anyone else playing this game? I want to find[…]

GBFANS Ghostlabs light kit

When you say you only have the proton pack light k[…]