User avatar
By fifth_beatle
#4842572
Undoubtedly, there will be a bunch of progress threads over the next few years, and that is fine. But, I thought this would be a good thread to start to just show one pic of your pack, and maybe to use as a "how did you do that"/sharing of information forum. So here is mine:

Image

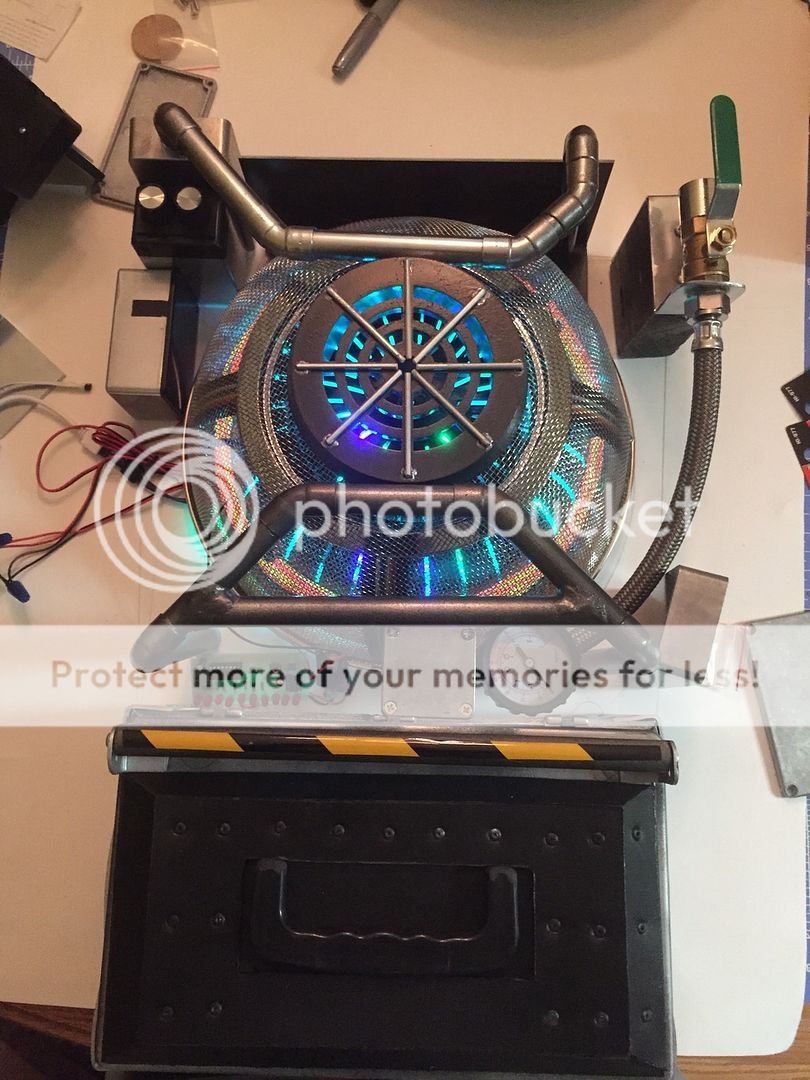
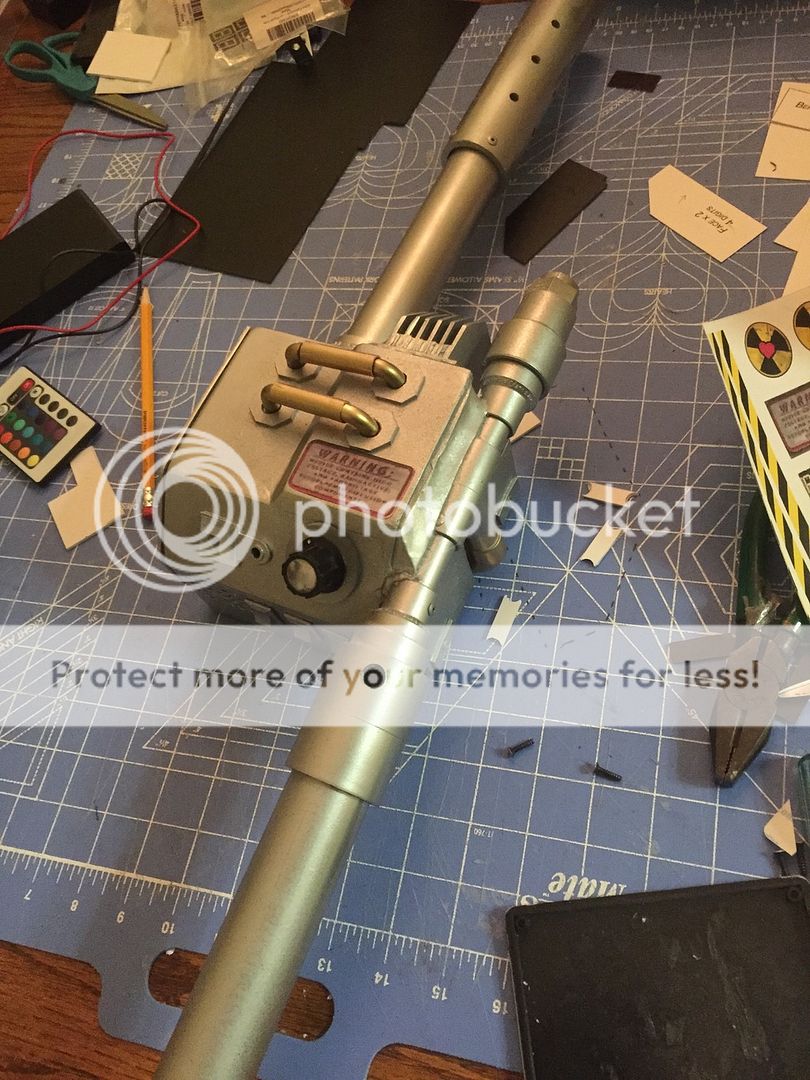
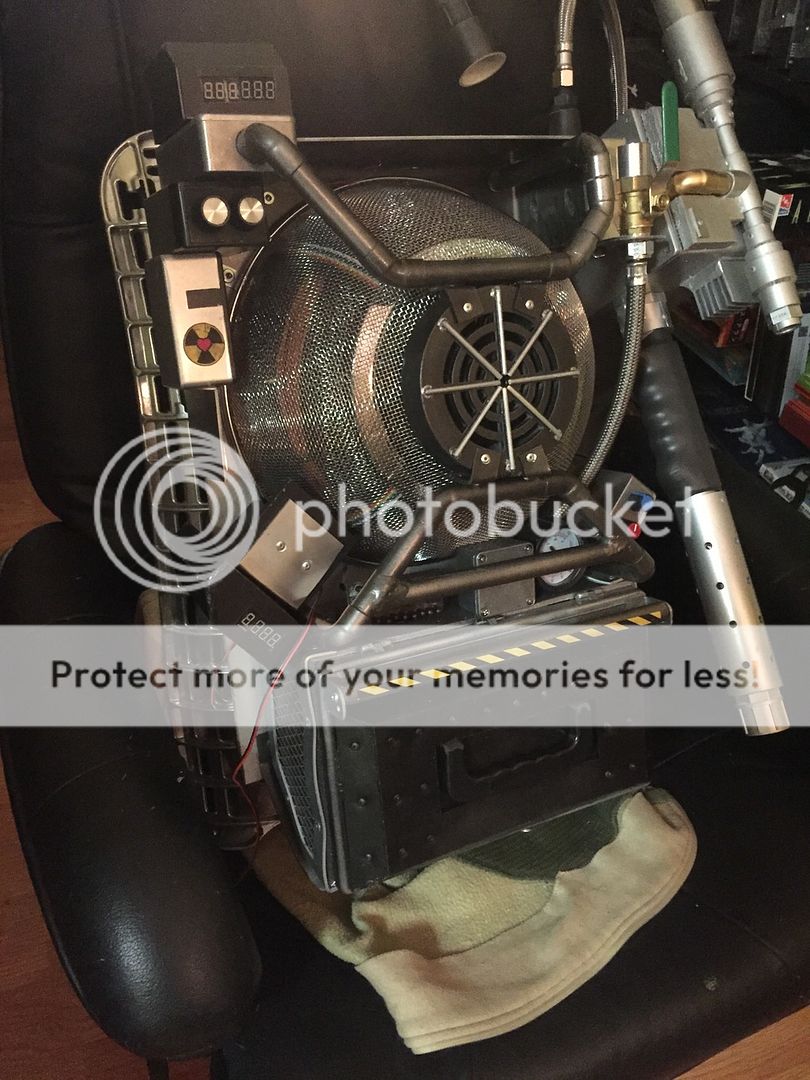
Unfinished for now; I still need to start on a wand, the middle Faraday cage is not the right size of mesh, and needs something underneath it, but the general shape is there, and I am pumped to continue working on it! I have had help with construction that is out of my realm- my two friends have done some welding to the pack, and several 3D printed parts have been added.
Kingpin, twmedford23, Glenn Frederick and 2 others liked this
User avatar
By Kingpin
#4842580
Off to a good start, Fifth. I'm super-impressed by the talent of this community that there's still the best part of a year until the film's release, and the community is already producing replicas that could be confused for the actual props. :)
fifth_beatle liked this
User avatar
By Kingpin
#4842714
A member of the Massachusetts Ghostbusters reported that a friend of theirs who was on location when they were filming reported red lights, and a rotating motion in the backpack. Sadly there isn't more that the second-hand account to work with at the moment.
By jason407
#4843322
DarkSpectre wrote:I'm loving the craftsmanship in this thread but I'm still not sure about the design. How hard was this to actually part out and assemble guys?
There are still a lot of unknowns as far as accuracy goes...so it's hard to really say.

For me, I spent about 1/4th of the time to build this compared to my "Real" proton pack.

For the pack:
I would consider this easier as there are fewer parts, a lot of which can be bought. (valve, project boxes, etc)
There are some tricky parts. The custom motherboard that has the hole/slots punch-out pattern(which I did NOT replicate), the toolbox type thing has not been found yet so that needs to be made, and the center heat sync thing. If sources can be found for those items, this thing would actually be pretty easy.

For the thrower:
It pretty much needs to be built...a 3d printer is great, but I have also seen a great example of one made by hand using a project box and pvc pipes as a base.(cough SpaceCoast GB's) ;) I would not really say it's any harder than an original thrower.

I was not really a fan of the new proton pack design at first...I don't really think it is better than the original. However, spending this much time on it, I have grown to like it more than I had. It definitely could have been worse...at least it still kind of "feels" like it fits in the Ghostbusters world to me. I am hesitant about the reboot, but I am hopeful that they will surprise us and it will end up to be a fun movie. This pack was made for my sister and I will be shipping it to her this week...whether or not I build one for myself will probably be decided AFTER the movie comes out. ;)
GBfan77 liked this
User avatar
By fifth_beatle
#4843349
Nice pack, Jason407!

I second that - I find that getting most of the parts to this pack is a whole lot easier. With an 84 pack (if you do it from scratch) you have to build your own series of boxes for the top part, and then some circles for the bottom. With the 16 pack, you order a bunch of boxes online, and then figure out where they go on the mobo once you receive them.

I think this thing has COST me more in the long run than an 84 pack, though. I've cut some corners by using "close-enough" parts from around my house.
By UncleSirus
#4848867
This thread is awesome! I can't believe it's so buried. I'm going to start a build for my wife in Jan and this is a wonderful idea pit! Thanks to all the trailblazers on this one! More exclamation points!!!
#4855675
Quick question for those who have build both original and remake packs. Which one was easier? Also is there a parts list out there for the pack and thrower?
The classic pack is much easier to make in my opinion. Just because there is more information available on them, and because people sell either fiberglass or vacuumformed shells that you can buy. Even if you scratchbuild a classic pack, you know the exact measurements down to the millimeter due to Stefan's plans.

The 2016 pack is made out of a bunch of project boxes, but you would have to scratchbuild the lower box, the unknown project boxes, the Faraday cage mesh, and the thrower. What makes this new pack harder in my opinion is not knowing the exact measurements, and the cost of all the materials. I think the studio purposefully made it so that you can't mold and cast it, but that is just the conspiracy nut in me talking. :)

Here is a list of most of the parts which can be found on another thread (thanks to user AUSTIN for list):
-1/2'' Copper Pipe x 6ft
-3/4'' Copper Pipe x 4''
-1/4'' Copper Pipe x 2''
-1/2'' 45° Copper Elbow x 6
-1/2'' 90° Copper Elbow x 3
-1/2'' Copper Coupler x 4
-3/4'' 90° Copper Elbow x 2
-1/4'' 90° Copper Elbow x 4
-1/2'' RUB Brass Ball Valve, P.N. T242D00 x 1
-Hammond Aluminum Project Enclosure, 2.3x2.17x1.02, P.N. 1550Q x 1
-Hammond Aluminum Project Enclosure, 4.4x2.3x1.6, P.N. 1590BS x 1
-Hammond Aluminum Project Enclosure, 3.5x1.38x1.02, P.N. 1550A x 1
-Rubber Boot for 2.5'' Ashcroft DG25 Gauge, P.N. 471B190-01 x 1
-TE Connectivity Round Connector Cable Clamp, P.N. 206966-7 x 2
-TE Connectivity Round Connector Housing, P.N. 796094-2 x 2
-POINTER KNOB FOR 6MM SHAFT, 19MM DIAMETER x 1
-POINTER KNOB FOR 6MM SHAFT, BLUE FACE x 1
-0.9" KNOB FOR 6MM KNURLED SHAFT (BRONZE W/ DOT) x 2
By Apache
#4855682
Love these!! Great jobs and a few are absolutely fantastic. That one wand...amazing. I'd post my first attempt and then my current second work in progress but alas....not sure how.
User avatar
By PattyTolen
#4856578
fifth_beatle wrote:Image
Great stuff! What did you use for the black circles in the center? 3d printed?? Is anyone up for 3d printing a few of these for some of us here who don't have a 3d printer? I'm slowly but surely piecing mine together, but that piece is a pain! Also, what did you use for your toolbox on the bottom? It looks great!!
User avatar
By PattyTolen
#4856579
buckrogers wrote:Has anyone put together a Feig Proton Pack tutorial? I can't wait to start my build!
A tutorial would be so great, but I haven't found one yet. It sure would be helpful!
User avatar
By fifth_beatle
#4856595
PattyTolen wrote:Great stuff! What did you use for the black circles in the center? 3d printed?? Is anyone up for 3d printing a few of these for some of us here who don't have a 3d printer? I'm slowly but surely piecing mine together, but that piece is a pain! Also, what did you use for your toolbox on the bottom? It looks great!!
Yeah, my friend 3d printed the center for me. I dont own a printer...I'm oldskool. As for the lid, I made that out of 1/2" MDF wood. I beveled the sides with a hand belt sander, and then I used rivets and a rivet gun to achieve that look. A few coats of primer, silver, and black followed by weathering it.
GBFANS Ghostlabs light kit

When you say you only have the proton pack light k[…]

I'm not familiar with this one (is it a model?) […]

Also somewhat related question...I don't see giz[…]

Ghostbusters Day 2024

Even if Frozen Empire somehow made a billion dol[…]