This is for other Ghostbusters Props that don't fit into the categories above.
By Alex Newborn
#4793990
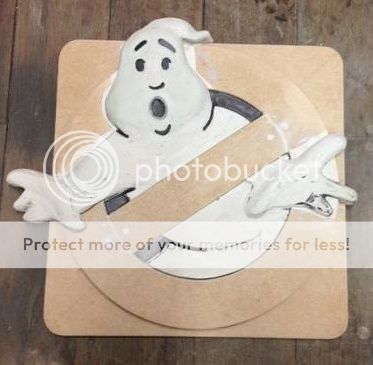
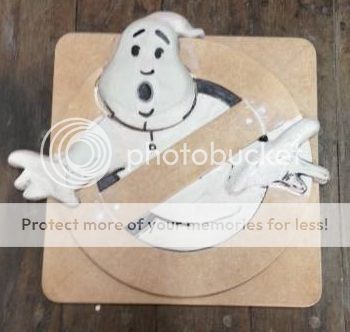
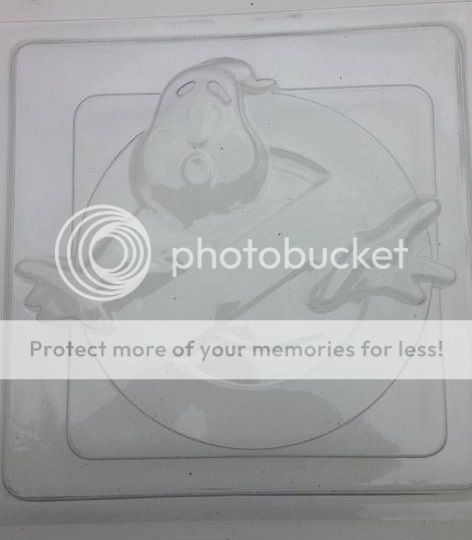
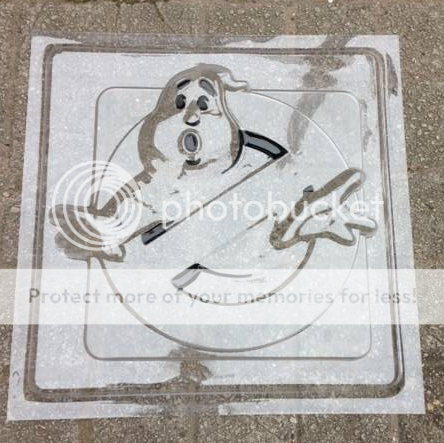
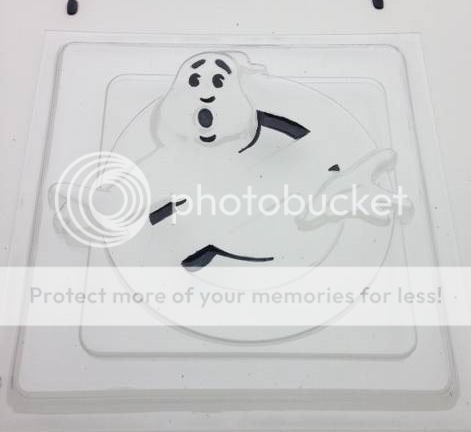
gbfhs wrote:Quick update ! Here is the latest offering, I think i am almost ready to vacform. As always any thoughts or suggestions are welcome. Image
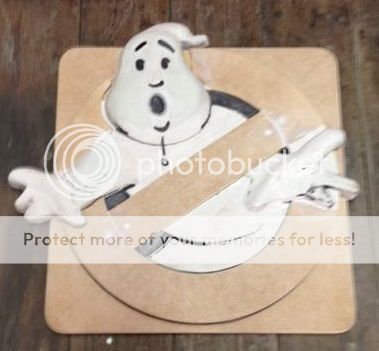
CaptCyan wrote:Is it the angle of your photo, or did you tilt his head to the left (his right)?
I agree with Cap. The head looks like it got shifted about seven degrees counterclockwise.

I know it's a lot easier to fix the photo than the real buck, but if you could just nudge it back to about here (exactly seven degrees in my software) I think it would look perfect.

Image

Alex
By gbfhs
#4794076
Hi to everyone and thanks for the suggestions. Just before i chop off and adjust the head i thought i would post another pic from a similar photo angle to see if it does need adjusting or if it is just the angle of the photo i had taken. Image Comments welcomed as always.
By Alex Newborn
#4794099
Yes, it definitely needs adjusting.

Here's a bit of photo manipulation to try to illustrate why.

If we adjust the horizontal and vertical perspectives of the movie frame, and also skew, stretch, and free-rotate the image, we can get the square borders of the sign a little closer to being perfect right angles.

Image

Now, this of course does all sorts of crazy distortions to the curves of the ghost, so I only want you to focus on ONE area... the upper right part of his head that runs along the black line I added at the noon position. See how well it corresponds to the vertical left and right edges of the square?

Above is the B side. Now let's use the exact same techniques on the A side.

Image

I didn't quite get all the edges vertical, but still you can see that same part of his face is lining up with the vertical.

And finally, here is the same set of manipulations done to your photo.

Image

I only put part of the 'noon' line on this one, so as not to obscure the white part.

As you can see, you actually HAD the head in the right spot, as indicated by the white area on the circle. But at some point, you rotated it counterclockwise. About seven degrees.

So although I totally understand your hesitation about altering the sculpt, it does need to be corrected before vacuforming from an incorrect buck.

It needs to go from this...

Image
(where he's looking slightly 'downhill')

... to this:
Image

Alex
portugueseGB liked this
By Alex Newborn
#4794113
Contented siiiiiiiiigh...
gbfhs wrote:Image
That looks SO much better! Thank you!

I should also say, I beg your pardon for wanting that ONE detail fixed.

But the reason was, this thing looked so beautiful and perfect in EVERY other detail, it was literally the only possible thing to tweak.

Can't wait to see what you do next.

Alex
By gbfhs
#4794122
Thanks Alex and CaptCyan for the kind words and help with the detail. So now all that is left is to fill in we're the adjustments have been made, then it's the bit I like best which is vacforming. Stay tuned ?
By portugueseGB
#4794158
Off topic, I am sorry, but one thought that always comes to my mind when I watch GB1 is illustrated on the fire house pictures above, when the Containment is shut down and the ghosts escape: Why does the fire house look GREEN?

On-topic:

Looking great! It would look so good hanging from the wall, lighted from the inside.
User avatar
By Kingpin
#4794206
portugueseGB wrote:Off topic, I am sorry, but one thought that always comes to my mind when I watch GB1 is illustrated on the fire house pictures above, when the Containment is shut down and the ghosts escape: Why does the fire house look GREEN?
Probably the result of it being a F/X shot.
User avatar
By CaptCyan
#4794805
That looks awesome without the Paint. :nicejobyoudid:

Being that it's a Clear pull, are you going to "Reverse Paint" it from the inside?
By gbfhs
#4794809
Yes I am going to reverse paint it, because I think that is how the original was done and it achieves a even gloss and protects it from the elements.
By gbfhs
#4794824
It is time consuming but what I will do is mask everything except the black bits and spray paint black then reveal the red bits and spray everything red, it doesn't matter if the red goes on the black. Then remove all masking tape then spray everything white, overspray on the red or black does t matter. I personally would not try to brush paint because I cannot do it but I have seen people paint glass and do a fantastic job (no brush marks etc).
By Alex Newborn
#4794858
I know we're past the sculpting stage, but just for the sake of collecting all the reference pics in one thread, here's something from the GB Storybook by Anne Digby:

Image

Alex
By GOZER84
#4794897
Hey gbfhs your sign is turning out awesome I cant wait to see more updates and the finished product, great job man :)
User avatar
By d_osborn
#4794965
I'm not sure if this will help, but it's cool having all of the sign reference in one place.

This is a quickie iphone shot. I really need to scan the whole image. From a GB2 scene that was cut down for the montage...

Image
Alex Newborn wrote:...here's something from the GB Storybook by Anne Digby
I remember reading that there was a false wall built inside H&L8 to make it look like the LA23 interior. This might be the best shot of that. Thanks for posting!
Kingpin, groschopf liked this
By Alex Newborn
#4794981
Yes, please scan that, but wow what a heart-breaking image. Did they really do that to the original prop from the first film, only to leave the shot out of the film entirely?

Good catch on the false wall. Never thought about that.

Alex
User avatar
By Kingpin
#4795000
Facinating photo Derek! I vaguely recall a script description of the abused sign, where it would've appeared shortly before some of the Ghostbusters entered the wrecked Firehouse and viewed the destroyed Containment Unit... prior to "We're back!"


That shot gives a good idea of the scale of the sign... it's huge!
User avatar
By CaptCyan
#4795001
Alex Newborn wrote:... Did they really do that to the original prop from the first film, only to leave the shot out of the film entirely?...Alex
Seeing as how they stored the Ectos, I'd be willing to bet that they didn't have to do much distressing to the Sign. What's more likely is they found it in a corner and said, "Hey this looks like it's been through an explosion. Let's use it." and made the shot.

Just my opinion.
User avatar
By d_osborn
#4795193
CaptCyan wrote: Seeing as how they stored the Ectos, I'd be willing to bet that they didn't have to do much distressing to the Sign. What's more likely is they found it in a corner and said, "Hey this looks like it's been through an explosion. Let's use it." and made the shot.
Like Kingpin mentioned, it was actually written that way in the script.

I scanned a few shots and posted them in the press photo thread. I'm not sure if the shots will help with the sign project--hopefully so. Great progress, gbfhs!
Alex Newborn liked this
By gbfhs
#4795312
I have started the paint process and i have learnt a few thing along the way, i found that if i used a white board marker i can outline on the front surface then flip it over and trace on the back, this makes it a lot easier and if you make a mistake on the front you can simply wipe it off before you flip it over and trace. i have decided for the black colour i am using a permanent marker pen, it just seems easier than masking off all those curves especially the eyes etc. Here are a few shots of the progress on different surfaces.
Image

Image
ollidauss, Alex Newborn, CaptCyan and 2 others liked this
User avatar
By CaptCyan
#4795357
Looking great ! Are you also going to give it a once over with some Black Paint? Marker on Plastic, even the permanent kind, can leave streaks and light spots.

The amount of people participating in the milest[…]

No issue with Spongeface keepalive and TalentCel[…]

After 2 years of this failed Walmart trap conversi[…]

Wanna play Unleashed with me?

I'm ready big man whenever you want let's goooooo.[…]