- July 17th, 2016, 9:24 pm#4872274
"Boy this equipment's heavy..."
This post may contain an affiliate link that helps support GBFans.com when you make a purchase at no additional cost to you.
A few people have asked me about my process when building my reboot pack. I will say right now that there are several other builds that are waaaay prettier than mine, but since this is one of those times where sharing information is pretty invaluable, I thought I would share my experience and materials for anyone who might be looking for pointers.
Here is the latest addition to my proton pack family.
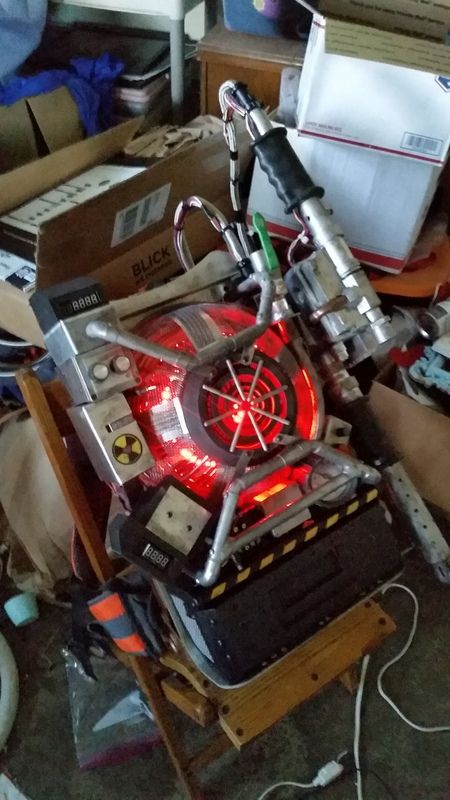

I went out and bought my parts as soon as the first trailer hit. I have been excited about the movie for over a year, but as soon as I saw these packs in action I knew I would have to have one.
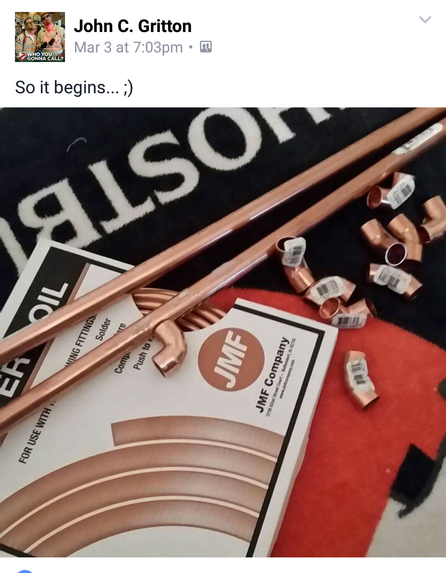
I’ll start with a parts list (as best I can remember.)
Motherboard from Spongeface. These are incredible. It’s really difficult to begin your build without a motherboard since everything is literally bolted to it. The slots on these makes mounting very easy, but I did have to drill some additional holes, specifically for mounting to my Alice Frame.
viewtopic.php?f=31&t=40972
Not sure if Doug is going to do another run of these, but Joe Luna is, I believe, and either option is going to set your pack apart, and look amazing.
An Alice Frame isn’t accurate to the movie, but I chose to go with this option, and I was very happy. I painted the frame to bring out some of the copper color from the pack.
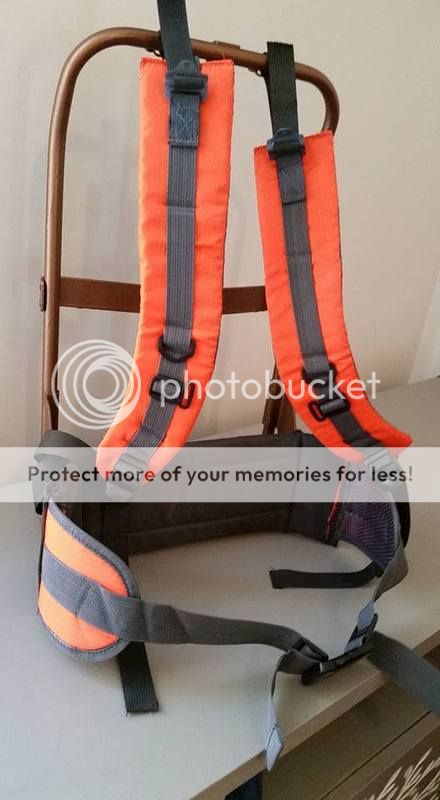
Here is the backpack that I harvested the straps from.
http://www.ebay.com/itm/Outdoor-Hiking- ... SwhOVXext6
A list of the Hammond Boxes I used and their placements:
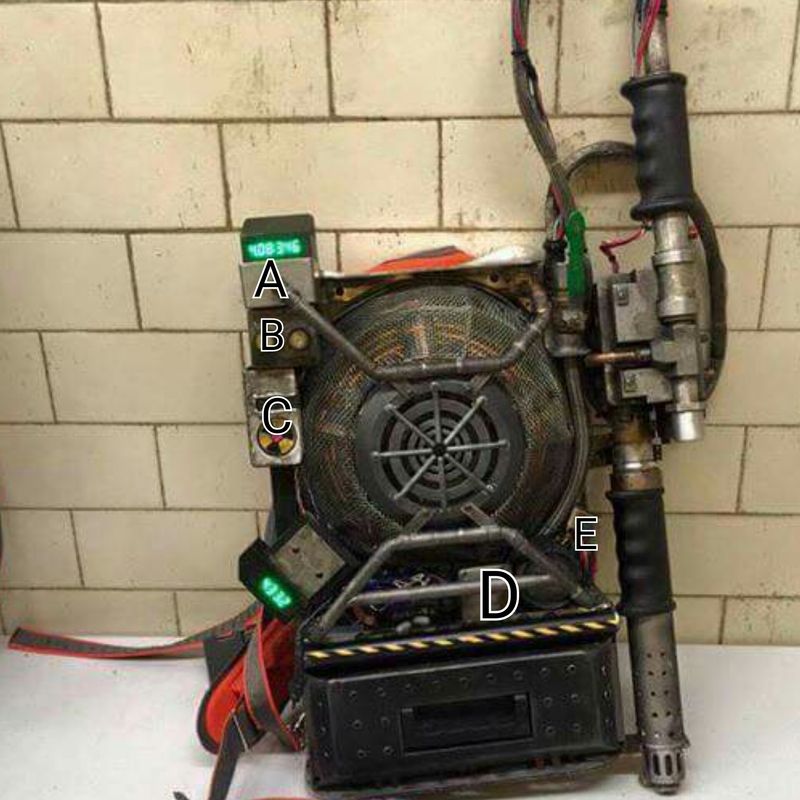
A. Hammond 1590N1
B. Hammond 1590N1 (Cut in Half)
C. Hammond 1550A (Under Custom Cover)
D. Hammond 1550Q
E. Hammond 1590N1 (Cut down)
Top to Bottom:
(All 3D printed parts are from Thomas Lemieux.)
(Left Side)
- 3D Printed Top Display Box
- Hammond 1590N1
- Hammond 1590N1 (Cut in Half)
Knobs:
http://www.allelectronics.com/make-a-st ... dot/1.html
(The dots come off with some light sanding.)
*Both the lower 1590N1 and the 1550A are supported by long bolts, supports, and Extender Nuts.
- 1/16” Custom Made Bracket
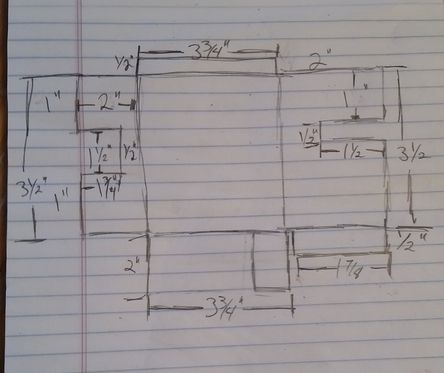
- Custom Made Nuclear Love Box
(Rough measurements. These were tweaked in the final construction.)
- Hammond 1550A
- Custom 1/8” Thick Aluminum Brace
- 3D Printed Lower Display
- 1/16” Thick Aluminum Brace Under Lower Display
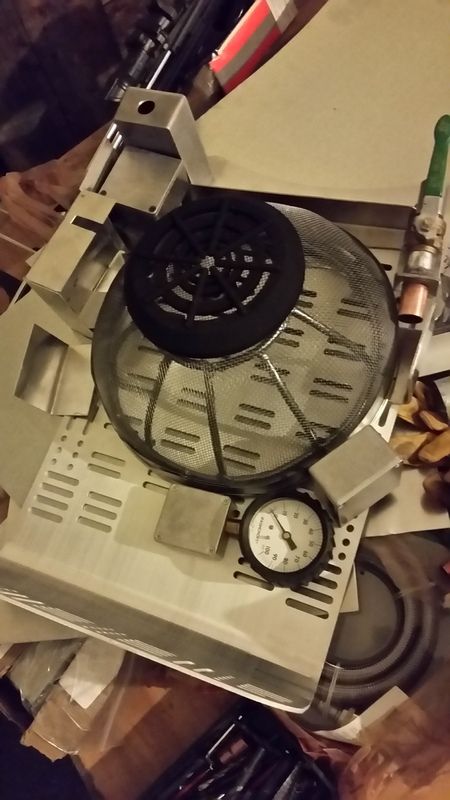
(Above Synchrotron)
- 2” by 2” Stainless Bracket (Used to keep drywall corners from suffering damage.)
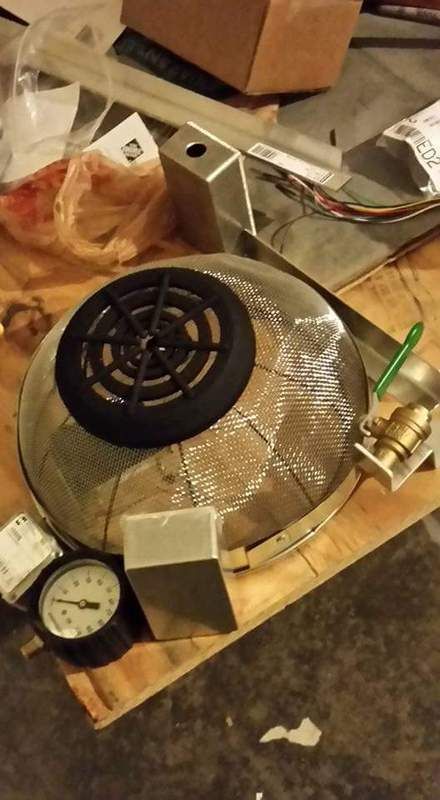
(Inside Synchrotron)
- One of these things from the hardware store:
- Colander from the Dollar General Store
- Vinyl Tube wrapped Hanging Flower Basket
- 3/16” Copper tubing wrapped.
- Various and sundry wires.
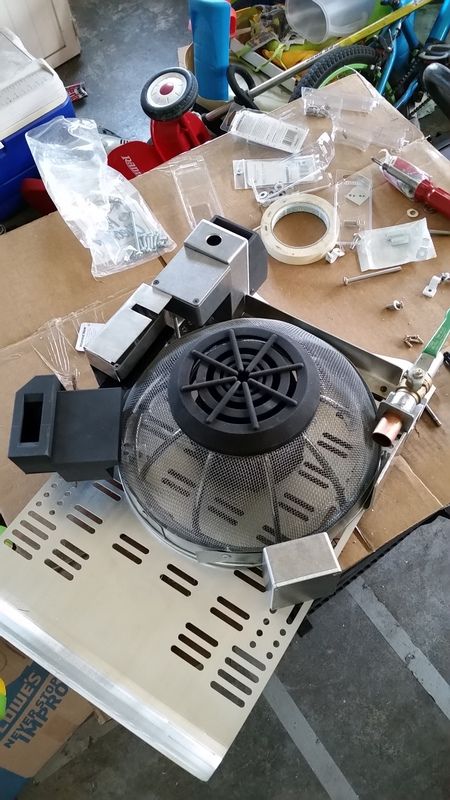
Synchrotron Cage:
http://www.walmart.com/ip/Fox-Run-Craft ... 3=&veh=sem
Lined with Sheet Metal at the bottom.
(Upper Right Corner)
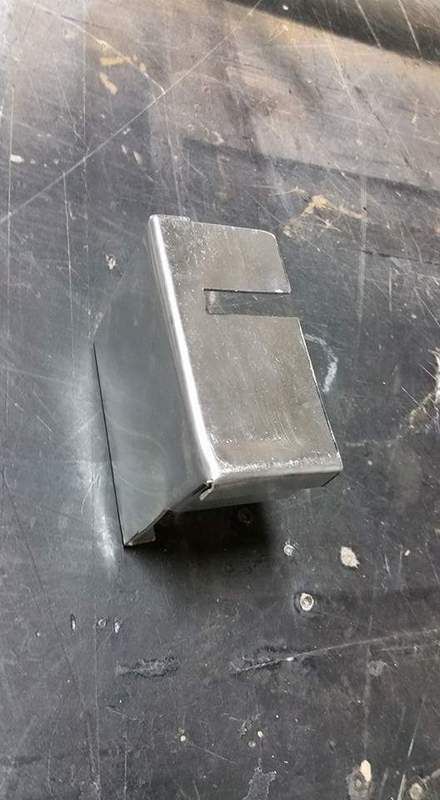
- Custom Valve Bracket
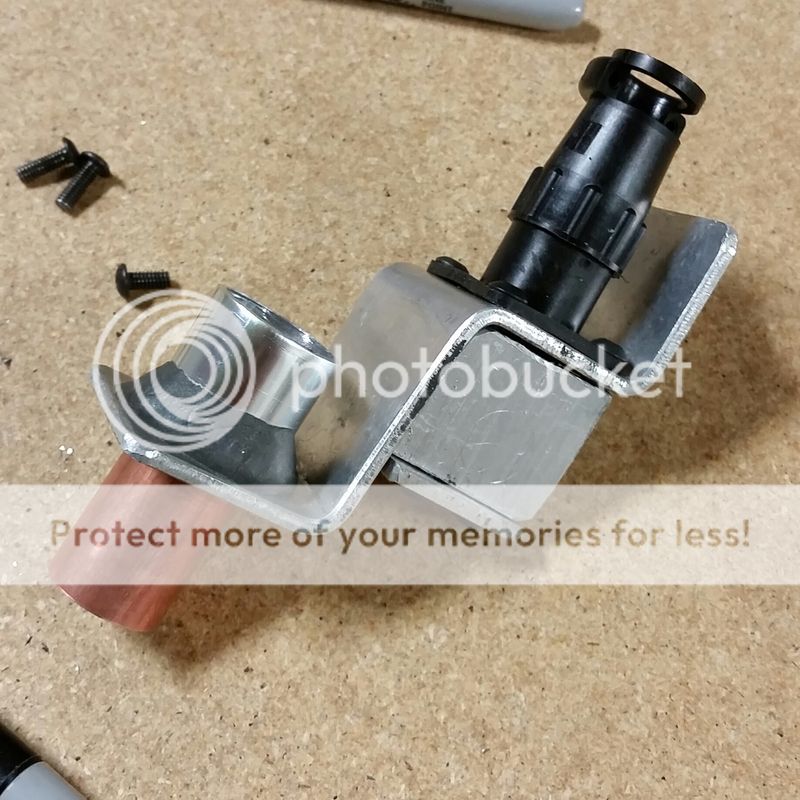
- ½” RUB Valve
- 9 Pin TE Connectivity Connectors
X 2 - http://www.newark.com/te-connectivity-a ... dp/73K4032
X 2 - http://www.newark.com/te-connectivity-a ... eElse_None
X 1 - http://www.newark.com/te-connectivity-a ... BN-44F8389
- Custom Gun Mount Bracket Out of 1/8” Aluminum
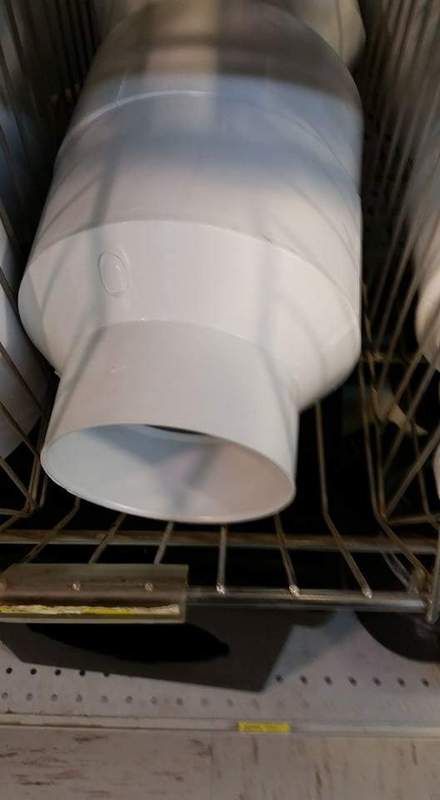
“Bumpers” are ½” Copper Pipe.
I used several different connectors:
- 6 X 45 Degree
- 3 X 90 Degree
- 3 X Caps
I went to Shapeways for my top Grill:
http://www.shapeways.com/product/E3UBGH ... d=59321632
(Loved the texture on this.)
(Under Synchrotron)
- Ashcroft Valve attached to Hammond 1550Q
https://www.zoro.com/ashcroft-gauge-pre ... lsrc=aw.ds
- Boot for Ashcroft:
http://www.coleparmer.com/Product/Rubbe ... X-68334-90
- 3D Printed Circuit Board
- Computer Thumb Screws
- Gray Wire Boots
- Various Wires
- Orange USB Cell Phone Charging cable
Red Pointer Knob:
http://www.allelectronics.com/make-a-st ... ter/1.html
Blue Pointer Knob:
http://www.allelectronics.com/make-a-st ... ace/1.html
The handle with the Caution Stripe on top of the Cryogen Box is a Dowel rod with pipe over it.
Cryogen Box (with built in handle) is 3D printed. Rivets are real rivet heads.
Caution tape came from Lowes.
Rod holding barrel cup is ½” rod. Held on with ½” Split Shaft Collars.
Barrel Cup is ¾” SMC AN500-06 Silencer/ Muffler.
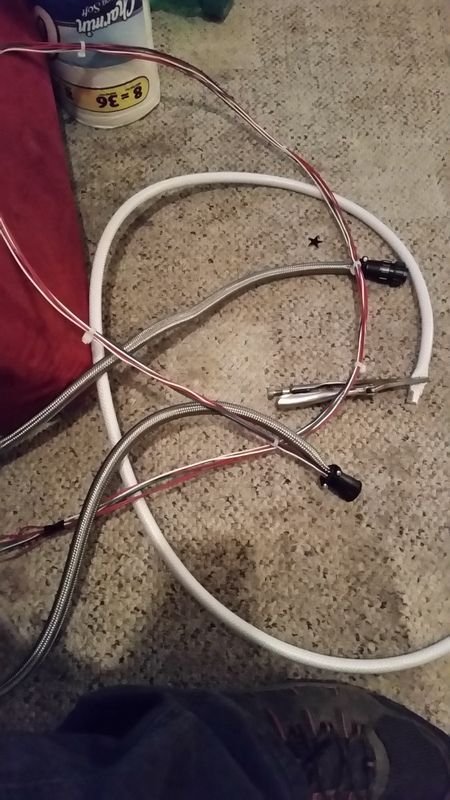
Gun Hose:
http://www.homedepot.com/p/Everbilt-3-8 ... /205854141
Wires for Gun Hose:
Home Depot “18-4 UL Sprinkler Wire Burial”
(Pull out rubber insert.)
Gun Body came from Jason Murphy. A work of art!
viewtopic.php?f=31&t=41045
For the rear handle I used 1” Conduit, for the front Barrel I used a piece of 1 ¼” pipe I found lying around at work. Have no idea what it’s supposed to be used for, but it drilled out easily enough and is pretty lightweight.
For the Gun Grips I used this stuff:
https://www.versimold.com/products/blac ... 3-lbs-puck
It’s easy to use, and very versatile.
Synchrotron lights are 4 of these:
https://www.adafruit.com/product/2875
and one of these:
https://www.adafruit.com/product/2860
As for the build itself, there was a lot of trial, error, frustration, blood, sweat and tears. I literally have a scar from mounting the MoBo to the Alice Frame. Use caution when drilling through metal and don’t put your arm on the other side!
Here are a few pics of my build process:
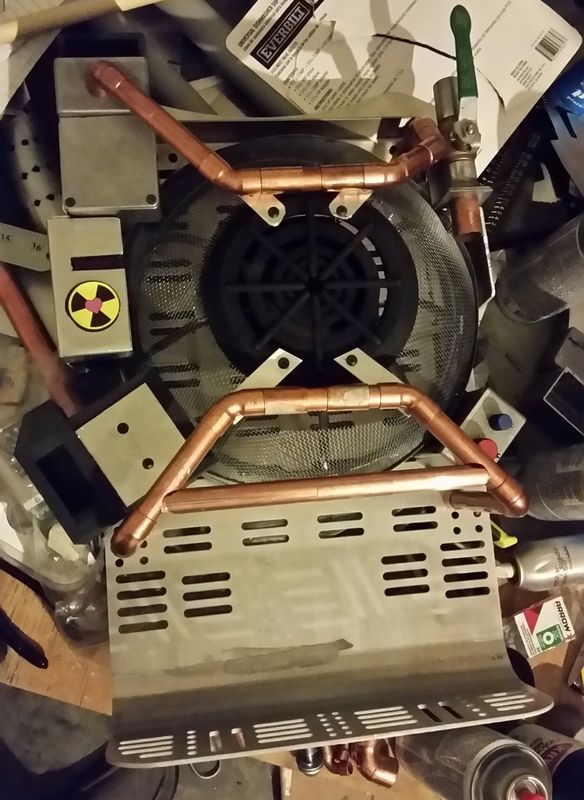
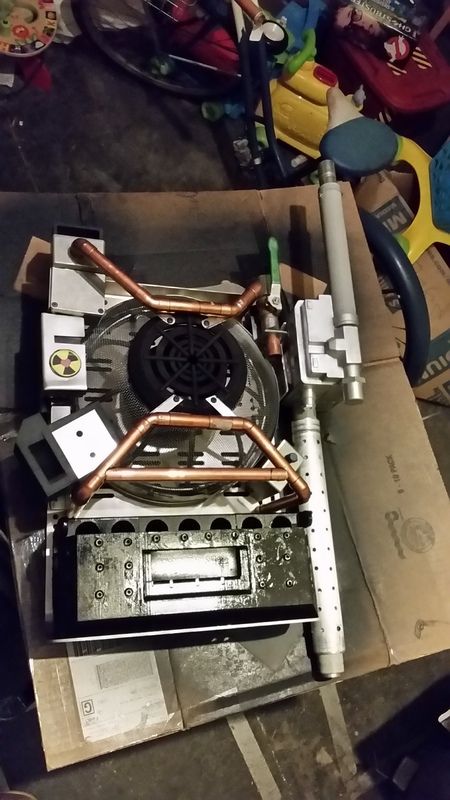
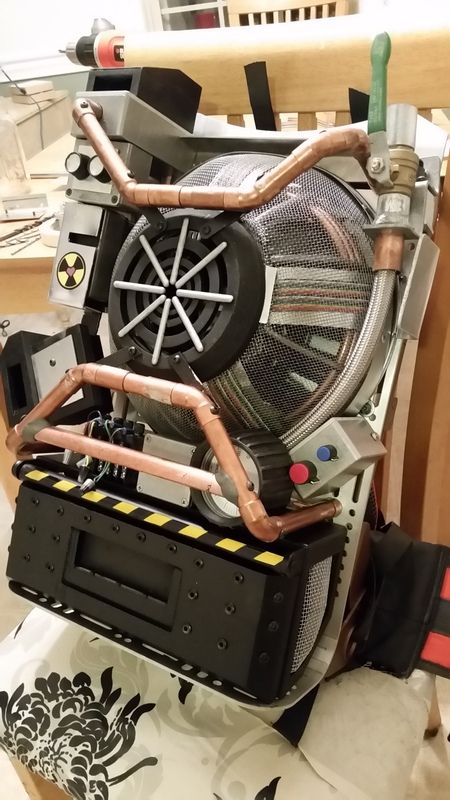
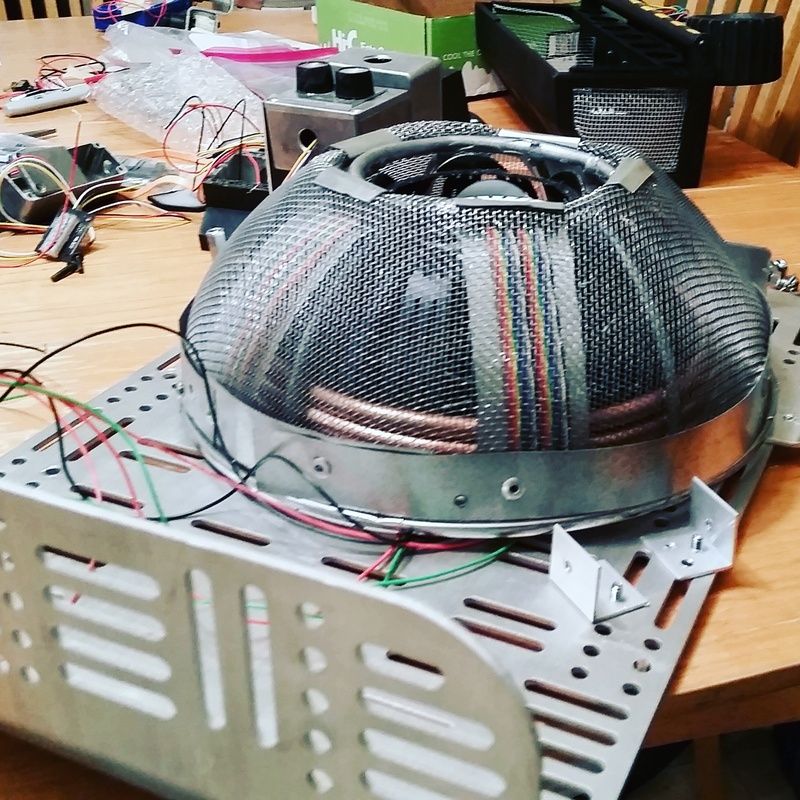

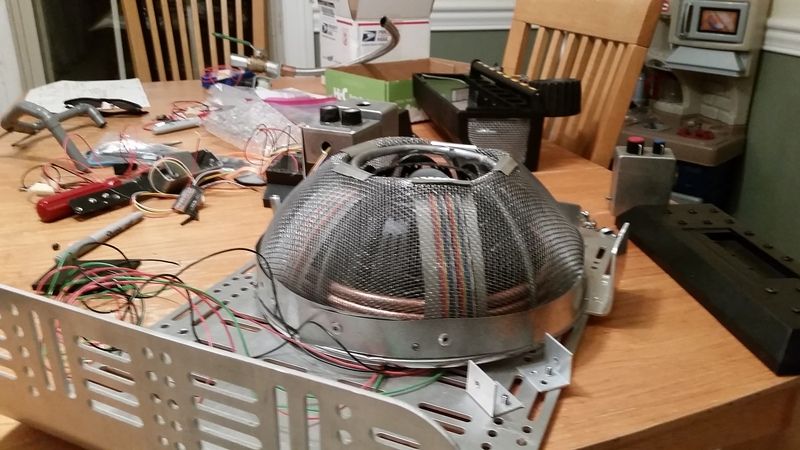
A few little things that I would pass along, I re-formed the faraday cage to better match the screen used cage. The weathering is very important for this build. My pics show how the gun goes from a silvery silly thing to a for real proton gun with a bit of weathering.
I am absolutely not saying that this is the be all, end all build thread, or that all this information is 100% accurate. This is just what got me to where I am on this build.
I wanted to give a special mention to Thomas Lemieux for his massive help on this build. I have been able to go to him with help, or advice at every turn. Now go check out his build thread and see how it should be done.
viewtopic.php?f=2&t=41297
If anyone has any questions I would be happy to help in any way I can.
A few people have asked me about my process when building my reboot pack. I will say right now that there are several other builds that are waaaay prettier than mine, but since this is one of those times where sharing information is pretty invaluable, I thought I would share my experience and materials for anyone who might be looking for pointers.
Here is the latest addition to my proton pack family.
I went out and bought my parts as soon as the first trailer hit. I have been excited about the movie for over a year, but as soon as I saw these packs in action I knew I would have to have one.
I’ll start with a parts list (as best I can remember.)
Motherboard from Spongeface. These are incredible. It’s really difficult to begin your build without a motherboard since everything is literally bolted to it. The slots on these makes mounting very easy, but I did have to drill some additional holes, specifically for mounting to my Alice Frame.
viewtopic.php?f=31&t=40972
Not sure if Doug is going to do another run of these, but Joe Luna is, I believe, and either option is going to set your pack apart, and look amazing.
An Alice Frame isn’t accurate to the movie, but I chose to go with this option, and I was very happy. I painted the frame to bring out some of the copper color from the pack.
Here is the backpack that I harvested the straps from.
http://www.ebay.com/itm/Outdoor-Hiking- ... SwhOVXext6
A list of the Hammond Boxes I used and their placements:
A. Hammond 1590N1
B. Hammond 1590N1 (Cut in Half)
C. Hammond 1550A (Under Custom Cover)
D. Hammond 1550Q
E. Hammond 1590N1 (Cut down)
Top to Bottom:
(All 3D printed parts are from Thomas Lemieux.)
(Left Side)
- 3D Printed Top Display Box
- Hammond 1590N1
- Hammond 1590N1 (Cut in Half)
Knobs:
http://www.allelectronics.com/make-a-st ... dot/1.html
(The dots come off with some light sanding.)
*Both the lower 1590N1 and the 1550A are supported by long bolts, supports, and Extender Nuts.
- 1/16” Custom Made Bracket
- Custom Made Nuclear Love Box
(Rough measurements. These were tweaked in the final construction.)
- Hammond 1550A
- Custom 1/8” Thick Aluminum Brace
- 3D Printed Lower Display
- 1/16” Thick Aluminum Brace Under Lower Display
(Above Synchrotron)
- 2” by 2” Stainless Bracket (Used to keep drywall corners from suffering damage.)
(Inside Synchrotron)
- One of these things from the hardware store:
- Colander from the Dollar General Store
- Vinyl Tube wrapped Hanging Flower Basket
- 3/16” Copper tubing wrapped.
- Various and sundry wires.
Synchrotron Cage:
http://www.walmart.com/ip/Fox-Run-Craft ... 3=&veh=sem
Lined with Sheet Metal at the bottom.
(Upper Right Corner)
- Custom Valve Bracket
- ½” RUB Valve
- 9 Pin TE Connectivity Connectors
X 2 - http://www.newark.com/te-connectivity-a ... dp/73K4032
X 2 - http://www.newark.com/te-connectivity-a ... eElse_None
X 1 - http://www.newark.com/te-connectivity-a ... BN-44F8389
- Custom Gun Mount Bracket Out of 1/8” Aluminum
“Bumpers” are ½” Copper Pipe.
I used several different connectors:
- 6 X 45 Degree
- 3 X 90 Degree
- 3 X Caps
I went to Shapeways for my top Grill:
http://www.shapeways.com/product/E3UBGH ... d=59321632
(Loved the texture on this.)
(Under Synchrotron)
- Ashcroft Valve attached to Hammond 1550Q
https://www.zoro.com/ashcroft-gauge-pre ... lsrc=aw.ds
- Boot for Ashcroft:
http://www.coleparmer.com/Product/Rubbe ... X-68334-90
- 3D Printed Circuit Board
- Computer Thumb Screws
- Gray Wire Boots
- Various Wires
- Orange USB Cell Phone Charging cable
Red Pointer Knob:
http://www.allelectronics.com/make-a-st ... ter/1.html
Blue Pointer Knob:
http://www.allelectronics.com/make-a-st ... ace/1.html
The handle with the Caution Stripe on top of the Cryogen Box is a Dowel rod with pipe over it.
Cryogen Box (with built in handle) is 3D printed. Rivets are real rivet heads.
Caution tape came from Lowes.
Rod holding barrel cup is ½” rod. Held on with ½” Split Shaft Collars.
Barrel Cup is ¾” SMC AN500-06 Silencer/ Muffler.
Gun Hose:
http://www.homedepot.com/p/Everbilt-3-8 ... /205854141
Wires for Gun Hose:
Home Depot “18-4 UL Sprinkler Wire Burial”
(Pull out rubber insert.)
Gun Body came from Jason Murphy. A work of art!
viewtopic.php?f=31&t=41045
For the rear handle I used 1” Conduit, for the front Barrel I used a piece of 1 ¼” pipe I found lying around at work. Have no idea what it’s supposed to be used for, but it drilled out easily enough and is pretty lightweight.
For the Gun Grips I used this stuff:
https://www.versimold.com/products/blac ... 3-lbs-puck
It’s easy to use, and very versatile.
Synchrotron lights are 4 of these:
https://www.adafruit.com/product/2875
and one of these:
https://www.adafruit.com/product/2860
As for the build itself, there was a lot of trial, error, frustration, blood, sweat and tears. I literally have a scar from mounting the MoBo to the Alice Frame. Use caution when drilling through metal and don’t put your arm on the other side!
Here are a few pics of my build process:
A few little things that I would pass along, I re-formed the faraday cage to better match the screen used cage. The weathering is very important for this build. My pics show how the gun goes from a silvery silly thing to a for real proton gun with a bit of weathering.
I am absolutely not saying that this is the be all, end all build thread, or that all this information is 100% accurate. This is just what got me to where I am on this build.
I wanted to give a special mention to Thomas Lemieux for his massive help on this build. I have been able to go to him with help, or advice at every turn. Now go check out his build thread and see how it should be done.
viewtopic.php?f=2&t=41297
If anyone has any questions I would be happy to help in any way I can.
"Boy this equipment's heavy..."


 - By hawkbatsquadron
 - By mrmichaelt