By Mat
#4805751
Not at this time.

If or when I upgrade throwers, I may build another pack to go with the Mattel thrower and would probably go to town on that one! I've been contemplating doing a build with the SC shell, but it's only at the contemplation stage at this point. I would like to build one based on the pack seen at the start of the game. :mrgreen:
By Mat
#4806199
Err...I updated my HGA again. C.D.O. must be acting up! :walterpeck:

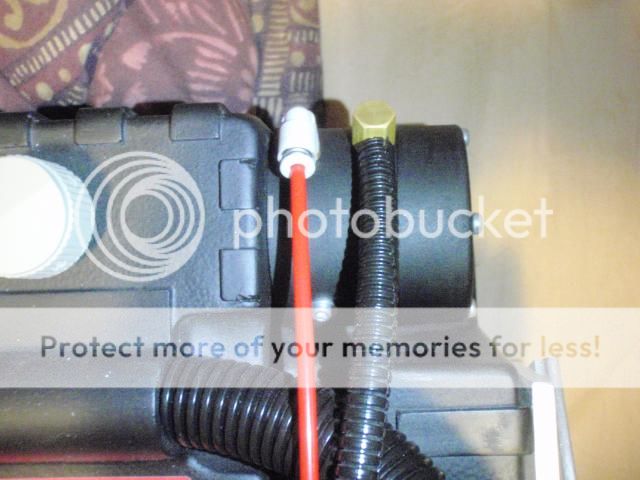
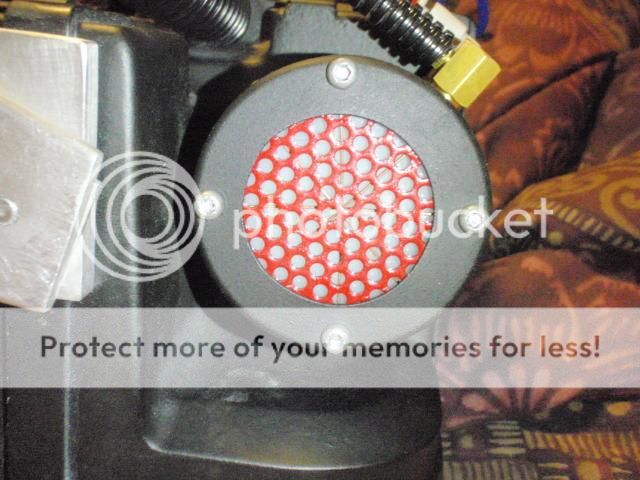
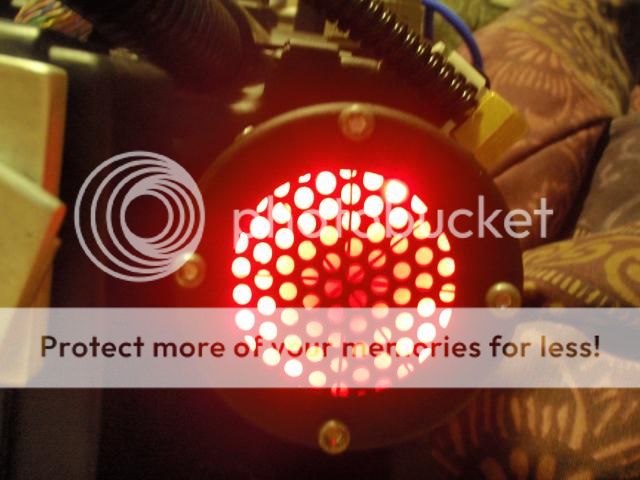
It's longer than the last one; I had to offset the two fittings to clear the circuit board of the chaser kit. It uses the same white lens as the prior version, only the lens is held in place with a baffle between it and the 4 screws. I cut and painted a piece of perf plate red and put that in front of the lens; I think it adds to the overall look.

Image
Image
Image
By Mat
#4806381
Funny you should mention that!

I took the wires off the lens and changed the chase sequence and it's happily Accelerating Hydrogen now! :lol:

Image
By Mat
#4806490
I think I'm actually finally happy with it!

Things are gradually coming together; flight suit and gloves came in today and I couldn't be happier! I haven't attached anything to the flight suit yet, but I'll get to that eventually. It goes without saying that the Tru-Spec's are waaaaaaaaaaay better than the Rothco pair I have. :mrgreen:

I got a shipping notice from Nick, so the booster plug and gizmo kit is en-route!

The pack is surprisingly comfortable; never thought I'd say that about an alice pack..
Image
By Mat
#4807880
I installed the booster plug today; it took a bit of sanding to get it to fit (I knew that it would as the tube I used is a smidgen narrower than it should be!) and I drilled a hole for the top bolt to pass into and apply pressure.
Image

It looks happy in there!
Image

...I also put the movie styled HGA back on for the time being.
By Mat
#4808732
I'm in the planning stages of building a thrower based on the " Updated Thrower Plans by Ejgunth87". I'm planning for the main gun body components to be steel; The more "machine heavy" parts will either be aluminum or resin outsourced parts when I get to that point. My available tools are limited to basically a 110v wire feeder burning self shielded fcaw, chop saw, die grinder, angle grinder, hand drill and drill press and basic hand tools/randomness so by no means will it be a "done by October 31" project. I'm going to start with the thrower body and go from there! I need to go through the garage (dig around under the work bench) to see what I have on hand for material. A few of the measurements will be figured out when I lay them out on the sheet metal. Not having a brake press, I'll bend what I can and weld what I can't! :mrgreen:

Image
By Mat
#4808876
Good lord. For whatever reason, I decided to cut these out with a pair of aviation cutters. NEVER AGAIN! Rad on the side of the thrower body was bent over the chunk of tube I'm planning to use for the thrower handle. As fate would have it, I have a lot of 1/2" x 1/8" flatbar that I'm going to use for the bottom where the cover will mount. They'll be mitered like a picture frame.
Image

Oh yeah, it's made out of the same sheet of steel I cut Bluey from. :)
User avatar
By bishopdonmiguel
#4808880
Somehow, this build slipped past me. A great thread. Really nice work!
By Mat
#4808991
I was wondering when somebody would pick up on that! :lol:

I wound up having to split the front plate into two parts; basically I cut the front plate off where the handle would attach. I'm thinking about using a thicker gauge of sheet there; couldn't hurt. I also figured out which detail parts were going to be of resin and which were going to be aluminum. Basically all of the detail parts that get painted black will be resin; knobs and whatnot will be aluminum. I'm hoping to use a real Clippard on the thrower and I'll probably upgrade the one on the pack as well.

As luck would have it, I found the "perfect" 1" square tube for the trigger box and rear instrument bar under the workbench, conveniently filled with cobwebs! But the size is right and the corners aren't overly rounded. I wound up printing out Stephan's 1:1 thrower plans for reference. To check the scale, I placed one of my side plates on the drawing and everything was cop-acetic.

Image

What I'm planning to do for the trigger box is to cut the top triangle into the sides of the tubes, then simply bend the front and back inwards and weld it up.
By Mat
#4809019
Misc parts have been ordered! I need to track down an aluminum trigger tip assembly and two banjo's though (not the dueling kind), so I'm open to suggestions!

Grips, Palm Rest, Rear Cylinder, Hat Lights, Heat Sink, Gun Track and The dual Side Disks are coming from Nick; Front knob, Clear Tube, Side disk, Top Knob, Hose Barbs, Clippards, Clip Lites and light/sound kit are coming from the shop. Gun ears and lock block I plan to build; V hook will be the one off the present Mattel thrower (since the one on the pack is built for it). Pretty much Committed to the build now!

Meanwhile, I'm gonna go sit in the corner and have a good cry while my wallet hemorrhages in the opposite corner! :lol:
By Mat
#4809026
Final update for tonight; I started tacking the thrower body together. First tack I did, I wasn't running enough wire and blew 1/8" hole (whoops!); not a big deal, I turned the wire up shortly there-after and put the metal back; it'll sand up okay! :lol:
Image
Image
Image

For the D.I.Y-ers, heres the machine settings. I'm going to have to pick up more wire in the near future! I'll check the wire size at that time as well.
Image

Once I have the majority of the thrower body together including the flat bar rim around the bottom, I'll add more tacks and weld it out; for welding, I'll probably tack a brace across the center of the opening and I have a chunk of aluminum bar to use as a heat sink to keep warping to a minimum.
By Mat
#4809128
Front plate tacked into place. It's funny how the camera flash makes sliver gaps look massive; in reality the gaps are maybe 1/32" wide tops. The front plate is 1/8" thick.
Image
By Mat
#4809139
Last update for tonight; base rim tacked in place and more tacks added to other seams; I put them on the inside. Adding the rim made it a lot more rigid.
Image

Aluminum trigger tip assembly has been sourced from EJgunth87! One less part to worry about. :mrgreen:
By Mat
#4809263
Thrower body is welded! When I paint everything, I'm planning to use a sandable primer which should fill a few of the minor surface imperfections. If I ever do another thrower, it'll be thicker metal all around, simply to make it easier to weld! Fortunately, the hard part is over; everything else is thicker! As things stand, it's rigid and rings like a bell when you twack the side!

Can't see ****, Sir! :mrgreen:
Image

Image
Image
Image
Image
ImageImage
By Mat
#4809301
Cranberry Club Soda. I like miller's, but I quit drinking two years ago! :mrgreen:

I got the front tube tacked onto the thrower tonight! I cut it to length using a "Farm Code Pipe Wrap" (2" wide masking tape! Emery Cloth also works good in a pinch! :lol:)
Image

I drilled a 1/16" pilot hole and ran a Uni-bit in until I had a hole large enough for a die grinder bit and allow for a bit of play...I dusted off my...little...die...grinder...
Image

And went to town until...
Image
Image
Image

So much nicer to weld when you have some meat to burn into! On that note, I need to hit up Princess Auto for some more wire. Next up will be the inner front handle...I want to tackle that before I weld anything in case the mount needs to be tweaked; easier to cut tacks than entire welds! I don't actually have material that will fit into the hole, but I have a plan for that (heh heh heh....) :mrgreen:
By Mat
#4809305
Decided to keep working on it tonight. :mrgreen:

So to make the inner handle, I took a piece of tube the same size as the outside and cut a half inch sliver out of it lengthwise.
Image

Working at it with a vice and snipe bar, I gradually worked it inwards while keeping it round-ish. This meant working the tube inwards at various rotations.
Image
Image

I wound up having to slice about two more 1/4" wide slivers out; the trick is to do it gradually so you don't wind up to small. Eventually, I wound up with this.
Image

I tacked up the seam, welded one end about an inch and ground that flush. I cut a collar and welded it on one end.
Image

Then ground the weld flush and cleaned up the inside edge with the die grinder.
Image

To keep it from warping, I did one set of stitch welds, followed by the second set.
Image
Image

I then ground the weld flush.
Image

Stubby?
Image

Then I cut the outer handle.
Image

The handle came out fairly straight so we're good in that department; I need to do a bit of work on the inner handle and collar ends to get a consistent gap and free up a few points that hang up the rotation, but I'm pretty happy with it so far. Admittedly, the collar is by no means screen accurate; I honestly have no idea what keeps the outer handle from falling off; I'll probably wind up sanding it down to a lower profile at some point. :mrgreen:
By PssdffJay
#4809408
I'm not there yet, but doesn't the outer handle get screwed to the inner handle and it's in a slot so it can twist?

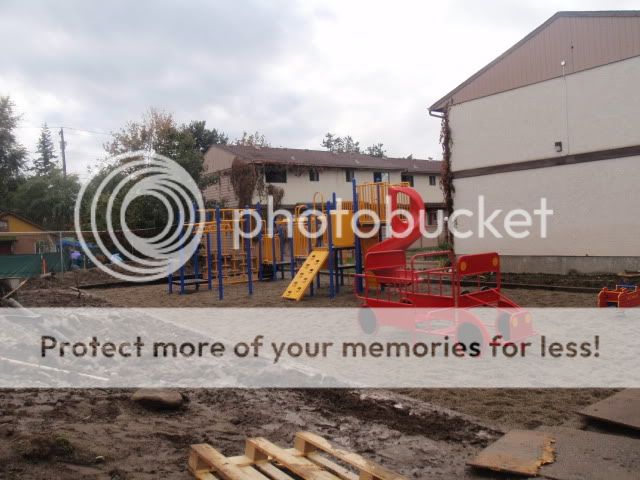
That yellow pipe sure looked like you cut up someone's playground...
By Mat
#4809418
I think you're right; I was looking at other threads and they showed a slot with guide screw; suffice to say, I'll be sanding the collar down quite a bit and cutting a slot in the inner handle later tonight!

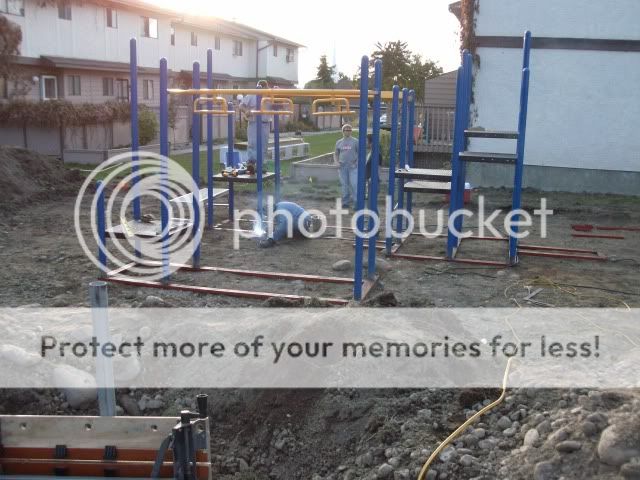
All of the tubing I'm using is crop from a playground I help put up a few years ago for the "Let Them Be Kids" foundation. :mrgreen:
Image
Image
By Mat
#4809427
More planning; tip extension, lock block (I tried to find a face on view of this thing, to no avail; I wound up having to use in part, Stephan's plans and the matty thrower; not the best reference, but it was there) and one gun ear. The one ear is just traced from the 1:1 thrower plans for clarity.

The extension is a variation of the one seen on this thread, http://www.gbfans.com/community/viewtop ... &p=4802638 ; the main difference being the only thing that extends into the gun body is a length of flat bar; the spring and Arrestor Cable are housed in the front handle. I'm quite a ways off from actually building it though, but technically it should work! I don't own a scanner, so the best I can do is take pics and fiddle with the brightness/contrast setting; it's not drawn to scale or anything. :wink:
Image
By Mat
#4809465
I worked as a welder (production and maintenance; some pressure) for 10 years at various companies. I'm literally right in the middle of a career change at present and going into Millwrighting. While I don't mind welding, it's far from my favorite activity. I like doing a little bit of everything! :mrgreen:

So this is my last update for today; I went and did absolutely nothing that I said I was going to do. Instead, I welded up the thrower collar, cut and welded the two ears onto the front handle and attached the rear handle. I'm not going to build the lock block until the grips get here. This thing is now officially heavier than the Mattel thrower!
Image
Image
Image
Image
Image
Image
Image
Image
Image
By Mat
#4809705
Thanks! :mrgreen:

I still haven't done anything with the front inner handle. What I did do today was I installed the piece of round stock onto the top of the thrower; I didn't have any 5/8" bar, so I used 1/2" but the only way anyone would be able to tell would be to put a tape on it. I also corrected some areas on the gun body that were out of whack visually; essentially just some touch up grinder work. I built and installed the cover plate. At this time I don't have any socket heads, so I used #6-32 machine screws which I'll change out when I do have the proper ones! I attached the V-hook because I wanted to see it on the pack. I also mounted the front handle. I tapped the mount for it the same as the holes for the cover plate and it's the same story about the socket caps! Tomorrow I'll build the TB/IB. I'm not going to cut the bar graph window until I have the light kit and I'm procrastinating on cutting the vent holes...can you guys tell? :lol:

Image
Image
Image
Image

Oh yeah, and getting the "Matty Adapter" hose adapter apart was a *bleep*...worth it!
By Mat
#4809910
I did what I needed to on the front handle; built and installed the TB/IB and cut the vent slots. It's starting to look like a thrower now! :mrgreen:

I set the rotation up to go plus or minus 90 degrees from horizontal; it seemed like a nice round number. I ground the collar down a little bit; I'm hoping to match up the diameter with the trigger tip ring-ish.
Image

To cut the slots, I drilled the ends and used a cutoff disk on my die grinder; I cleaned them up further with a file.
Image
Image
  • 1
  • 3
  • 4
  • 5
  • 6
  • 7
  • 8
PKE Meter build project!

DO you have this files on sale?

Also, sorry I can’t answer the question, but[…]

There's some fun dialogue TV-edits, a replacement[…]

Thanks The_Y33TER ! Confirmation there's no elect[…]