By Mat
#4787005
Exclamation point! Figured I'd throw this into the fray. Like the pack, it's more of a representation than anything! Updates will probably be sporadic, but none-the less...off to a humble start! I'm lightyears ahead of my first uniform...it was a grey pair of coveralls and the logo...wonder if I can find a picture...AHA! 6-ish years ago; ignore the embarrassing chin...beard...thing!
Old
Image

New
Image

The Patches are from Katarra8 and the rest is from a random online army surplus store. I went with a different styled pistol belt as I wanted something with a more modern in appearance. I thought about using my last name on the patch, but decided that going the "ROOKIE" route would be more comical. Even then, cramming "BILLINGS" onto a small piece of fabric would have been no easy feat, I'd imagine! The name tag is going to be held on by Velcro anyway, so if I decide to change my mind down the road, it'll be fairly easy to swap out! :lol:
By Mat
#4787073
Run of the mill Rothco. For the time being though, it'll do the job!

Lets just say that "somebody" me went against his own rule and didn't do any research on the subject beforehand! Last time I did that I grenaded an RC helicopter into the side of the house (It was spectacular), so in the grand scheme of things I'm not all that concerned! :walterpeck::lol:

*edit* Okay, the color now officially bugs me! Might go to plan B. :lol:

*uber edit* Calling the Rothco a write off and ordered a tru-spec. I'll probably pawn the rothco I have off on a local classified site here in K-town; I'm sure somebody can find a use for it! :mrgreen:
By Mat
#4787389
The Tru-spec should do the job judging by pictures, although depending on a few things I may upgrade to a nomex when it wears out! Flame retardant clothing + Kelowna weather = one warm Ghostbuster!

Anyway, I ordered a leg hose from "triple m," now I need to find a pant leg connector. :mrgreen:
User avatar
By Hoot
#4787391
Mat wrote:The Tru-spec should do the job judging by pictures, although depending on a few things I may upgrade to a nomex when it wears out! Flame retardant clothing + Kelowna weather = one warm Ghostbuster!

Anyway, I ordered a leg hose from "triple m," now I need to find a pant leg connector. :mrgreen:
Crix. He has'm
By Mat
#4806656
Well it's been awhile since I last looked at this thread, but today I got quite a bit done on the uniform side of things!

I ditched the velcro idea and sewed both patches to the tru-spec flight suit. The name patch was relatively easy to sew on however the shoulder patch took ages! :lol:

It looks war-billy because it's hanging on a hanger in my closet here; I can assure you that when it's worn it's straight and lays flat!
Image

A lot of cursing may have been involved with this one!
Image

Crix' Leg Hose Connector was extremely easy to attach. Before doing anything I ran a drill through each of the mounting holes to clean them out and then attached it to the flight suit using khaki embroidery thread. I shortened the hose to hang just below the knee. To snug the hose up in the fitting, I wrapped the end of the hose with electrical tape and then trimmed the electrical taped end of the hose in half to fit neatly inside the fitting; I'm going to be leaving the hose clear. :mrgreen:
Image

And worn! :mrgreen:
Image
By Mat
#4806687
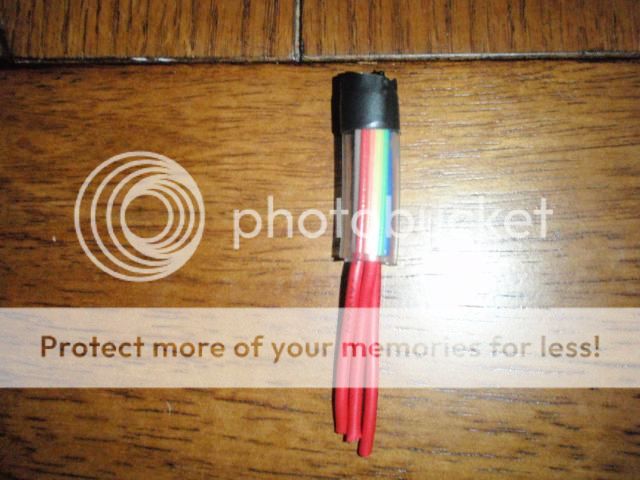
I was digging around in the storage room and stumbled across a tub of old art supplies. Among the debris, I came across a roll of ribbon cable (Why I have a roll of ribbon cable is beyond me) that looked like it would work perfectly for a GB2 styled Nixie tube. When I do the gizmo, I'm planning for it to be a combination of the two movie versions. A not-so-sloppy stunt version, if you will! :mrgreen:

Feeling inspired, I mocked one up! The top of the Fakesie Tubes™ will be hidden by the nixie holder...top piece...thing, so I just put a bit of electrical tape on top. Relatively simple thing to make; cut a tube to length, add a slice of ribbon cable, stick a couple'o'red wires up the center, tape the top and trim the excess and bam! Weasel Spice.
Image
By Mat
#4806858
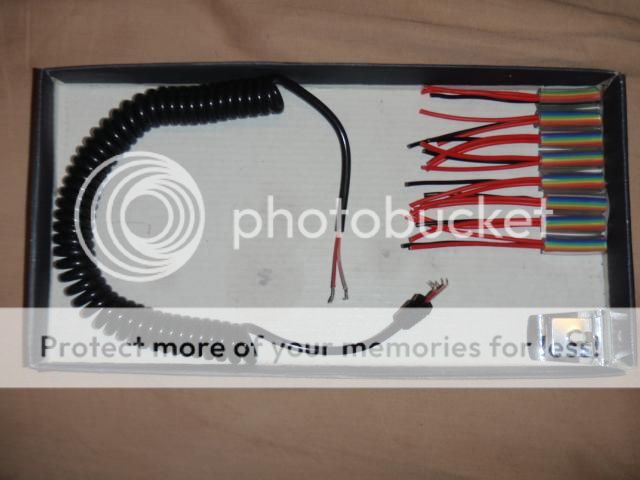
Did a bit of work today. Scavenged a tape measure clip for the daughter board, a coiled 12v extension from Canadian Tire and I assembled 8 rainbow tubes. :mrgreen:
Image
By Mat
#4807004
Thanks! I can't take credit for the rolled up ribbon cable though, there have been a few GB2 gizmo builds that I referenced (JoeLuna33's from back in the day, Jackdoud's, Slimeguy's and several others spring to mind!) as well as the pictures of Ernie Hudson's belt and a few other reference images. (I can't recall where I found them, but the pictures are labeled "mosen" if it means anything to anyone!)

Jairus' site has also helped. It will be a huge help when I go to make or modify a tape measure holder.
http://jairuswhitley.com/download.html

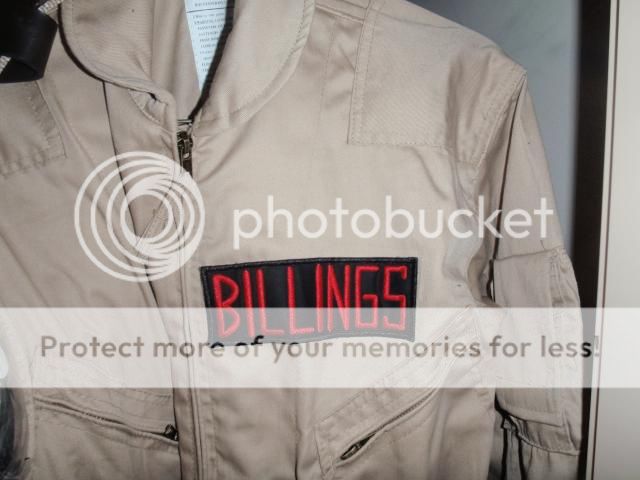
Anyway, I discovered that the velcro on my actual last name was just sewed on so I removed the velcro from the back. I had mounted the "ROOKIE" tag a hair to high on the suit anyway (going of the reference where Louis is putting on Spengler's flight suit), so I decided to swap them. They sew on a lot easier without the iron on backing! :mrgreen:

Image
By PssdffJay
#4807009
Looking good! The name patch location can be frustrating trying to line up. I just did another one last night and the pockets are slightly higher than my first suit so it threw my normal positioning out the window. Yours looks spot on to me though.
By Mat
#4807819
The thing that drove me nuts was trying to get the patch straight horizontally. I didn't have any pins, so I used needles for pins and a mirror for alignment; good times!

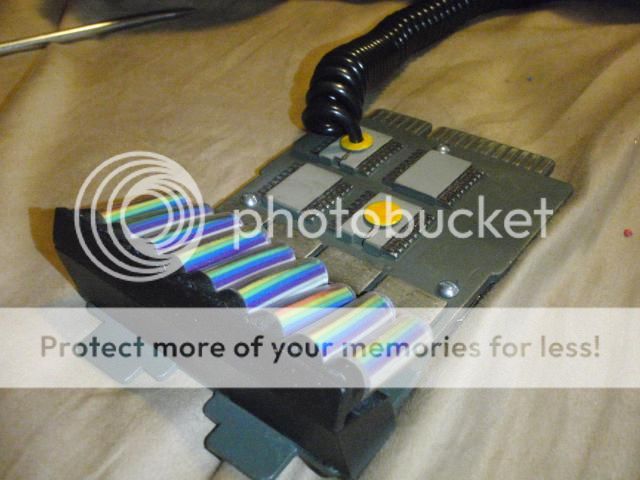
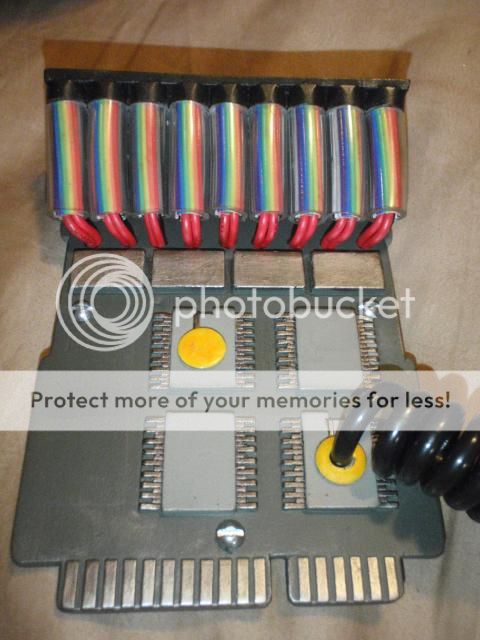
My gizmo parts came in today! I'm going to need a narrower diameter tube for the nixies which isn't a big deal; I started working on the daughter board. I drilled and bolted on the tape measure holder and laid out and drilled for the coiled cord. To keep the cord attached, I ran the two internal wires under the tape measure clip between it and the board and used that as a clamp; no glue required! :mrgreen:

Image
Image
By Mat
#4807852
This seemed like a good place to drill for the other end of the cable. :mrgreen:
Image

I attached the cable ends the same way I did on the daughter board. I used an existing hole for the clamp, but may move this up to be hidden by the tape measure holder (which I still need to make or modify)
Image
Image

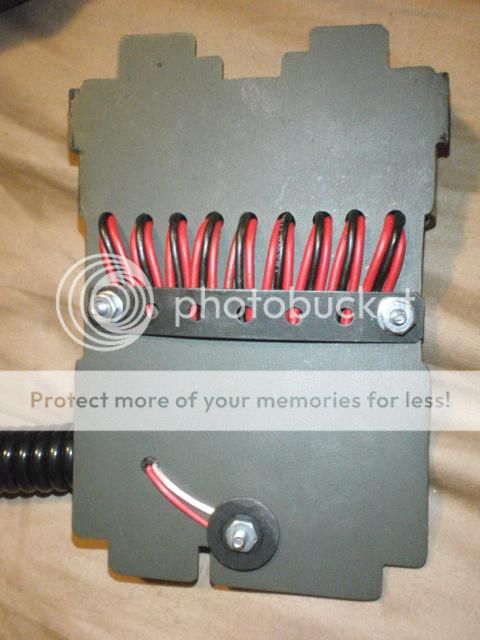
Having no desire to drill 27 holes for wires, I drilled 9 larger ones that closely match the diameter of the 3 wires. To get the fake nixies to work, I just used a longer piece of ribbon cable on the inside; worked like a charm!
Image
Image

Looks like I have some wires to trim; I'm going to build a cable clamp and attach that to the backside to get these under control!
Image
By Mat
#4808042
Plugged Away and finished off the main board. I need to find something to use for the disk capacitors, but that can be done down the road. I'm not going to be adding the other resistors or drawing lines all over the board as once the thing is in the Gizmo holder it won't matter...on that note, I ordered a gizmo and pke holder from MMM, so that's taken care of! I'm still working on the daughter board. My attempt at making labels failed miserably...might need to look into getting some printable sticker paper. I know the colors aren't exact, but I was trying to use up some spray paint I've had for awhile. The metallic parts were painted with a 14 year old "Gundam paint marker" that to much amusement, wasn't dried up! :mrgreen:

Image
Image
Image
By Mat
#4808120
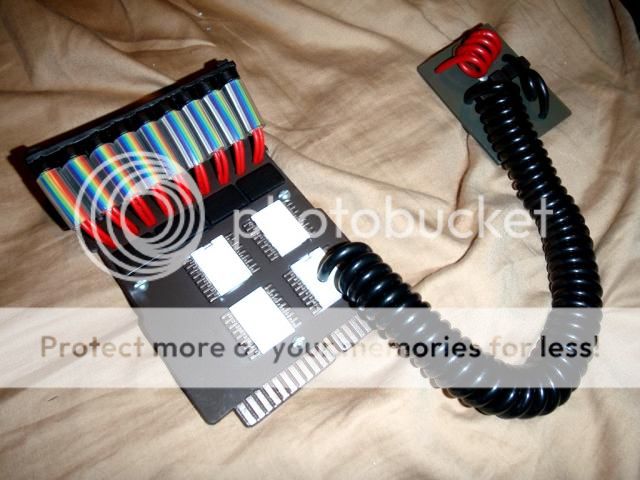
Today I decided to play around a little bit with weathering and completed the daughter board as well. I wound up using a black wire instead of a blue one; it looks the part! The wires were coiled around a pen.
Image
Image

The Daughter Board. I'm pretty happy with how this little do-dad came out!
Image
Image
Image

How they look on the belt. The main board is just sitting on it while the smaller board is clipped on.
Image
By Mat
#4808381
I wasn't satisfied with my paint job on the main gizmo, so I sanded the paint off and started re-painting it. I also made some shorter nixie tubes and filed off the two yellow parts. I built two brackets to mount the top part of the nixie holder.
Image


I still need to paint the 4 larger chips white and I'm planning to pick up some sticker paper tomorrow for labels but I'm a lot happier with it now. :mrgreen:
Image
By Mat
#4811917
Belt Guff came in! I'm planning to add a tape measure clip to the back of the gizmo and a metal hoop to the gizmo holder for it to attach too. I had to take off one of the buckles and completely remove the hold downs to get the pke and gizmo holder onto the belt; not a big deal. If I was using the screen accurate belt instead of a tan version of the black gb2-ish pistol belt, it wouldn't have been an issue! :mrgreen:
Image
By Mat
#4816747
Pretty well ready for Halloween now! I borrowed my Dad's old Auxiliary RCMP boots; I was just going to use my hiking boots, but the black boots really sell the look! :mrgreen:
Image
Image
By Mat
#4817477
Thanks guys!

Halloween was a lot of fun this year! Here's a pic of My Nephew and I from Halloween night! :mrgreen:
*edit* photobucket isn't co-operating tonight, so if the picture is sideways that's why! :lol:
Image

    https://i.imgur.com/x4NZ1oq.jpg It was announced[…]

    I cant say much about other packs. I've been print[…]

    Don't forget about this classic: https://www.magno[…]

    "Tainted Empire" pack build

    Got it wearable! You will have to click the link […]