
- December 30th, 2011, 3:32 pm#368462
Some of you know me for my toy customizations. I happen to do props every once in a while. What prompted this one was my meeting up with a group of GBfans at the NYC Comic Con. I didn't want to be the one without gear and as I don't have a flight suit or a Pack, I opted to go as "Ready to Believe You" Egon.
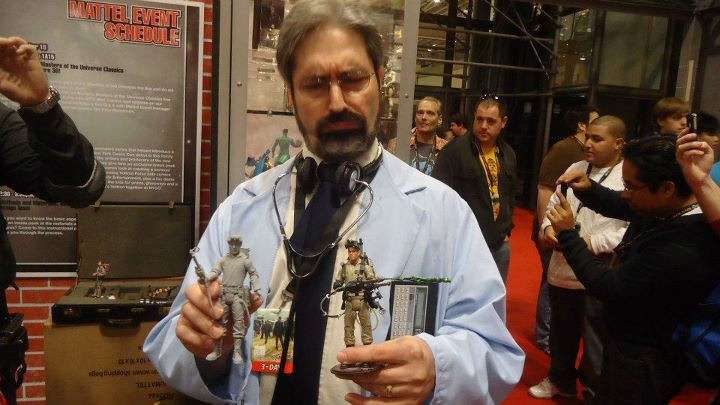
I snagged a lab coat and stethoscope from eBay and found a usable set of headphones at Dollar Tree. Only fly in the ointment was the lack of inexpensive Pocket Computers on eBay, so I decided to build a TSR - 80 out of paper goods. Here is my 2 day build.
My source material was an eBay listing that gave me an idea of the size to make the unit and an image to start with.
VINTAGE RADIO SHACK (TANDY) TRS-80 PC-4 POCKET COMPUTER (cat no. 26-3650). The unit is in good condition, and looks to be working good. Comes with 1k memory cart and brand new energizer batteries $7 installed and included. Nice vintage computer from radio shack..Please look below at high res pictures of the item
Technical specifications
RAM (total) : 1 Kb
RAM available : 544 bytes
ROM : 12 Kb
CPU : HD61913A01
Text screen : 1 line of 12 characters
Graphic screen : No
Sound : No
Size : 165 x 71 x 10 mm
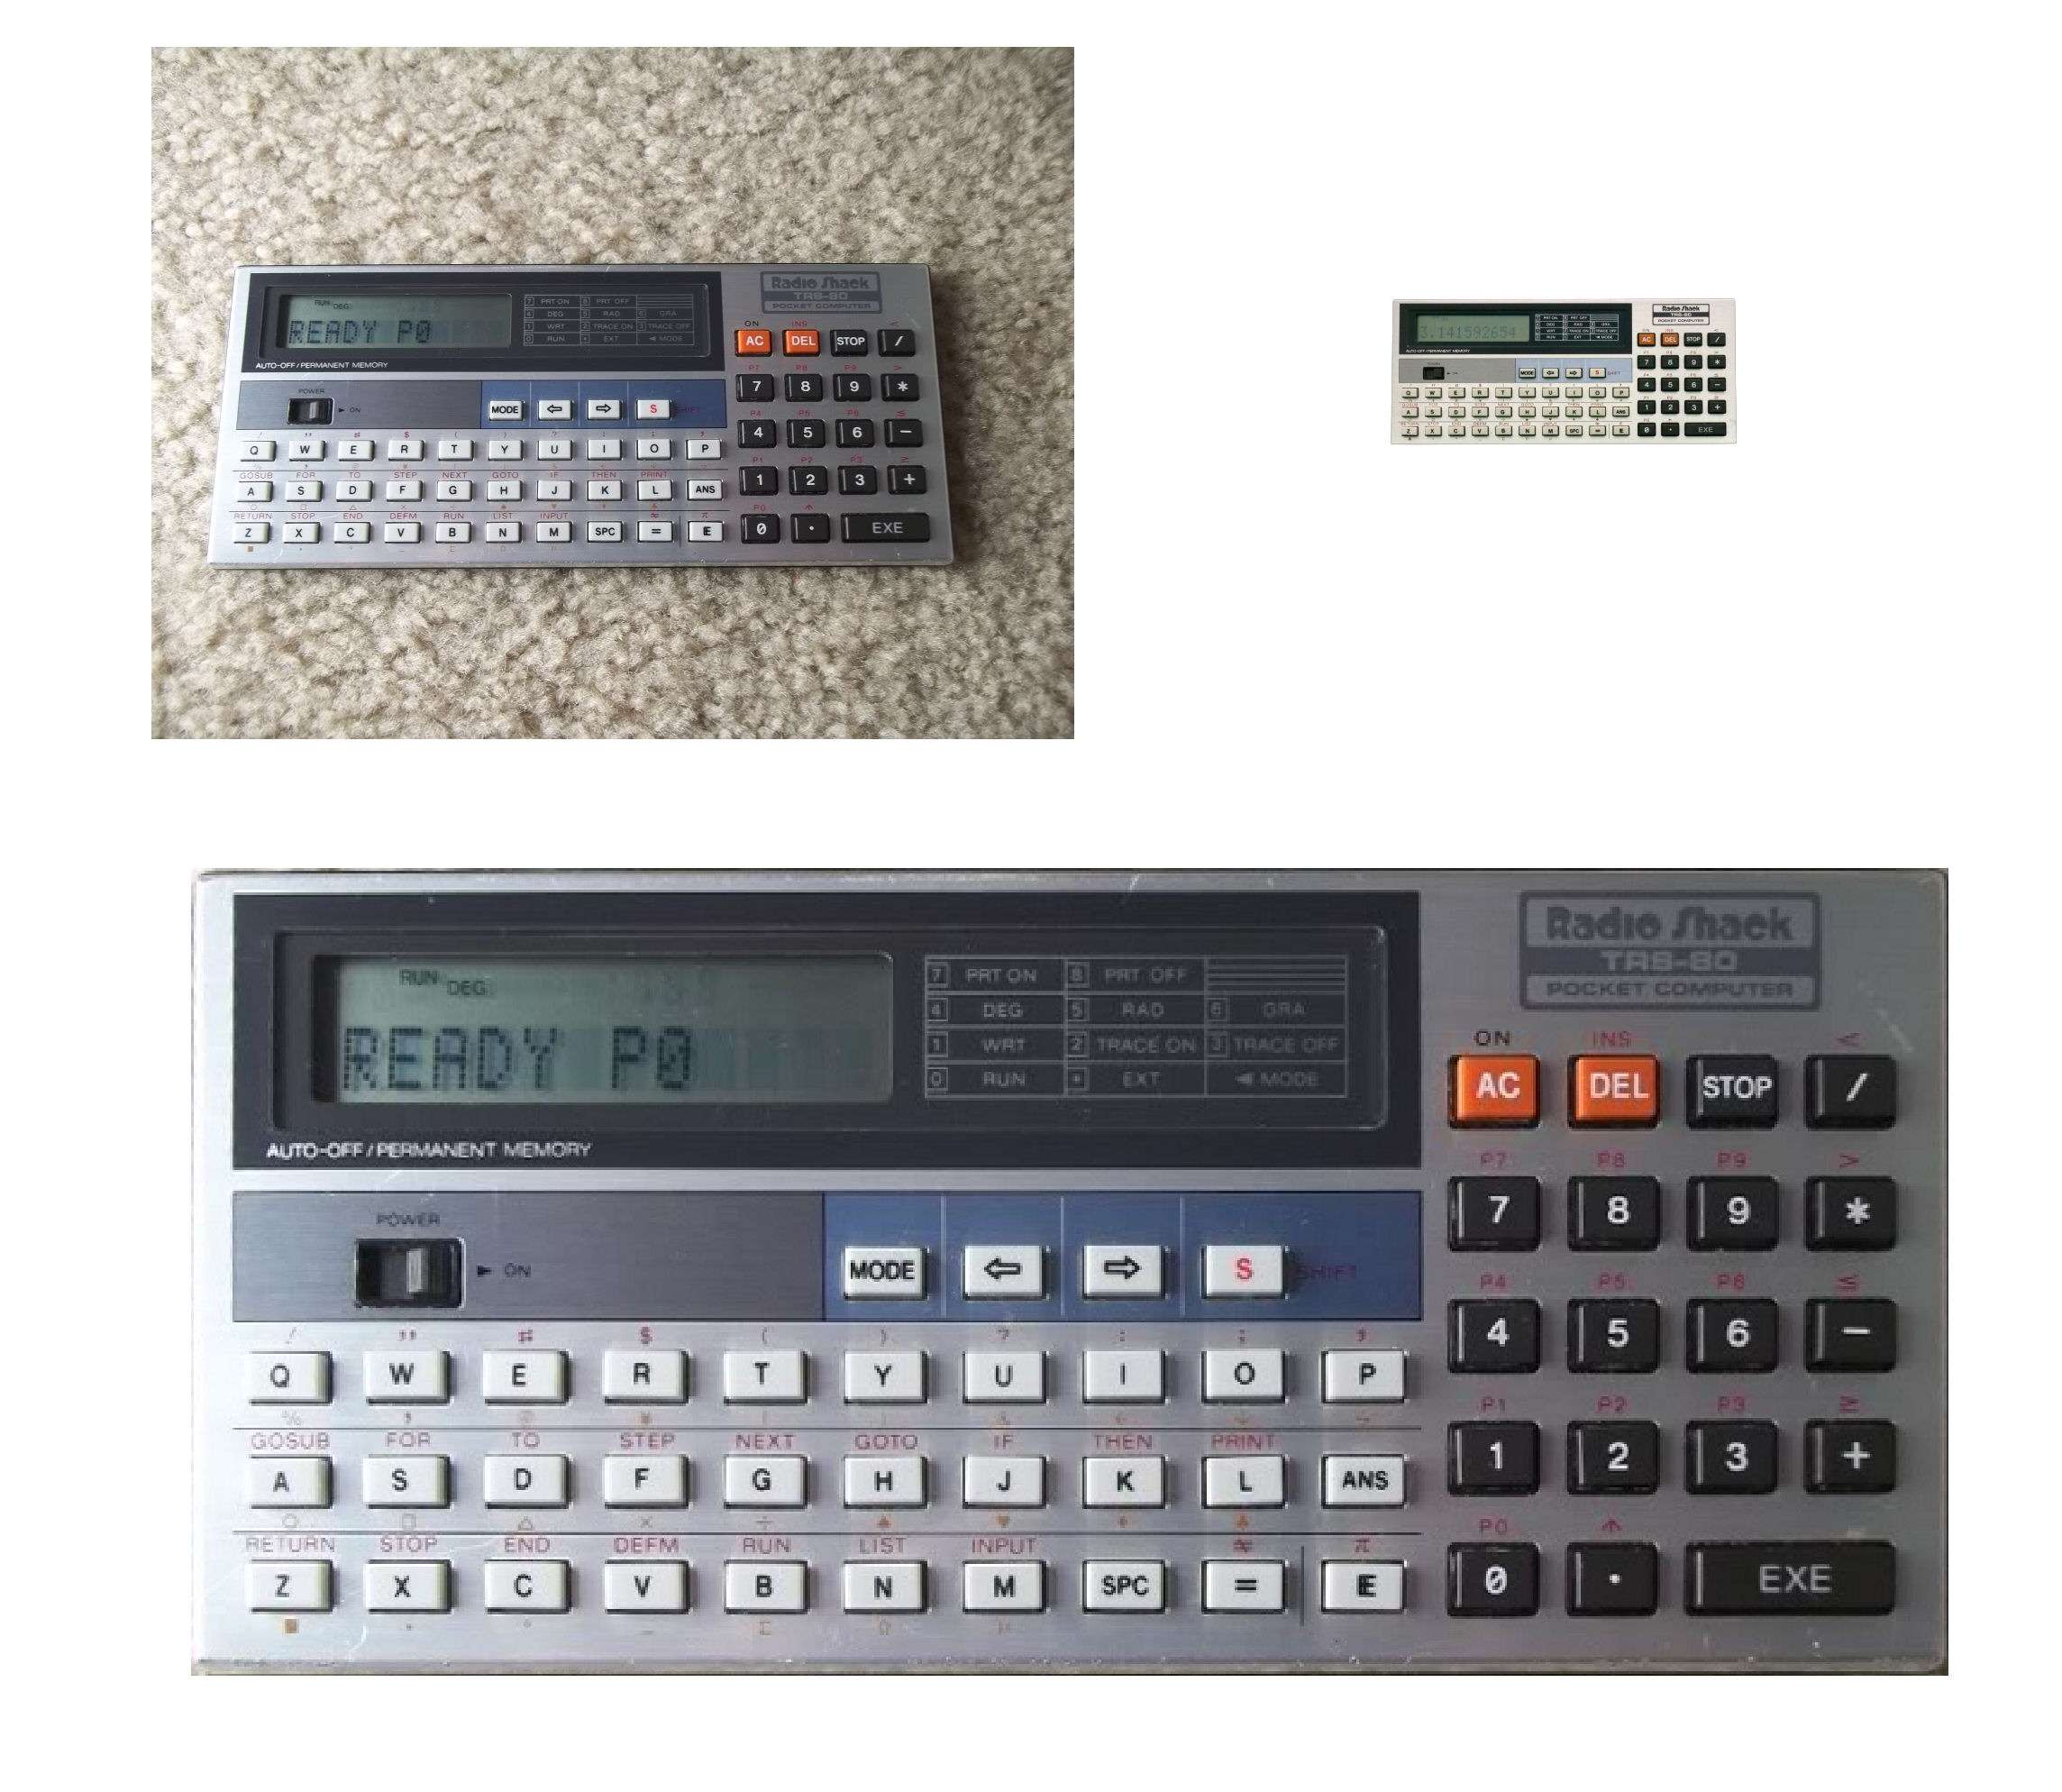
I then found a 2nd pic without all the shadowing. I squared up and resized the picture,"painted" over the blurry letters and numbers and cleaned up the image. I redid the lettering and even found a "Radio Shack" font for their branding.
I went to Staples and purchased some Sticker Paper and some fancy Silver Note Paper that was good to use with ink jet printers.
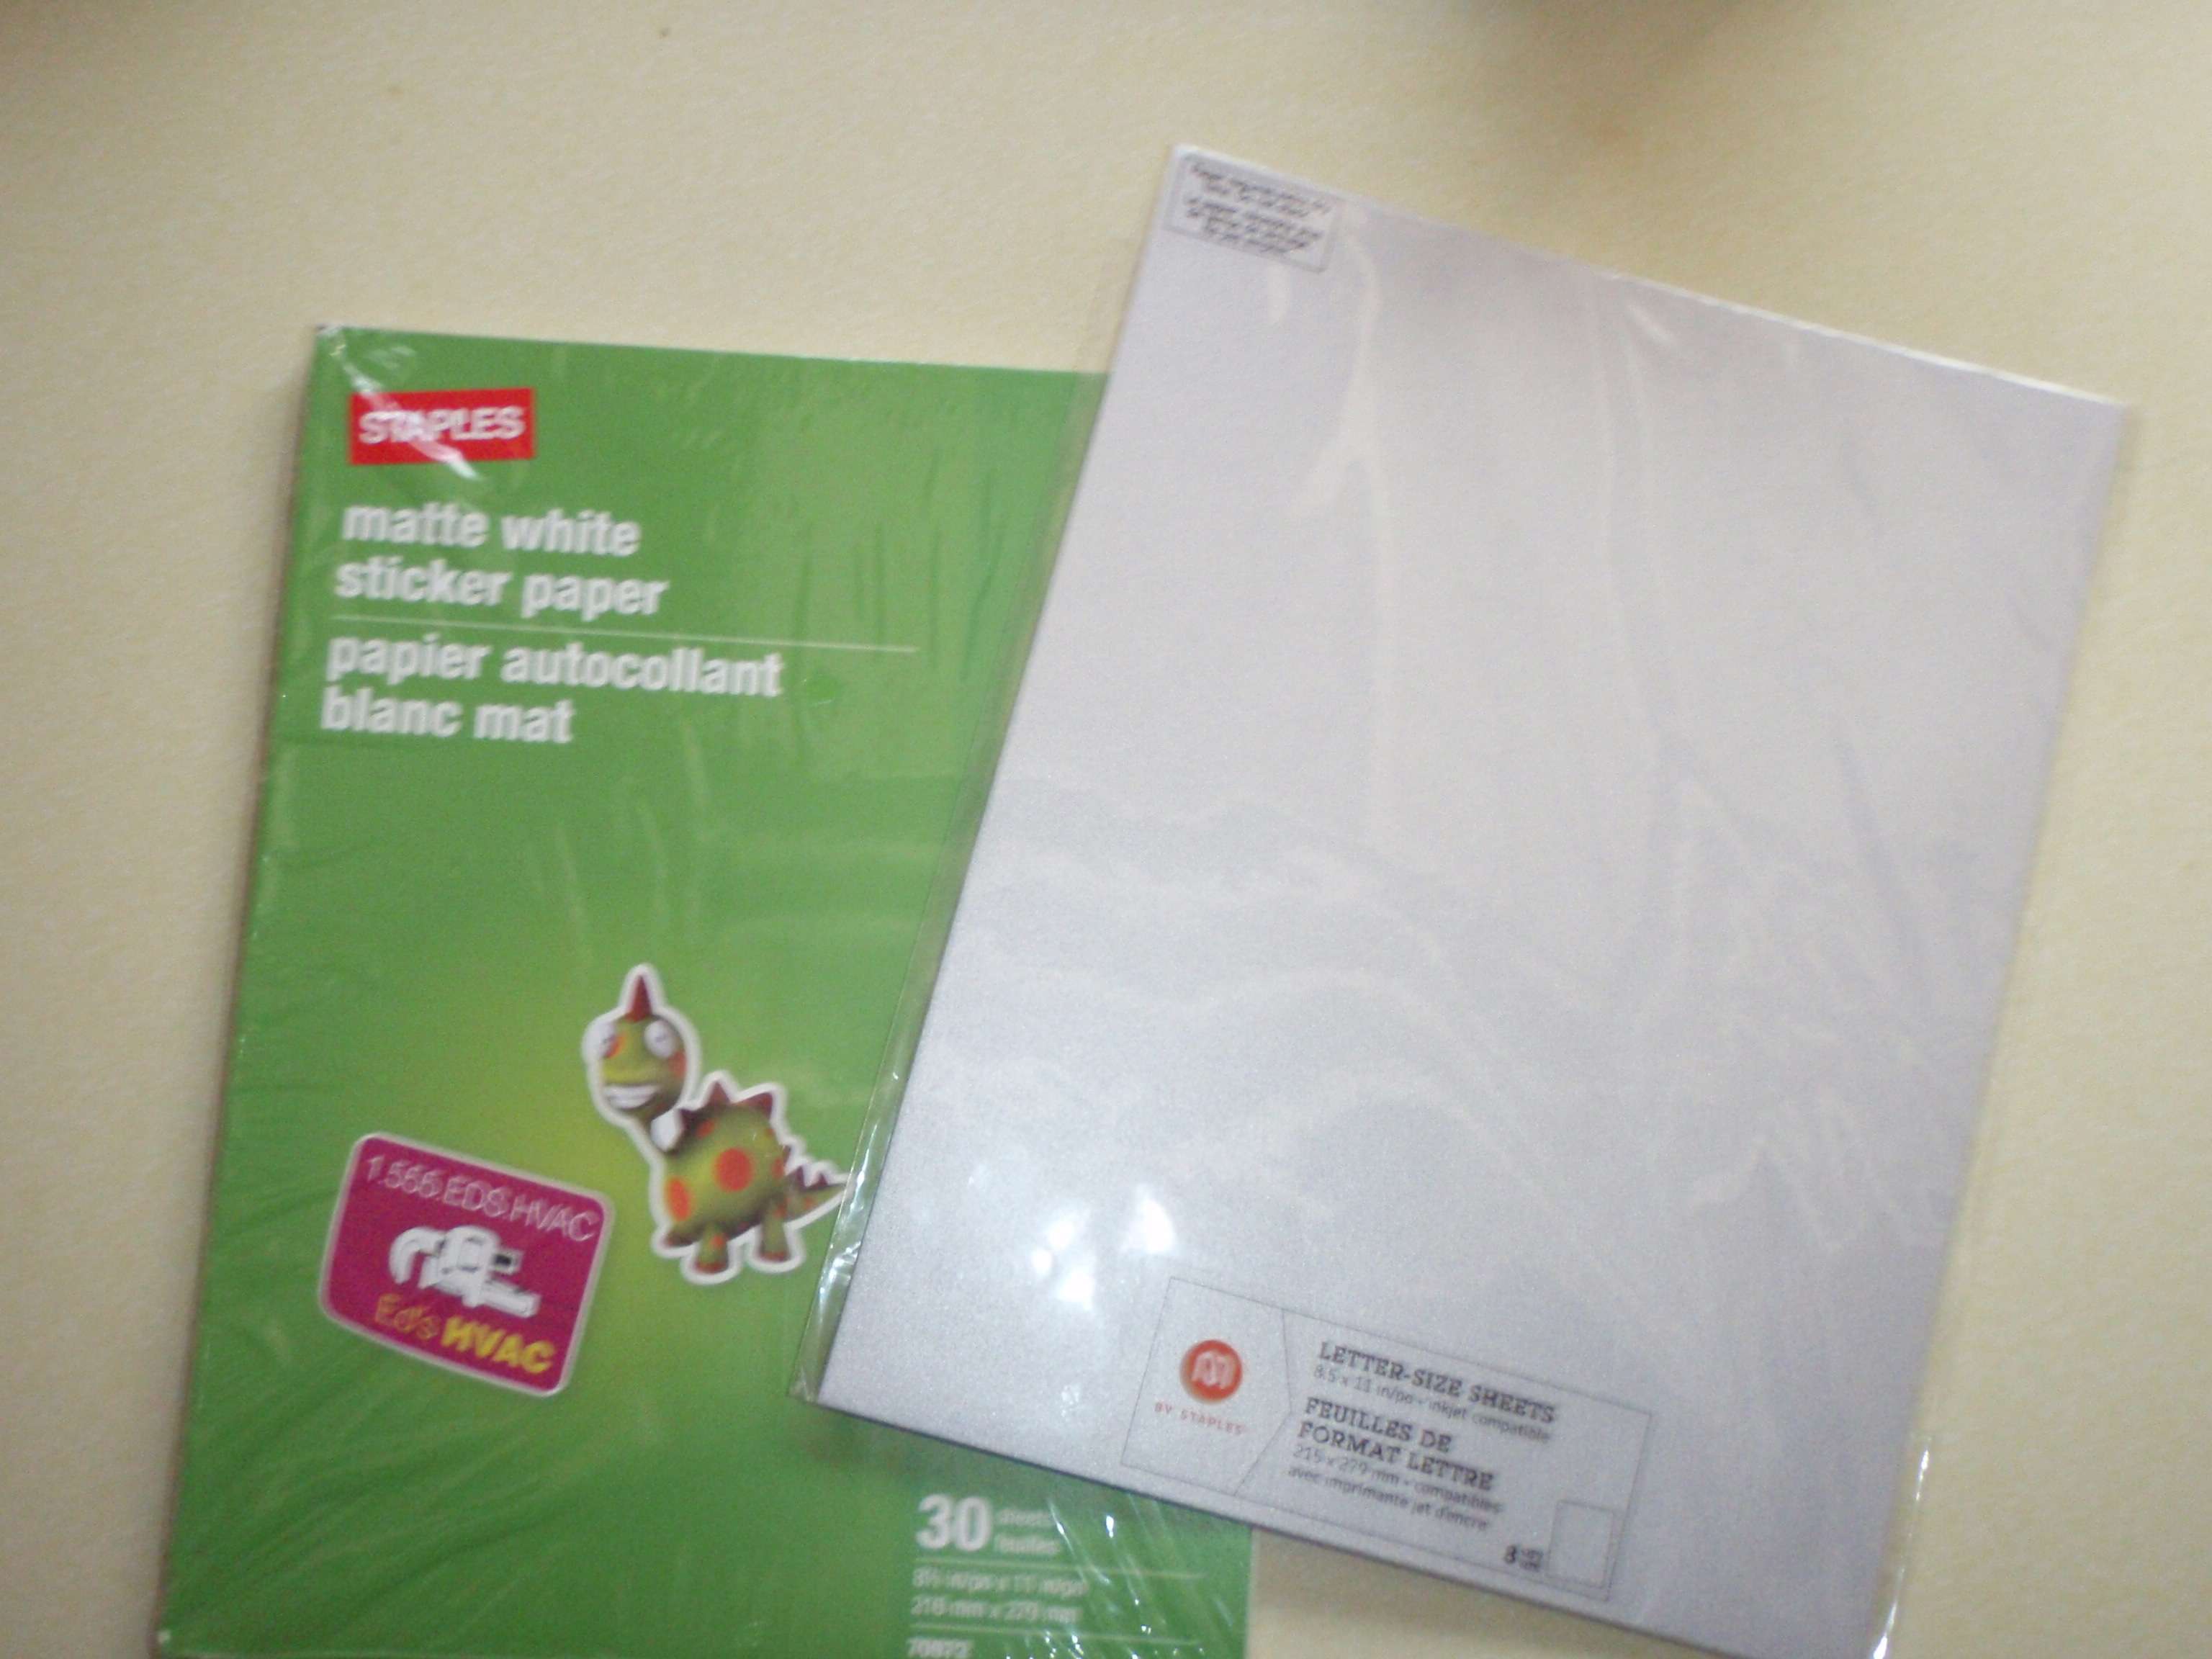
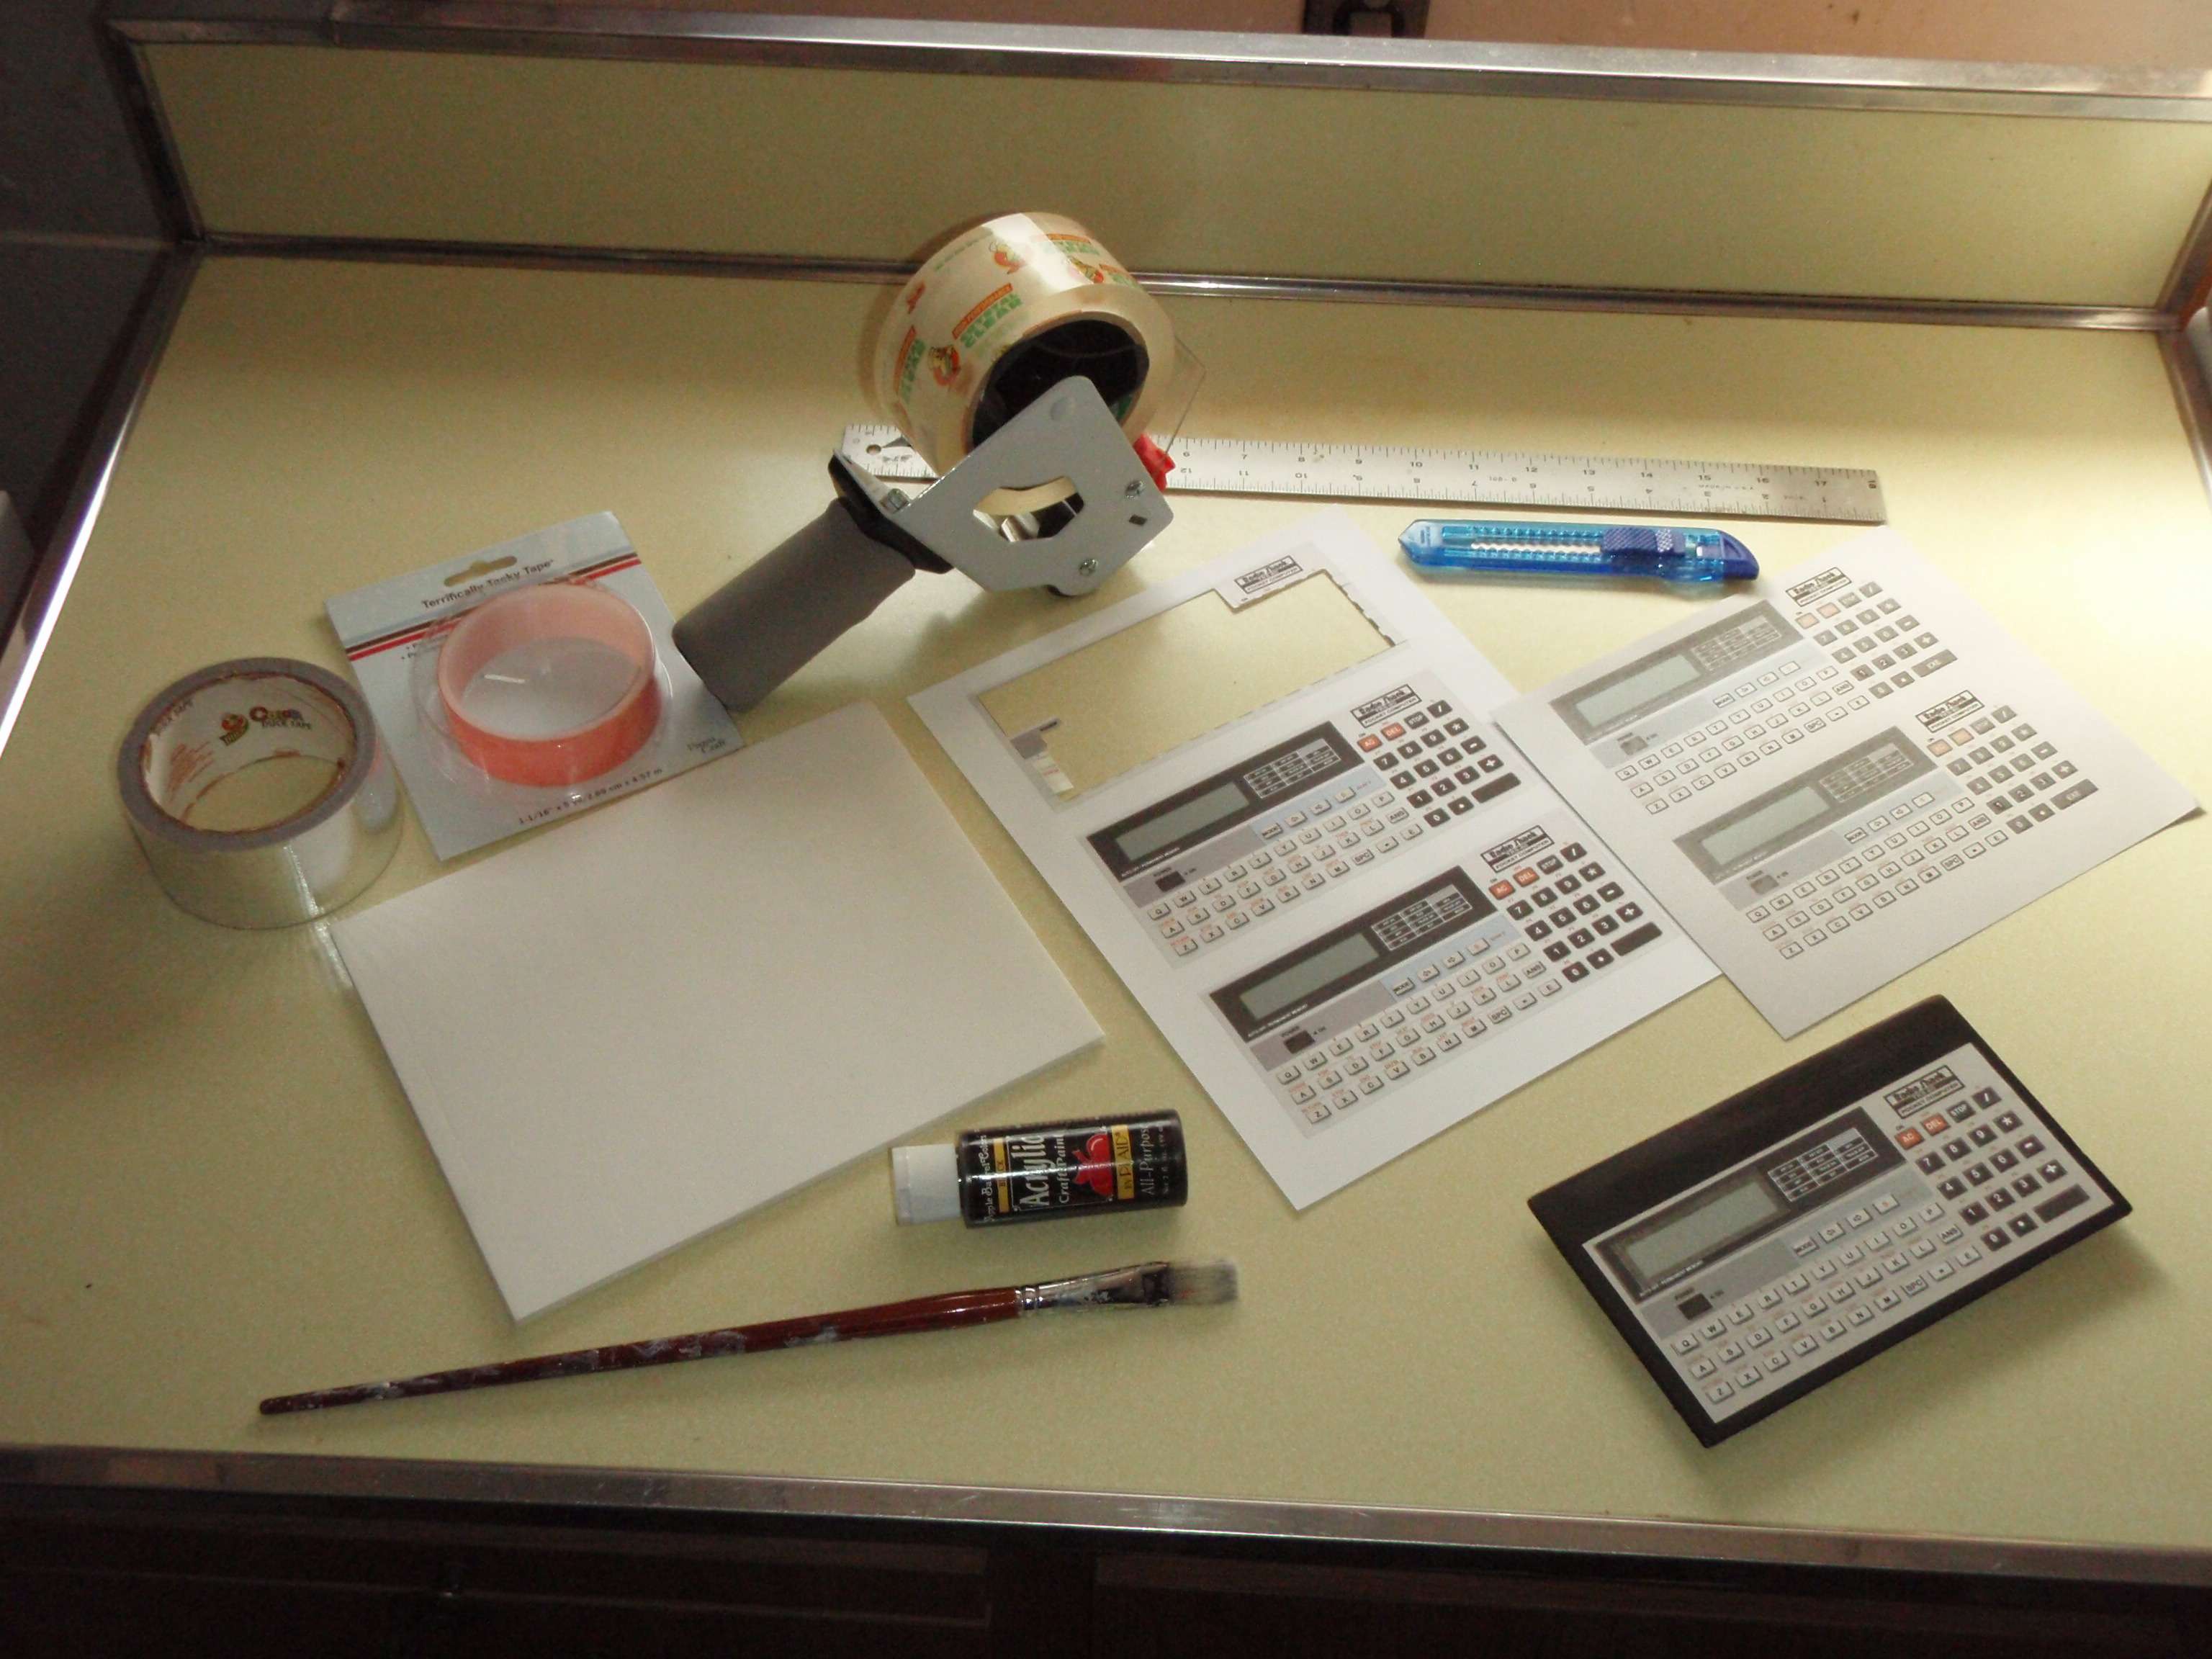
I printed out the image on both types of paper and gathered the rest of my supplies. Foam Core and Black Paint for the body/mount, Snap Knife, Steel Ruler, Double Sided Tape, Clear Packing Tape and Silver Duck Tape ( as that was what I had on hand at the time).
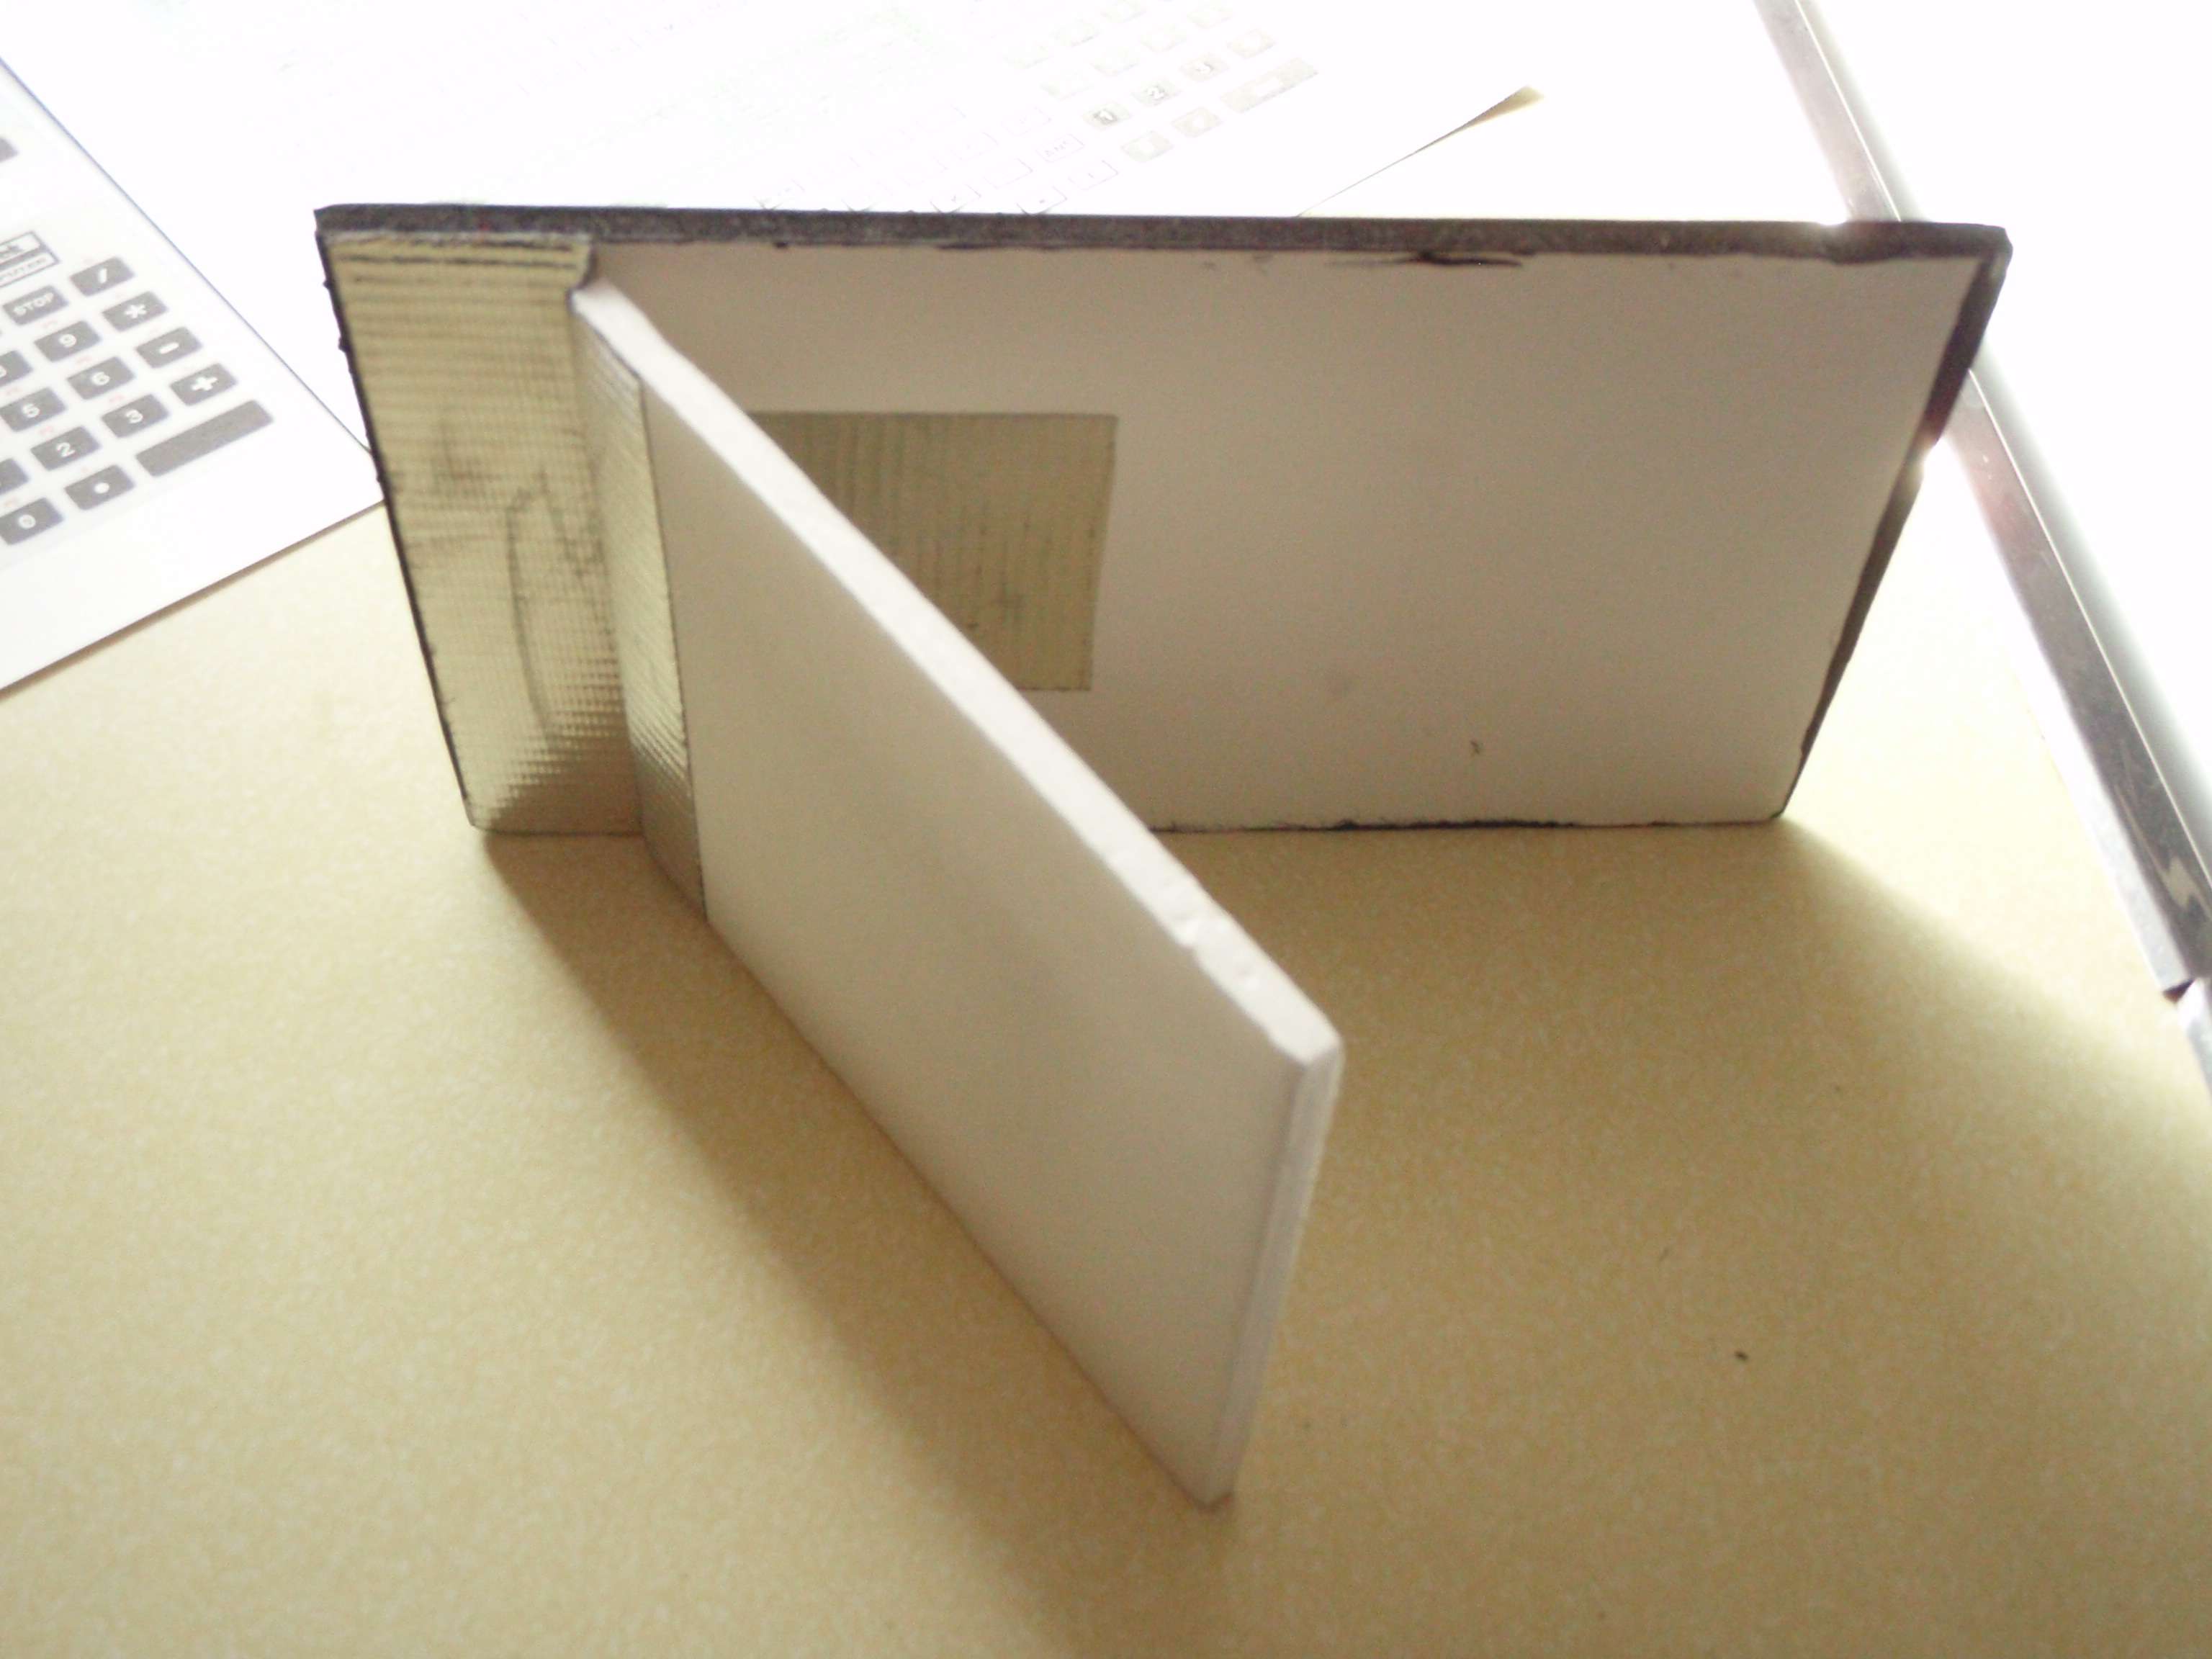
I painted the Foam Core black. Layed out the back side of the Silver Paper image with double stick tape, cut the image to size and taped it to the Foam Core. I then estimated the size of the Docking Unit and cut the Foam Core. I then took a strip of Clear Packing Tape and placed it over top of where the LCD Screen would be to imitate the glass covering.
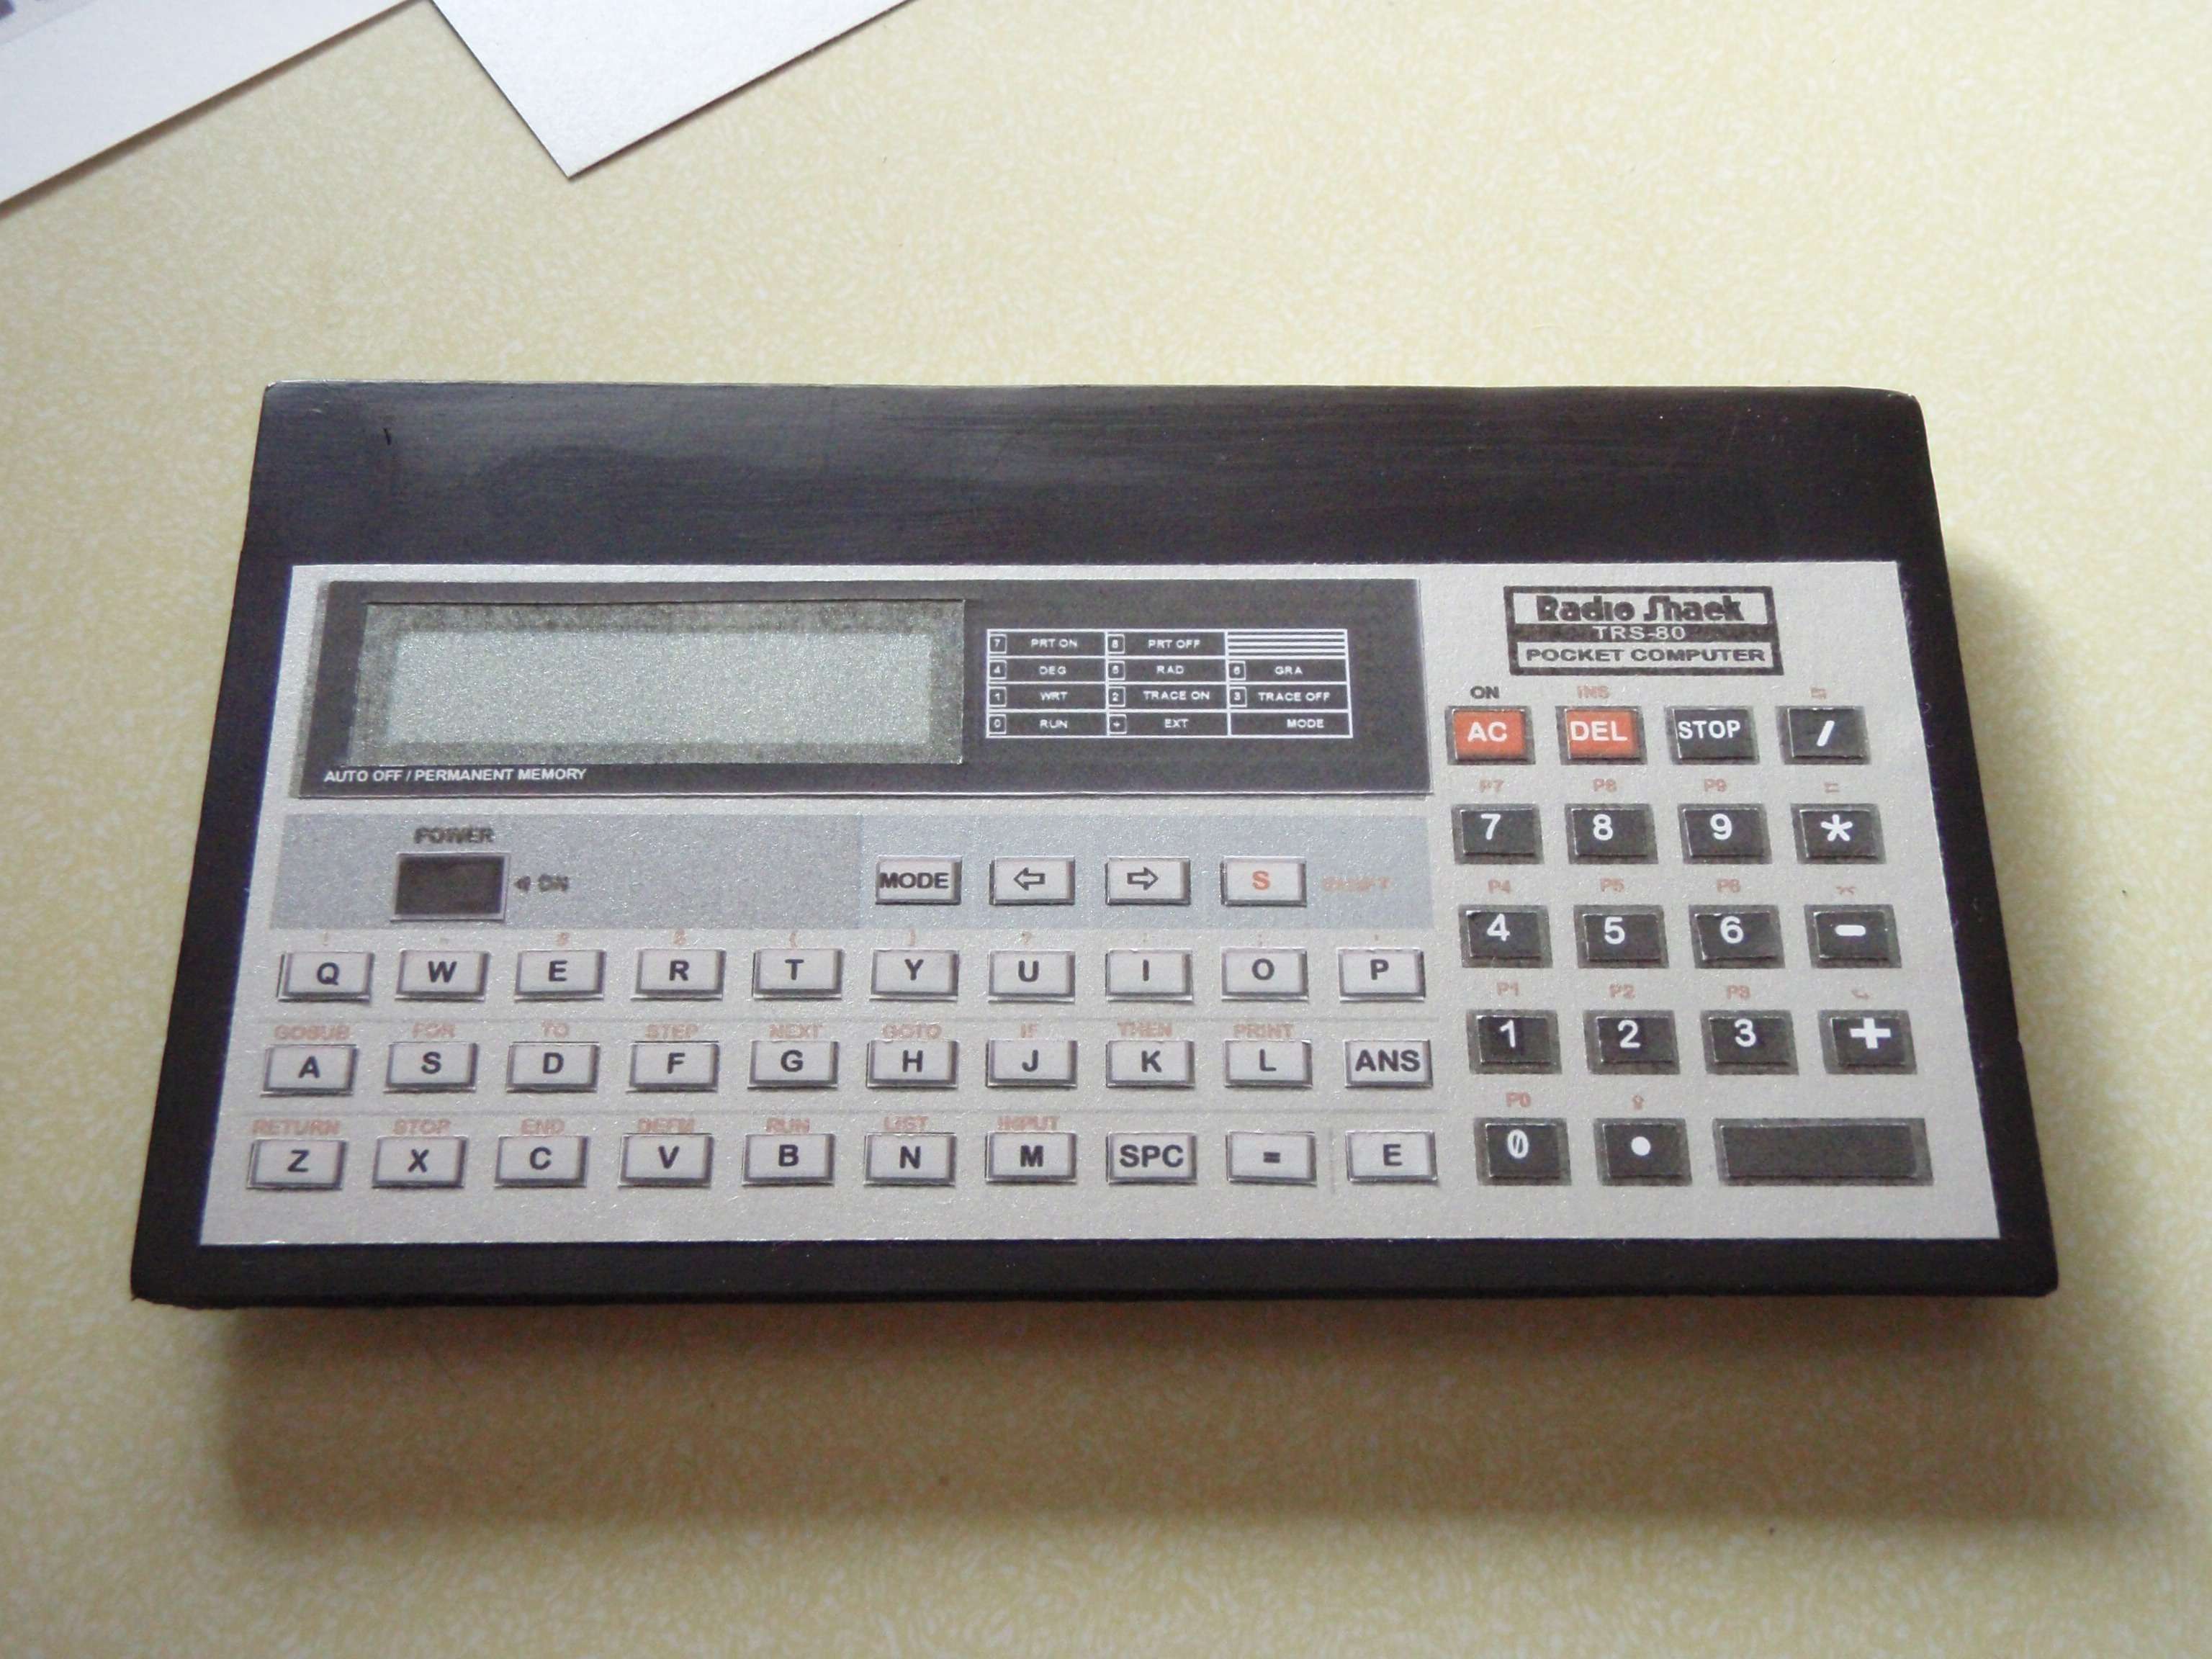
I sliced up the Sticky Paper image, cutting out all the buttons and the black graphics area around the LCD Screen and then the LCD Screen itself, leaving a hole. I took the backing tape off each piece and put them overtop of their twin on the Silver image. The Silver Paper does have a metallic sheen to it and looks alot like the real thing. When finished, it looked like this.
Last thing to do was to get it to hang from my Lab Coat pocket. A slice of Foam Core and some Duck Tape took care of that.
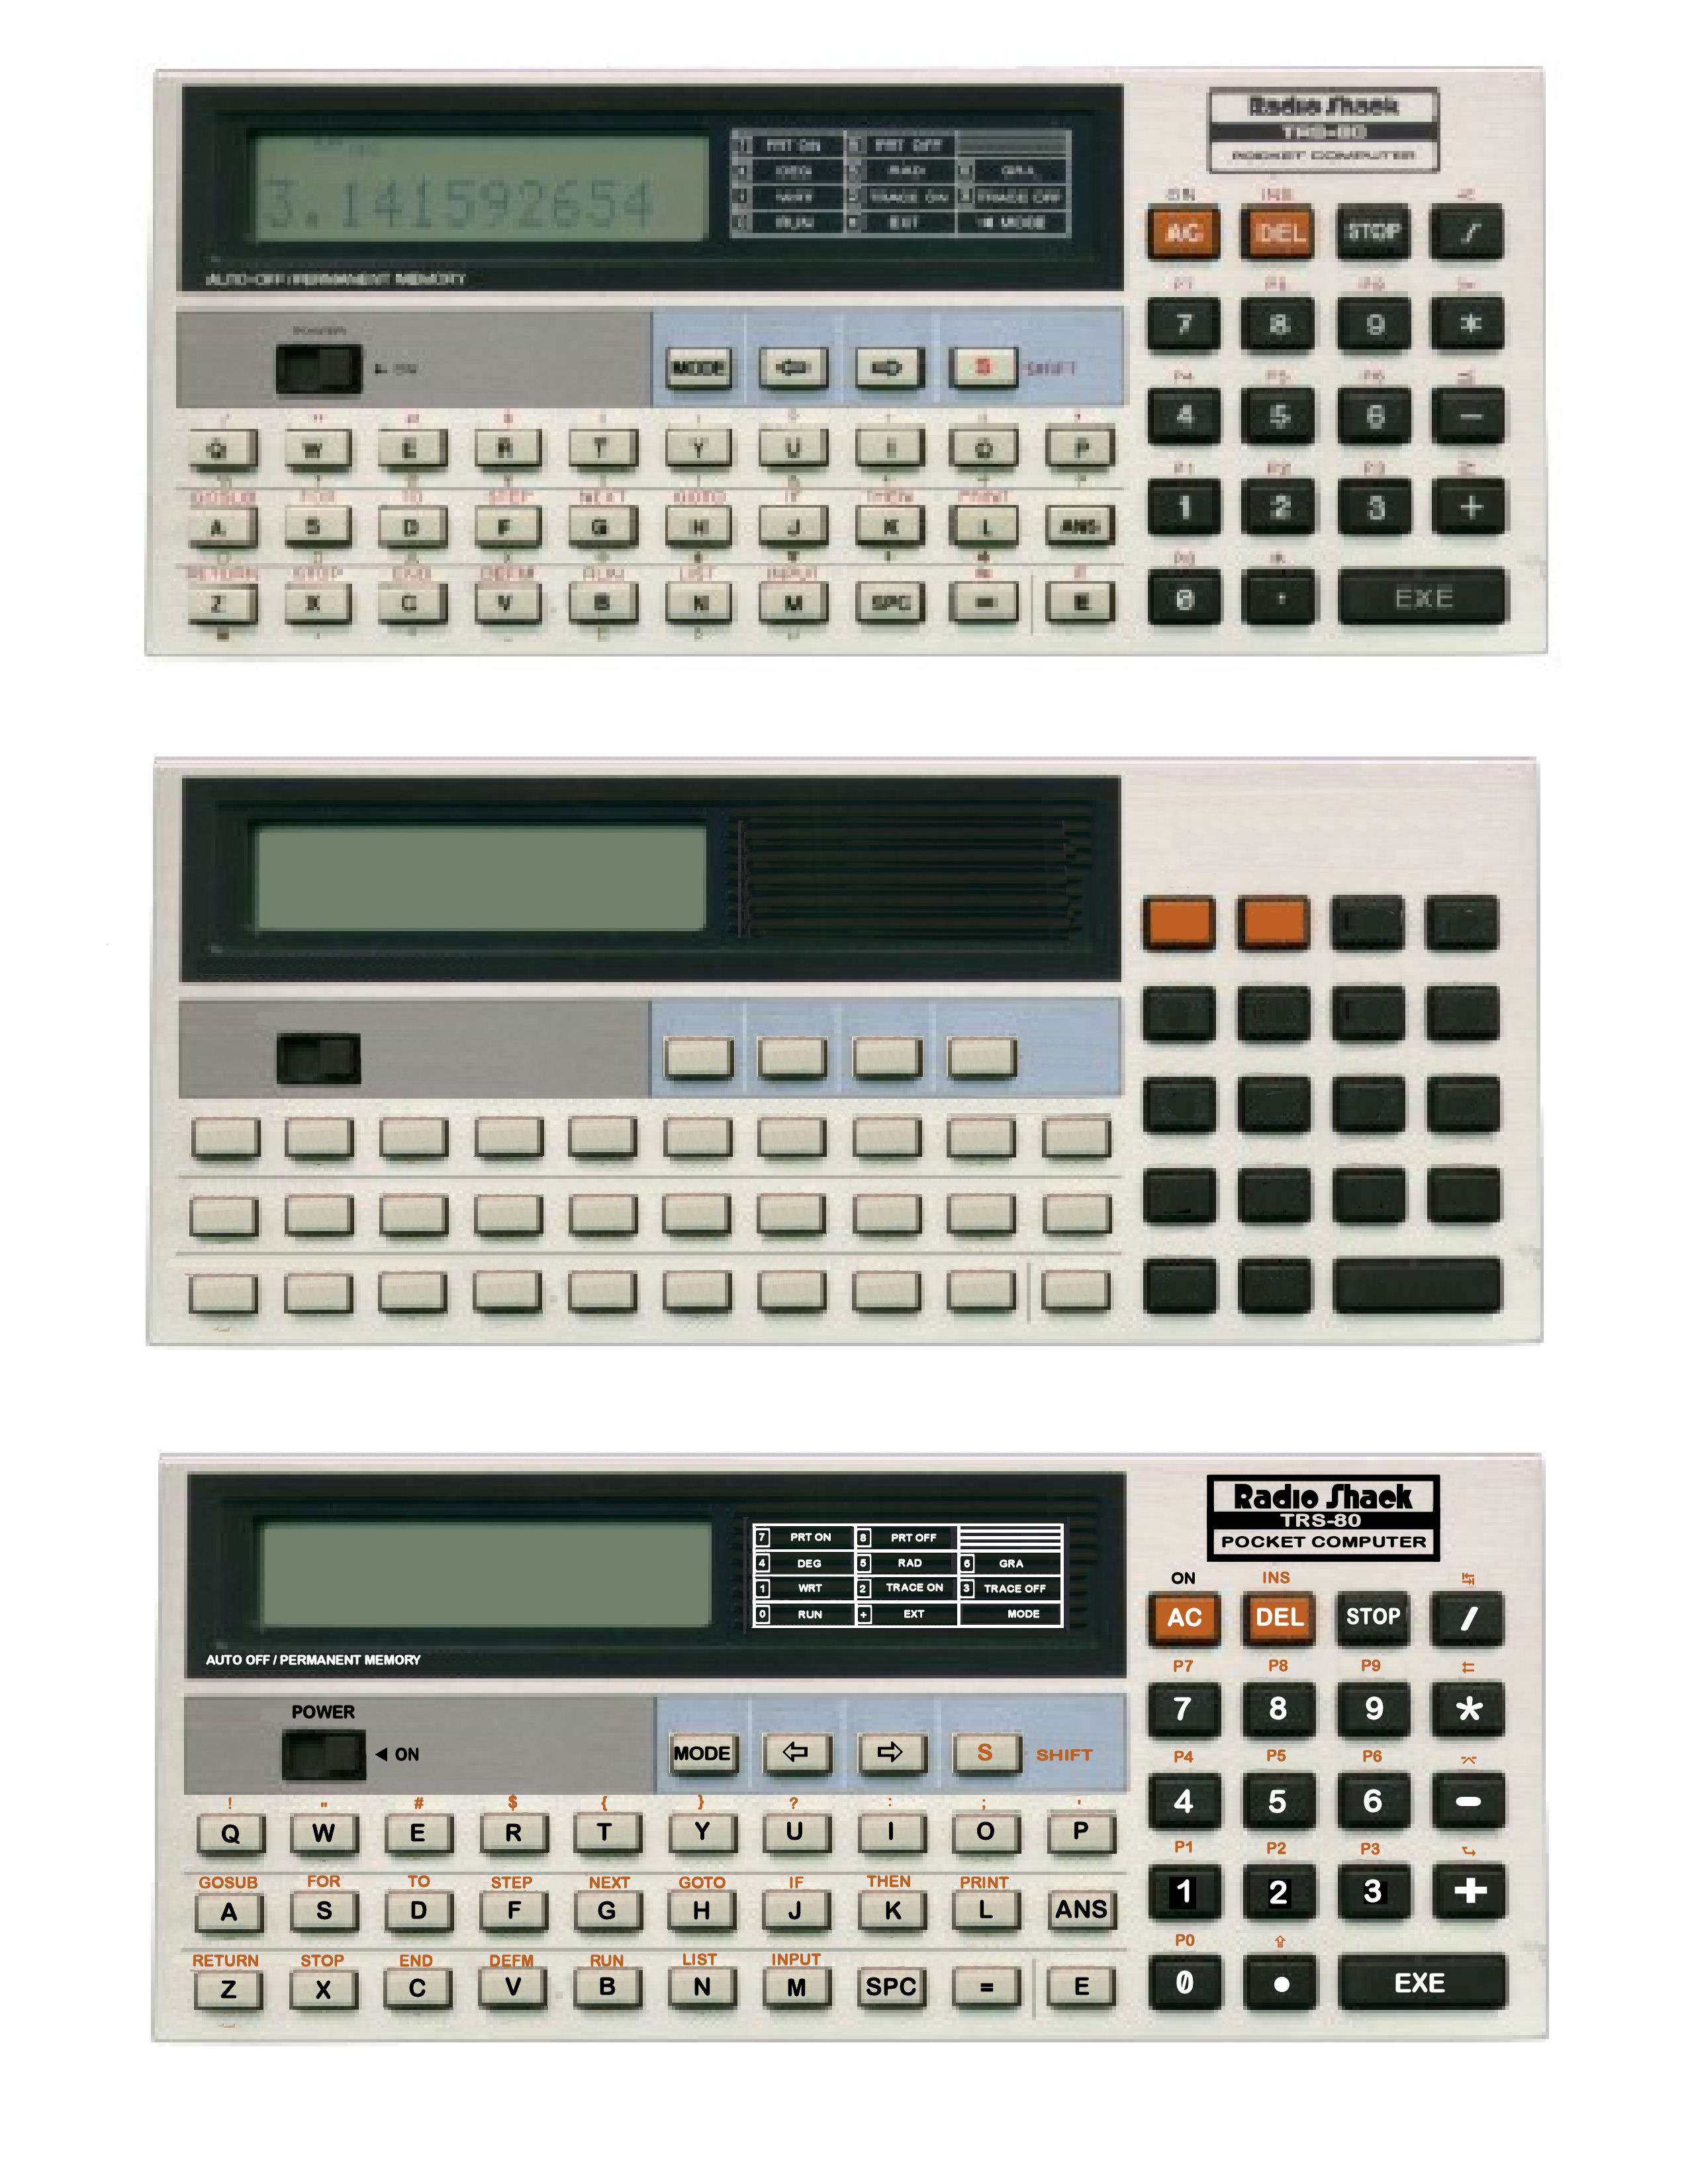
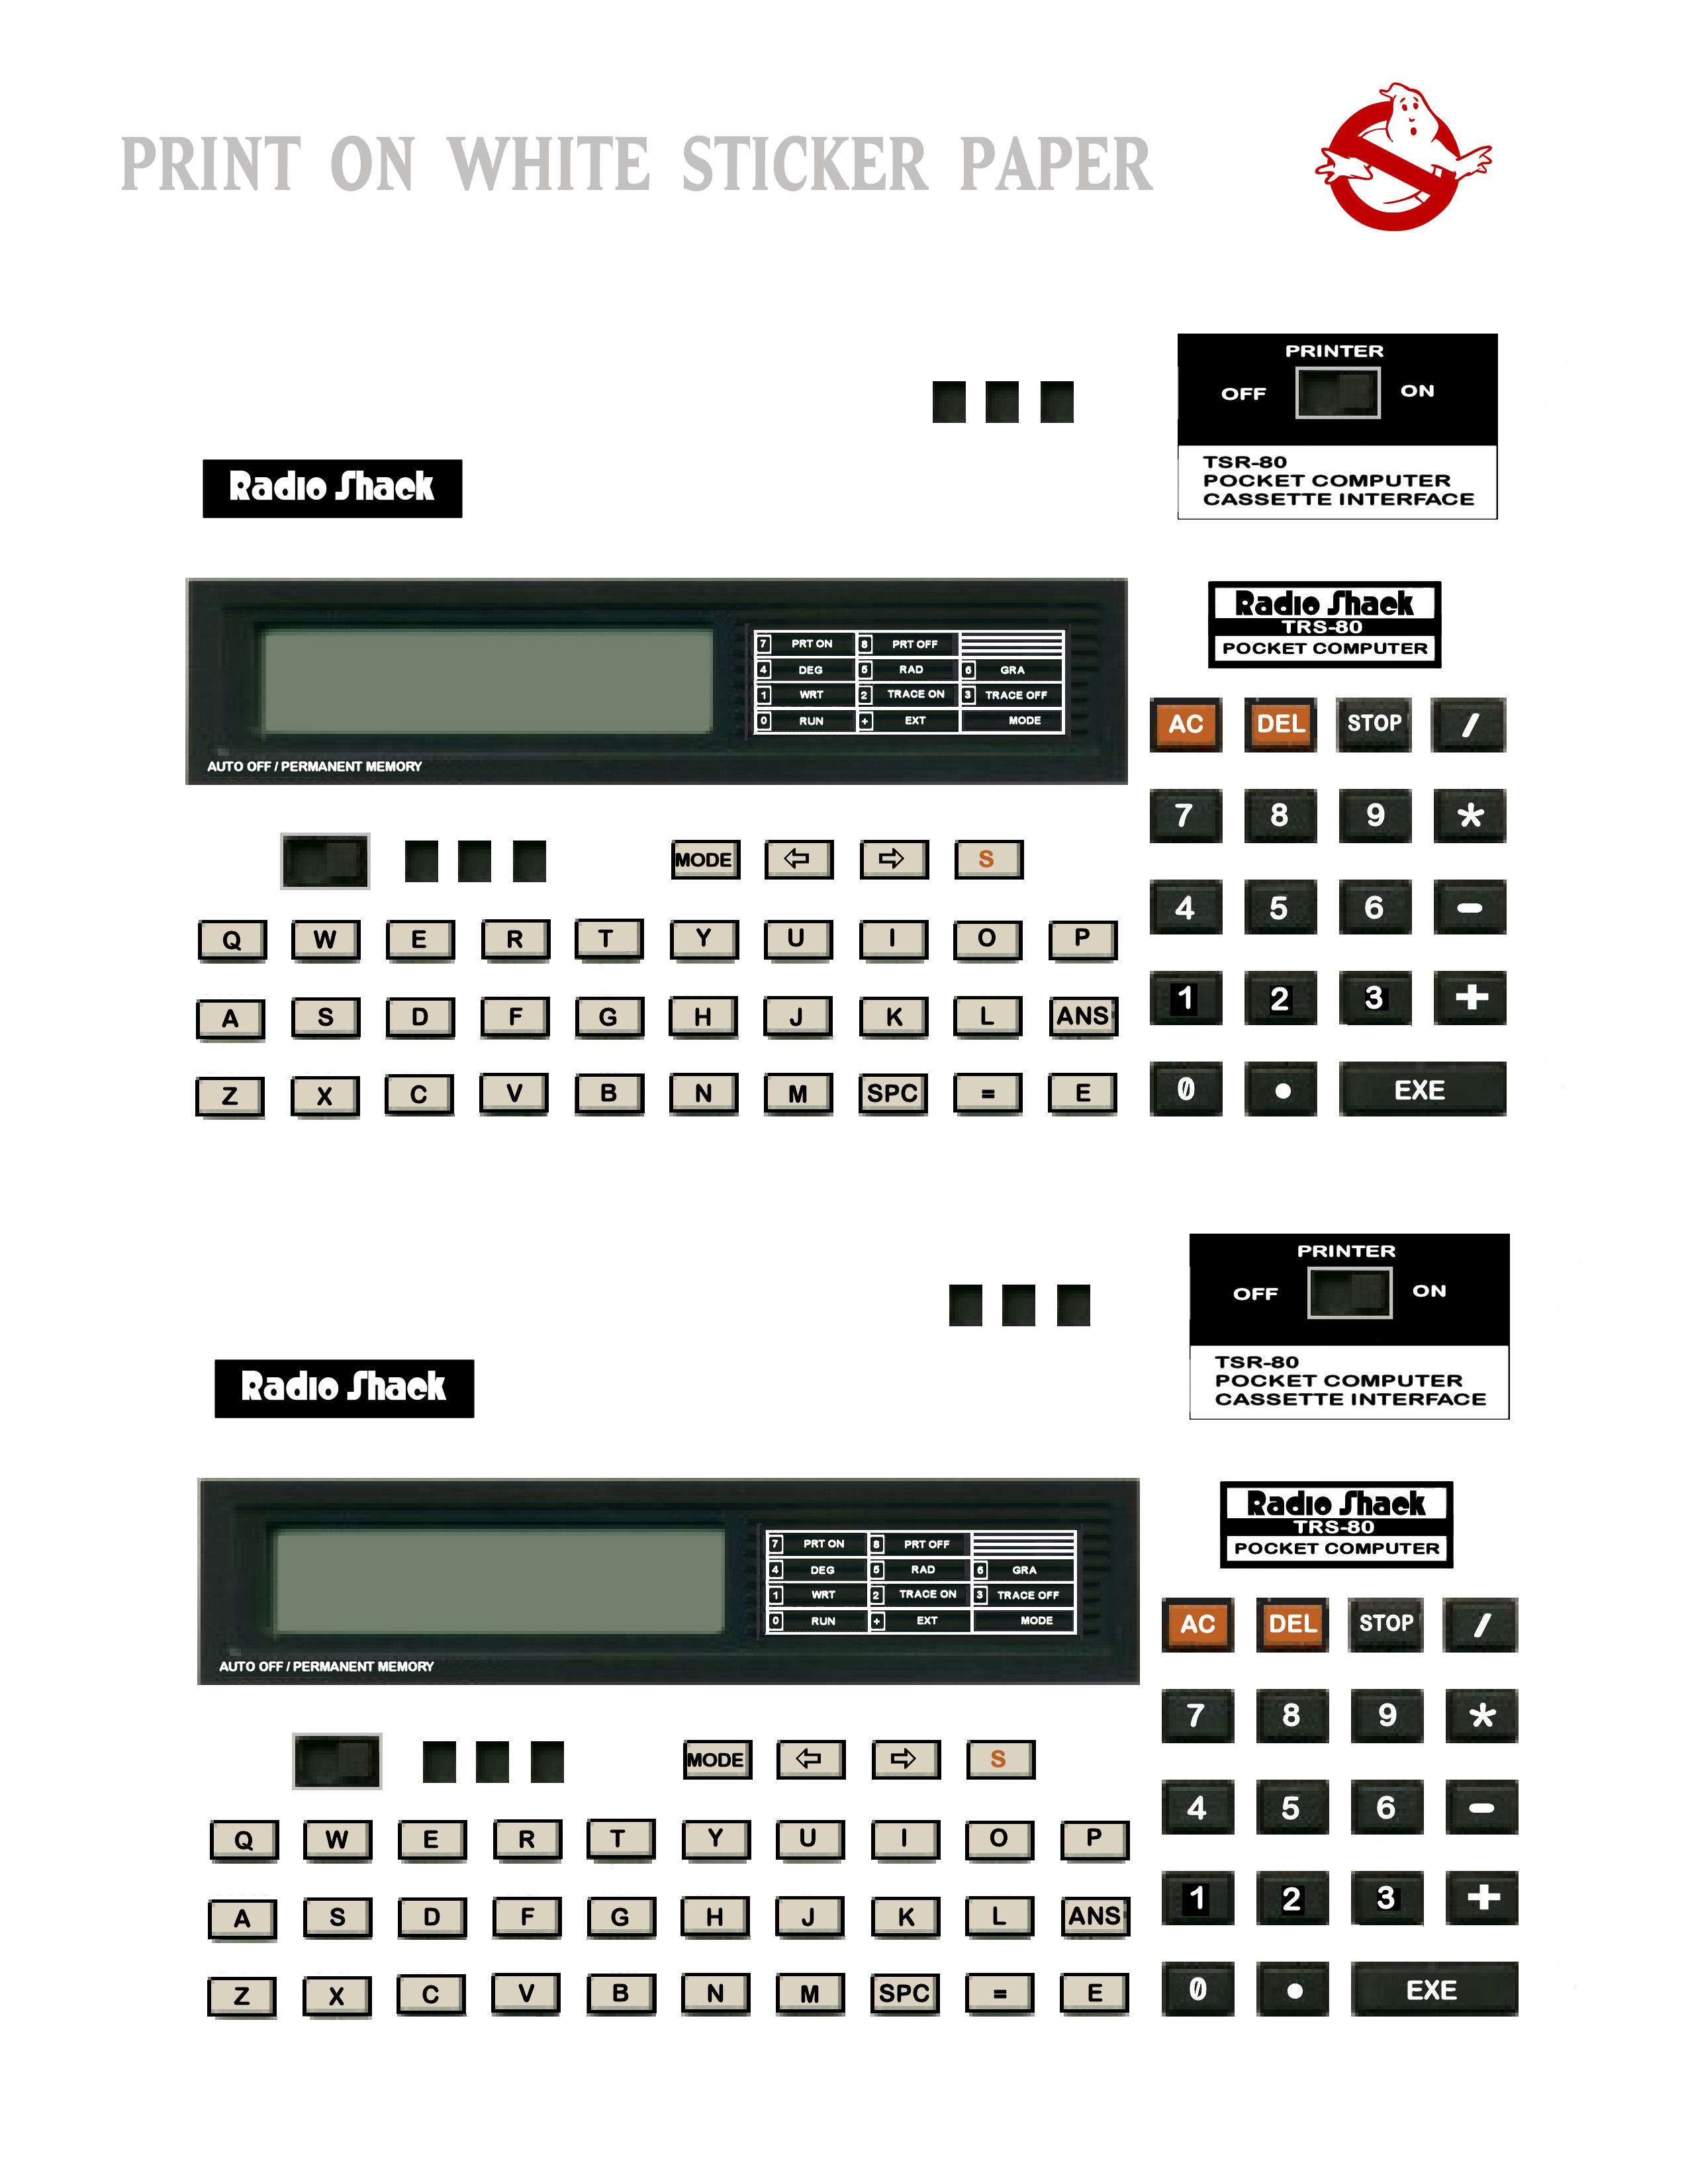
Since the build, I've done a bit more searching around and have come up with the graphics for the Cassette Interface (that black thing, but I do not have measurements for it) that the TSR - 80 attaches to. I've included them in the following pics, each has 2 sets of images on them. Anyone that wishes to build one of their own, click on the pic which will bring you to the image shack site. Click on the pic again and it should give you the full size image. Right click and "save as" to your computer. You can then print them out at full size ( 8.5 X 11 letter size) without any distortion.
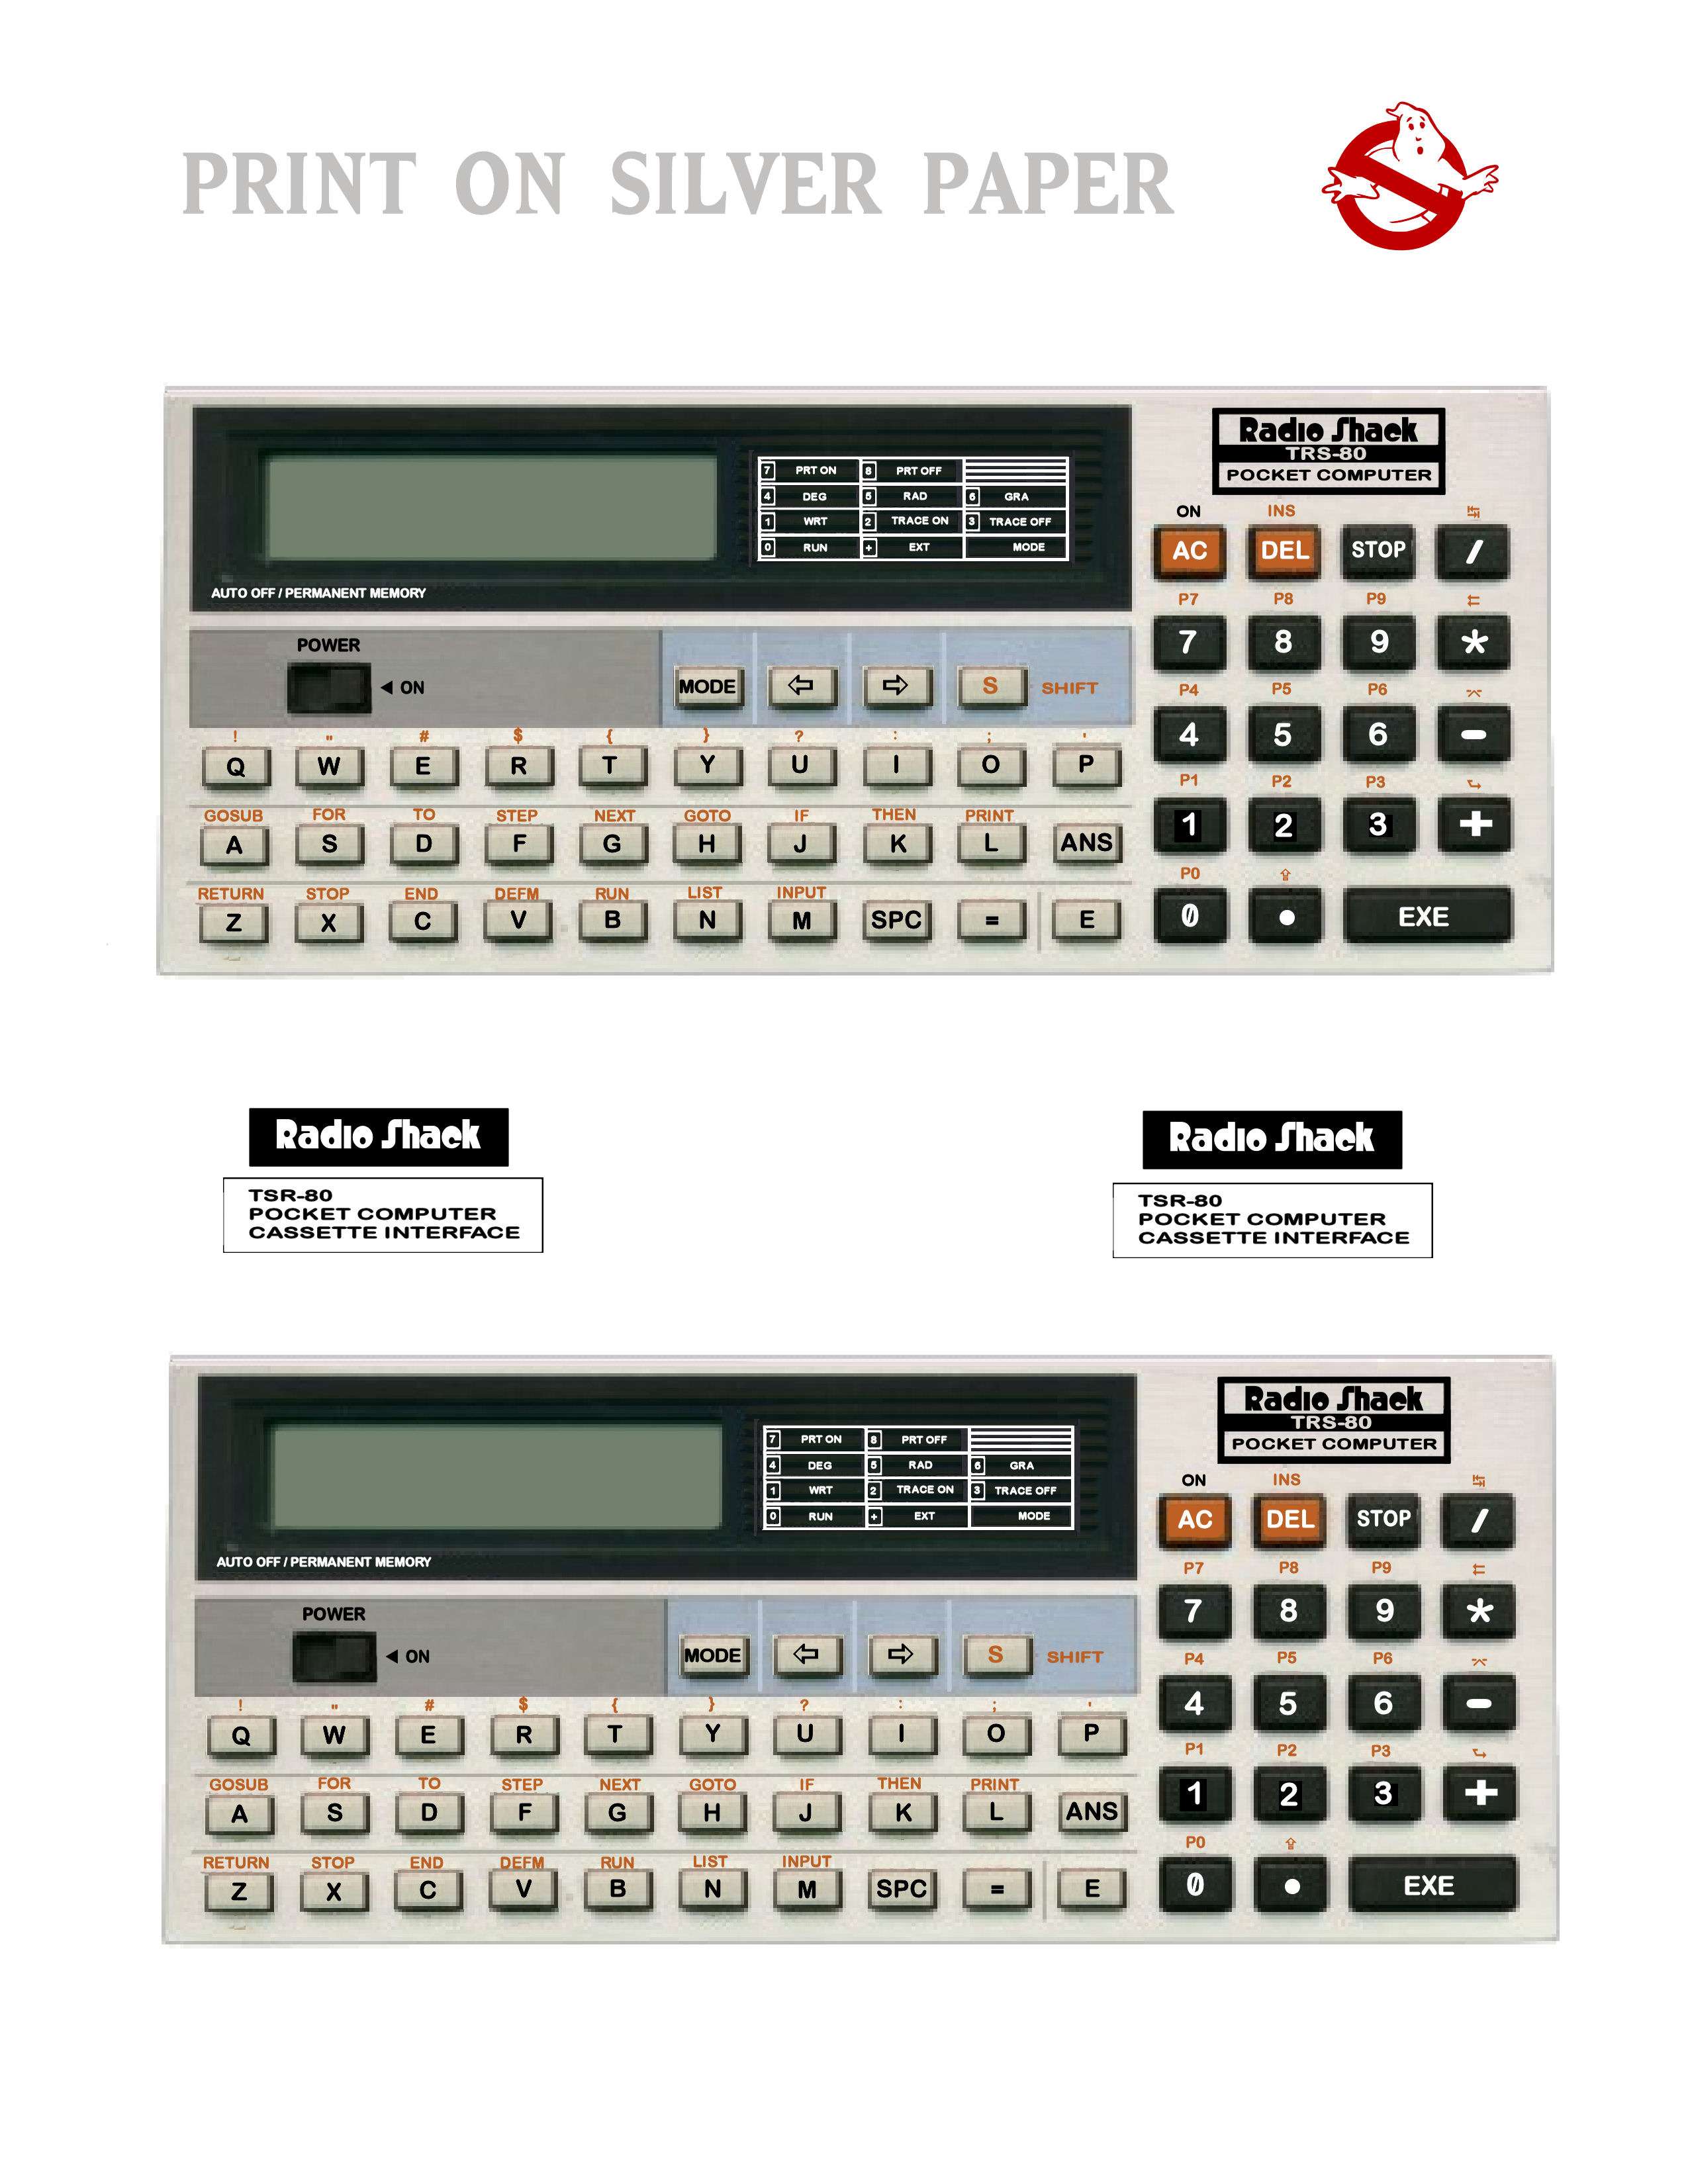
The 3 black squares in the next set are for the on / off button. Stack them one on the other to make the button taller.
If you put one together and come up with any improvements or better measurements, please add them to the thread. Enjoy!

I snagged a lab coat and stethoscope from eBay and found a usable set of headphones at Dollar Tree. Only fly in the ointment was the lack of inexpensive Pocket Computers on eBay, so I decided to build a TSR - 80 out of paper goods. Here is my 2 day build.
My source material was an eBay listing that gave me an idea of the size to make the unit and an image to start with.
VINTAGE RADIO SHACK (TANDY) TRS-80 PC-4 POCKET COMPUTER (cat no. 26-3650). The unit is in good condition, and looks to be working good. Comes with 1k memory cart and brand new energizer batteries $7 installed and included. Nice vintage computer from radio shack..Please look below at high res pictures of the item
Technical specifications
RAM (total) : 1 Kb
RAM available : 544 bytes
ROM : 12 Kb
CPU : HD61913A01
Text screen : 1 line of 12 characters
Graphic screen : No
Sound : No
Size : 165 x 71 x 10 mm

I then found a 2nd pic without all the shadowing. I squared up and resized the picture,"painted" over the blurry letters and numbers and cleaned up the image. I redid the lettering and even found a "Radio Shack" font for their branding.

I went to Staples and purchased some Sticker Paper and some fancy Silver Note Paper that was good to use with ink jet printers.

I printed out the image on both types of paper and gathered the rest of my supplies. Foam Core and Black Paint for the body/mount, Snap Knife, Steel Ruler, Double Sided Tape, Clear Packing Tape and Silver Duck Tape ( as that was what I had on hand at the time).

I painted the Foam Core black. Layed out the back side of the Silver Paper image with double stick tape, cut the image to size and taped it to the Foam Core. I then estimated the size of the Docking Unit and cut the Foam Core. I then took a strip of Clear Packing Tape and placed it over top of where the LCD Screen would be to imitate the glass covering.
I sliced up the Sticky Paper image, cutting out all the buttons and the black graphics area around the LCD Screen and then the LCD Screen itself, leaving a hole. I took the backing tape off each piece and put them overtop of their twin on the Silver image. The Silver Paper does have a metallic sheen to it and looks alot like the real thing. When finished, it looked like this.

Last thing to do was to get it to hang from my Lab Coat pocket. A slice of Foam Core and some Duck Tape took care of that.

Since the build, I've done a bit more searching around and have come up with the graphics for the Cassette Interface (that black thing, but I do not have measurements for it) that the TSR - 80 attaches to. I've included them in the following pics, each has 2 sets of images on them. Anyone that wishes to build one of their own, click on the pic which will bring you to the image shack site. Click on the pic again and it should give you the full size image. Right click and "save as" to your computer. You can then print them out at full size ( 8.5 X 11 letter size) without any distortion.

The 3 black squares in the next set are for the on / off button. Stack them one on the other to make the button taller.

If you put one together and come up with any improvements or better measurements, please add them to the thread. Enjoy!


 - By mrmichaelt
 - By LeoCor Replicas