PAINT AND TEXTURING Supplies: Krylon Bedliner, Krylon Fusion Satin Black
Prior to painting, I used a Dremel and a few attachments to remove the material for the power cell. After lightly scuffing the pack and wiping everything down with Simple Green, I proceeded to start with all of the light coats of bedliner spray to texture appropriate areas of the pack, paying attention to all the little crevices. After letting each light coat dry to the touch, I proceeded with the next, with a total of 6 light coats.


I then unmasked the pack and let it cure for a week and a half. I then began painting all the smaller parts for the pack with Krylon Fusion Satin Black. Even though the pack already had a satin finish to it, I wasn't happy with the way it looked and wanted to paint that as well.


Again, lots and lots of very light coats on all of the pieces. It came out to about 6-7 coats to get it where I wanted it. I then moved everything into the garage again to sit for another week to be sure everything cured. Upon inspection, I have a pack with a very even and smooth paint job.
WEATHERING Materials Used: Tamiya X-11 Silver Chrome, XF-1 Flat Black
After the pack was cured, I moved everything back inside and began slowly weathering the pack. I am not looking for a heavily weathered pack by any means. I want a pack that looks like it had been used, yet cared for, with rubbed areas starting to show through. I started with the wear marks on all of the surfaces that would wear over time -- the edges, the corners, etc...
 [/url ]
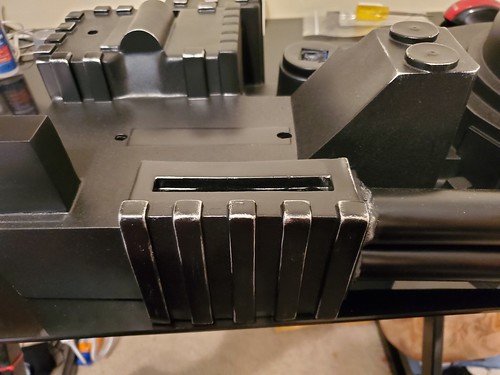
 20200409_195216
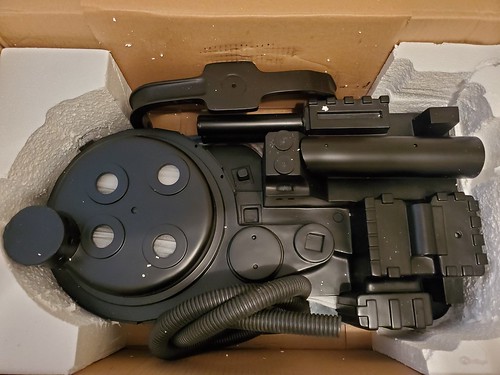
I then did a dry-fit of all of the pieces to get an idea of where I want to go next, and to see if I want to weather heavier, etc...

 DECAL TESTS - N FILTER STRIPING ISSUES
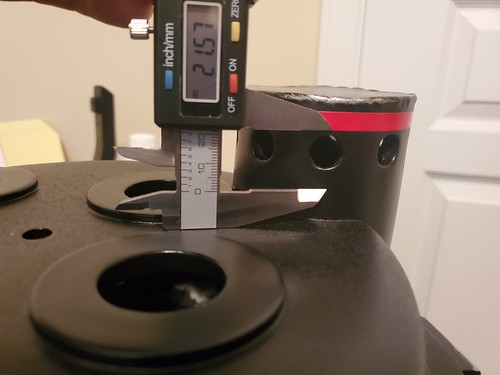
 Materials Used: Tamiya X-7 Red, Tamiya acrylic thinner, Tamiya XF-1 Flat Black, Tamiya X-2 White, Iwata Neo airbrush, Masters gravity airbrush, sharp line painter's tape, measuring caliper (could use a regular ruler too, but this was right here).
Here's my dilemma... I don't like the shade of red the decal for the N-Filter. It just looked way too red and almost cartoony. I wanted to do a custom touch and slightly darken the red. I chose to airbrush a stripe and use the supplied decal as a template to mask off the placement. I had to be sure that this stripe was uniform and straight. I couldn't use the top of the N-Filter as a point of measurement because it isn't flat or straight... so I used my caliper to measure from the base of the surface of the cyclotron to the bottom of the decal in 4 different places. i then measured from the cyclotron base to the bottom of the decal in 4 other places to ensure the supplied stripe decal was in fact straight.
I then proceeded to mask everything off and mix my red with a drop or two of black. Once I was happy with the color, I started spraying very light coats over and over again until I had a solid filter stripe.


Again, light coats... over and over again. Plenty of light sources to make sure there are no shadow spots.


Here is a comparison in colors: The stripe that came with the pack and the color I mixed


It's a nice, subtle custom detail.
I wanted to continue working on the N-Filter. I again masked off a section for all of the holes and proceeded to paint the inside lips all white. While doing this, I also wanted to pain the inside of the N-Filter all white so the kit light shows brighter. I suck at painting with a brush, so I thinned some Tamiya X-2 White and loaded my Iwata Neo. I proceeded to spray all of the circles, and also the interior walls of the N-Filter.


I really loved how bright the white came out, but as you can see in that second photo, one of the main complaints about the Anovos packs is the finish. I took this after only a few light coats, so you can see the texture of the material. The material goes from thick to thin in several spaces. It became very noticeable when I unmasked the holes and saw rough edges inside some of them.

I will make a determination after I install the mesh screen and see how noticeable it really is. If it's too bad, I will break out the flex shaft Dremel and start trying to repair that. I'm not sure it's going to be a problem, but I have a plan just in case.
I then loaded my airbrush with thinned Tamiya XF-1 Flat Black and cleaned up the edges of the white circles a little bit. I am planning on airbrushing some weathering/venting stains as well after the clear coat.
VINYL DECAL APPLICATION AND WEATHERING; PARTIAL DRY FITTING AGAIN Materials used: Tamiya X-11 Chrome Silver, Tamiya XF-1 Flat Black, Tamiya XF-49 Khaki, Horse Hair acid brush (cut down), Q-Tips, Windex, paper towels.
I then partially did another dry-fit assembly again to place some of the decals. I learned decal placement basically means you can put on decals in a lot of areas that are relatively accurate based on which ever photo you sourced. Again, i'm not going for a hero screen-accurate pack... just a clean but lightly worn tribute pack.
I had an issue with ONE decal that just does not want to stick. I will do a little sanding on the pack to see if maybe I can give it a little more grip, and if that does not work -- I will just glue it on.


It's great to see the decals finally, but they are just too clean. I want them to have a little weathering to them, so I started the wear first and then moved onto the weathering with colors.
I first start dark and go light. Black, then black and khaki thinned, then silver drybrushing, then something I discovered on accident -- Windex on a paper towel/Q-tip.


This is actually the last decal I worked on, and never added paint -- just wear. I sprayed a little Windex onto a small area of paper towel and just start rubbing in a circular motion, but moving a little up/down/left/right instead of just one spot. The effect is pretty clean and makes the decal look worn. You do have to be careful with your pressure to avoid blowing right through the decal. A little patience and the decal wears down nicely.
NEXT STEP: I will now take the pack back to the garage and clear-coat all of the smaller parts, and then the pack itself. The decals and the pack will be cleared over with Krylon Fusion Satin Clear, so the weathering will be sealed in, and the decals will not have a chance to peel off. After that, I MAY do a little more weathering/aging of the pack, but just slightly. I have on order a small jar of Tamiya clear that i can shoot via my airbrush for any further aging I do. This will sit in the garage to cure for a week, and then I will start the assembly. Motherboard next, and then the wand.
Thoughts on the Anovos kit so far: What everyone has said is true -- there are some construction issues in certain areas -- thin materials/thick materials, holes off center, etc. Is it a bad kit? Absolutely not. I've built a lot worse things than this. I unfortunately wasn't aware of these kits when they originally went on sale, but did read everyone's build threads and heard the comments. I can understand some of the frustrations now, but honestly -- it's all pretty minor stuff with mine...thankfully. It's a good learning experience.
And yes, I know these kits are old news.
HELPFUL TIPS:
These aren't pack-specific, but since we are all home and some people may want to learn how to do something and don't know where to start, I thought I would just throw some of my experiences out there and maybe help someone new to prop building, or looking into starting but not knowing where to go.
Paint Mixing: Mixing paint can be messy. The easiest way I found to do this is by using those little measuring cups you get with cough syrup. I actually ordered a sleeve of 100 for around $5 on eBay. I use these cups for cleaning my brushes, paint mixing, paint thinning, etc... even holding Windex. I also don't mix large amounts of color at one time. I also bought pipette droppers for around $3 on eBay for a set of 5. I have one for colors and one for acrylic thinner. If I am airbrushing, I do a 50/50 mix of paint and thinner, and spray at 18-22 psi.
Clean-up: I love using Tamiya paints because they clean right up with Windex. I keep an old Gatorade bottle on my desk as a catch jar. When I am done spraying, I dump any remaining color in my gun into that bottle, then spray a little Windex into my airbrush. I either spray that into my vent jar or directly into the Gatorade bottle. When that is done, I then take a paper towel and wipe the gun clean. Simple. Same goes for my brushes. All Tamiya acrylic paints clean right up with Windex.
When i make a mistake while painting, paper towel and Windex, as long as it has not dried yet.
Airbrushing: Don't be afraid to try to learn how to airbrush. You don't have to make a huge investment and buy expensive equipment. There are TONS of cheap starter kits out there that come with a small compressor, hose, and a gun or two.
I have a $200.00 airbrush, a $100-ish and a $19.00 airbrush. I use the $19 Masters airbrush more than the other two because honestly I like the way the paint flows for larger areas. I can just as easily use the more expensive ones for that too, but I really like the feel of the cheaper one. My first airbrush setup cost about $125 bucks with everything.
If you don't like something, change it. It's your project. I hope everyone and their families/loved ones are all safe and healthy through all of this.
-Mike
Best advice I've ever heard came from Ghostbusters: "If someone asks if you're a god, you say YES!" Hasn't failed me yet. Thank you, Winston!

 20200314_211919 by Michael Cole


 - By prodestrian
 - By mrmichaelt
 - By RiverofSlime