Page 4 of 20
Re: Bishopdonmiguel's all-fired plain-vanilla pack build
Posted: August 10th, 2014, 8:11 pm
by PssdffJay
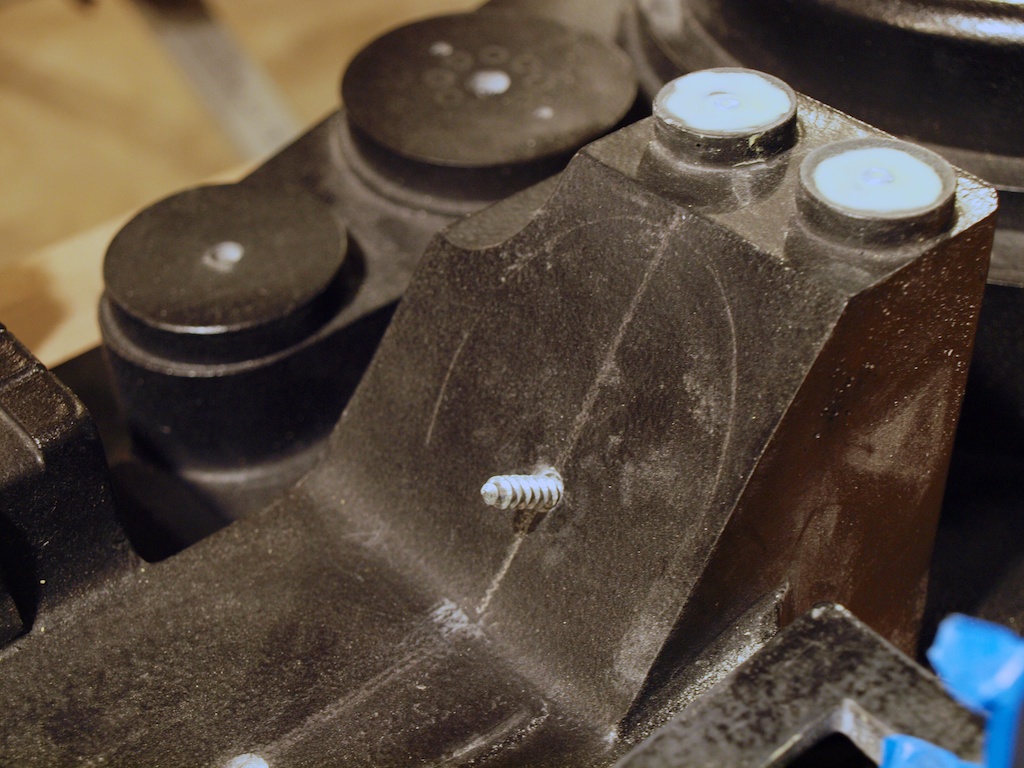
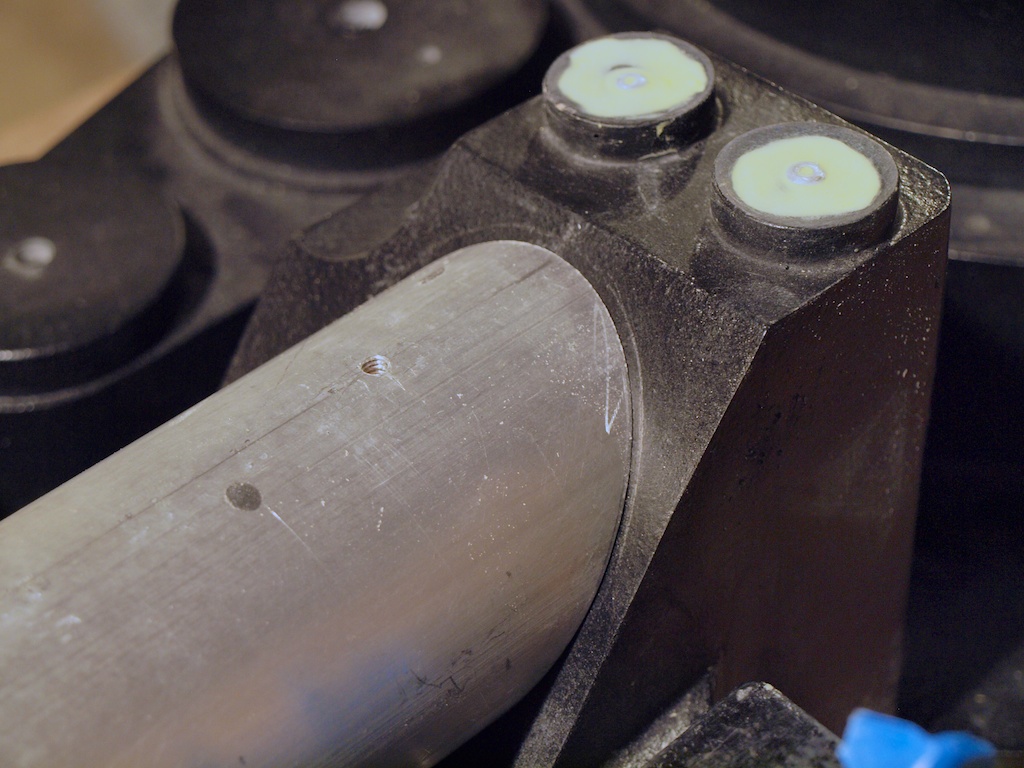
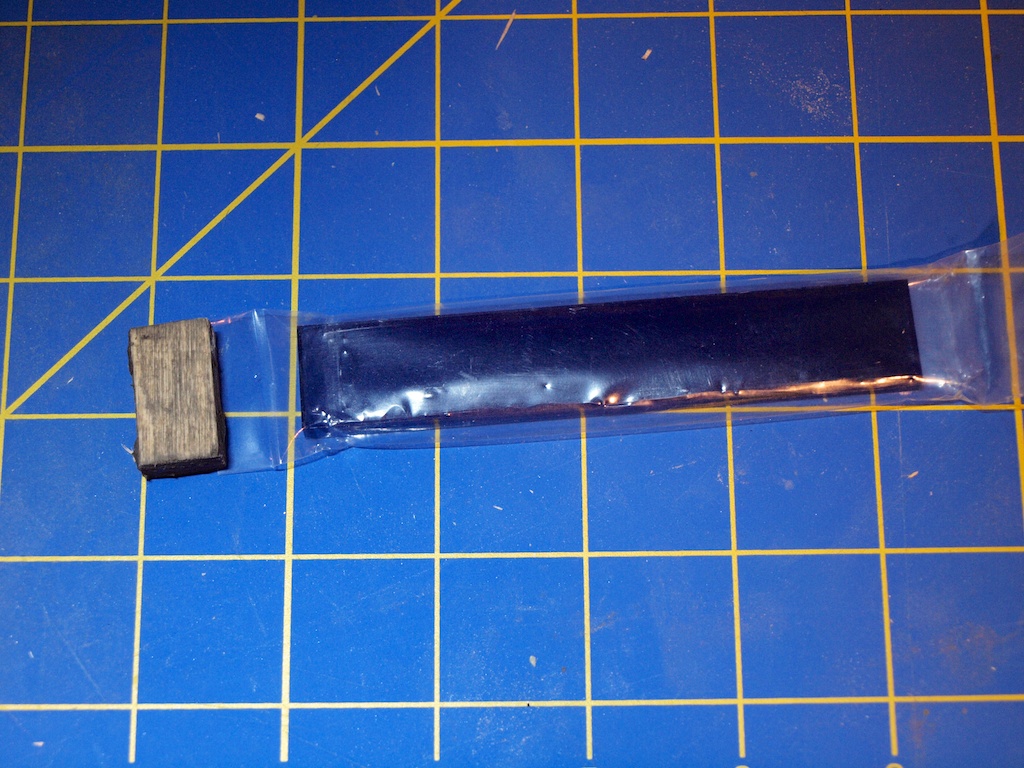
Ah ha!! Duh! I didn't think of putting a piece of metal in there! Mine squished together. I have a second one though.
Re: Bishopdonmiguel's all-fired plain-vanilla pack build
Posted: August 11th, 2014, 5:26 am
by bishopdonmiguel
venkman30 wrote:Coming along very nice. Looking forward to more.
Thanks! Really missed working on this the past few weeks. I need to keep making regular progress if I am going to get this done before Halloween.
PssdffJay wrote:Ah ha!! Duh! I didn't think of putting a piece of metal in there! Mine squished together. I have a second one though.
Don't feel too bad, I squished mine too. But it bends apart easy enough.

Would not have been a problem except for the fact that it was causing a wobble when spinning the knob.
Re: Bishopdonmiguel's all-fired plain-vanilla pack build
Posted: August 11th, 2014, 5:37 am
by bishopdonmiguel
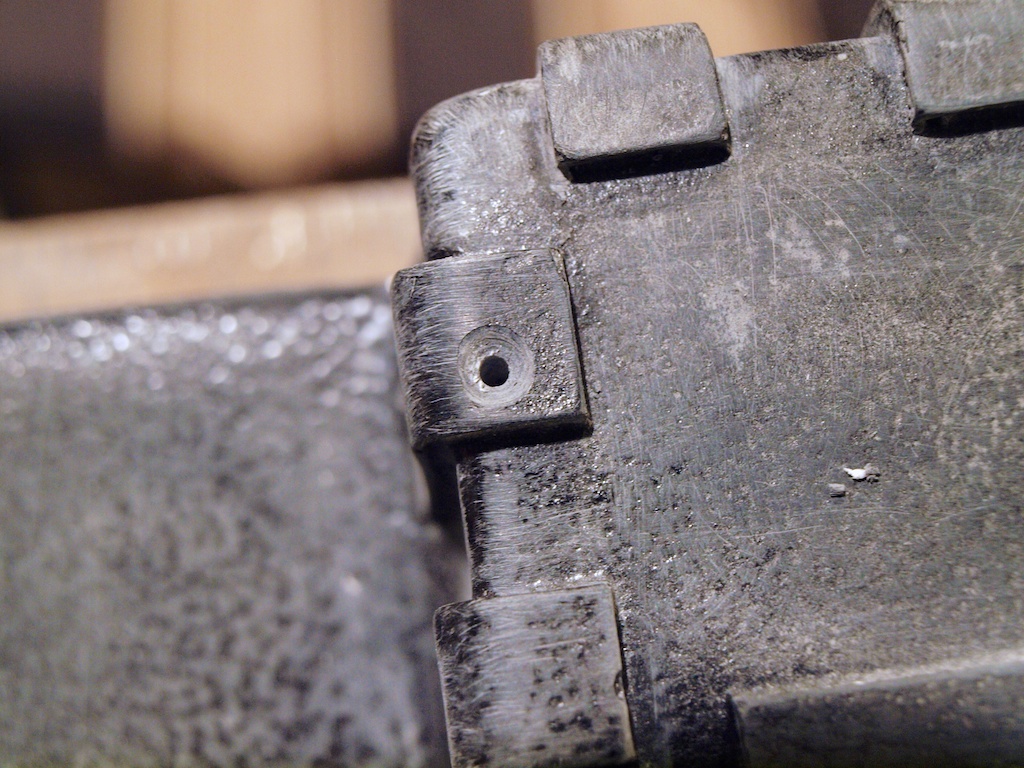
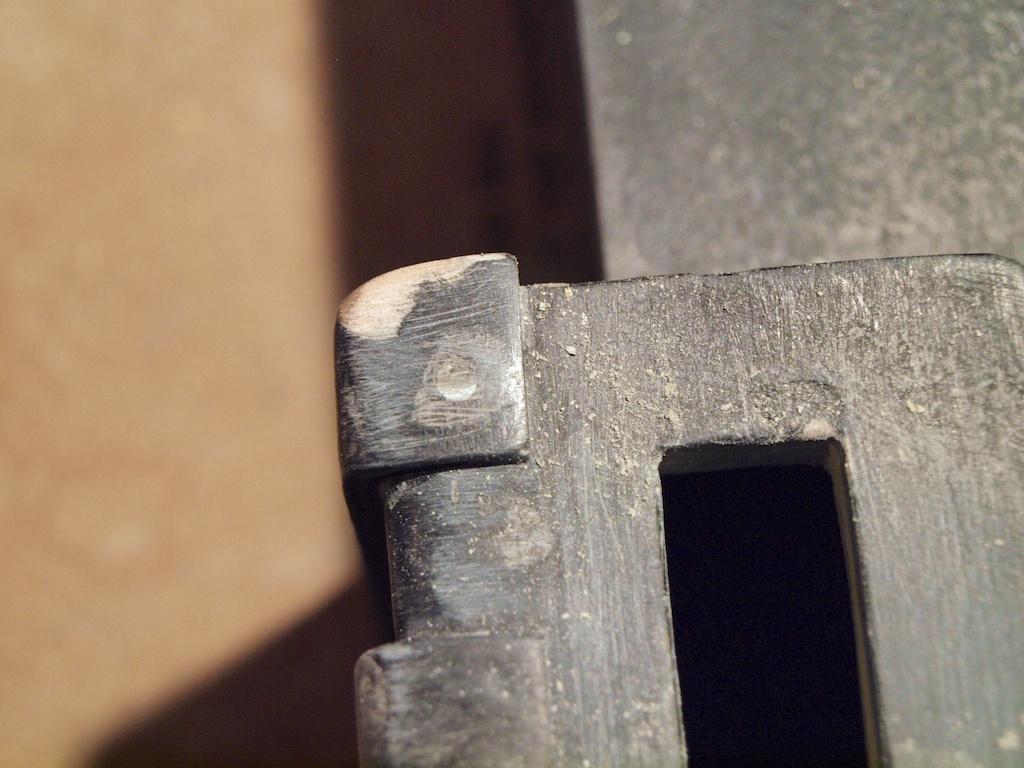
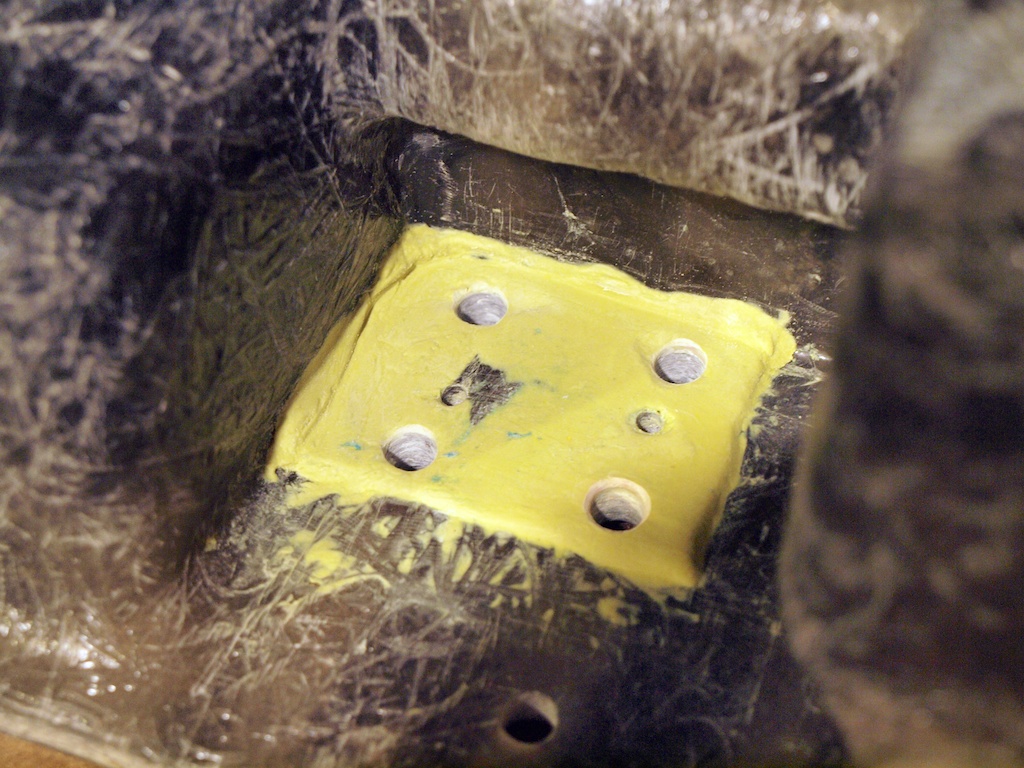
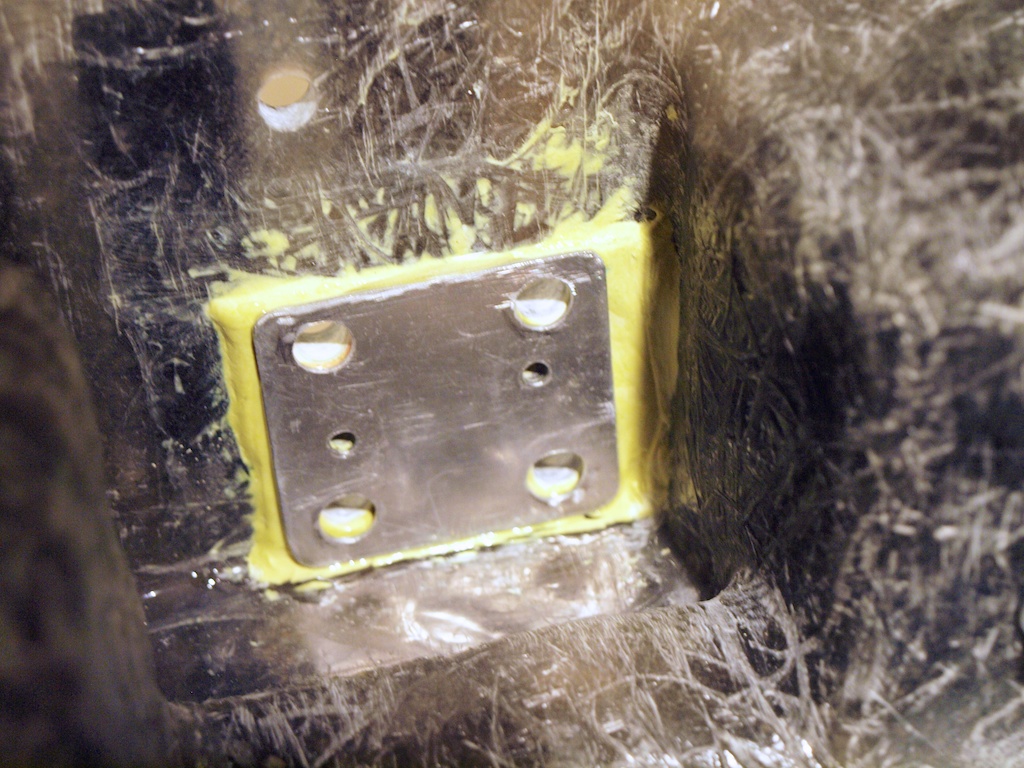
The Gun Mount backplate has been bothering me. The inside shell was not level in this spot and was causing an issue with the plate alignment. I mixed up some green Milliput to smooth this out. Once it cured, I epoxied the plate and it aligned perfectly. I will be reinforcing a few other areas of the shell in the next few days.
Re: Bishopdonmiguel's all-fired plain-vanilla pack build
Posted: August 12th, 2014, 10:10 am
by bishopdonmiguel
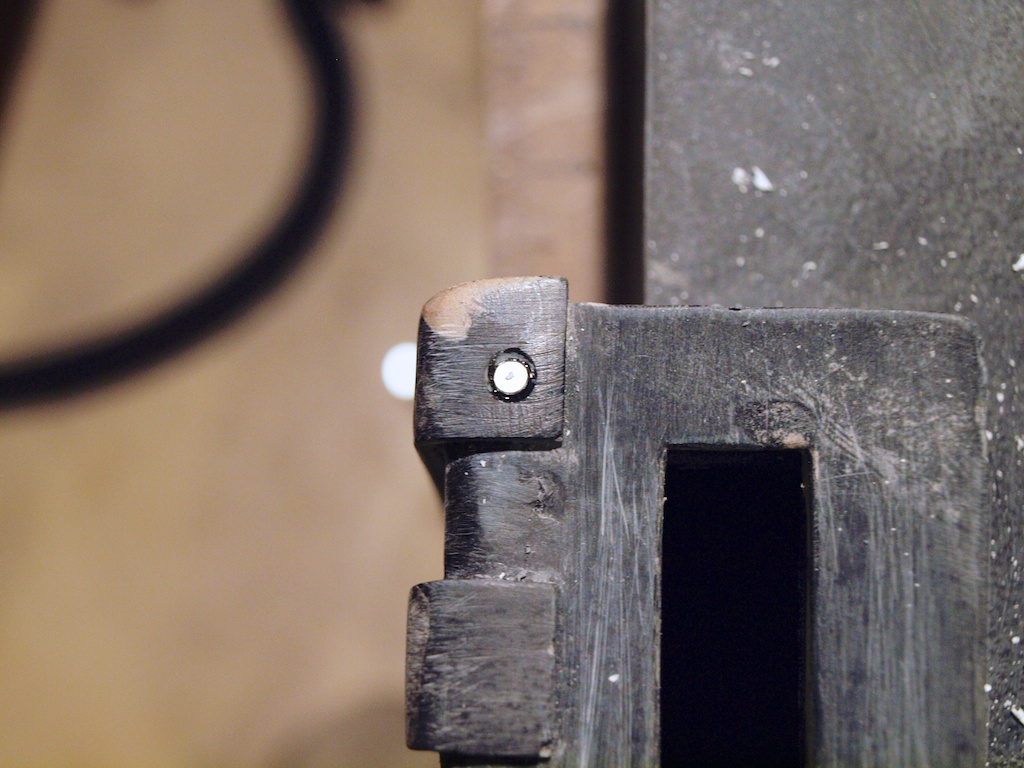
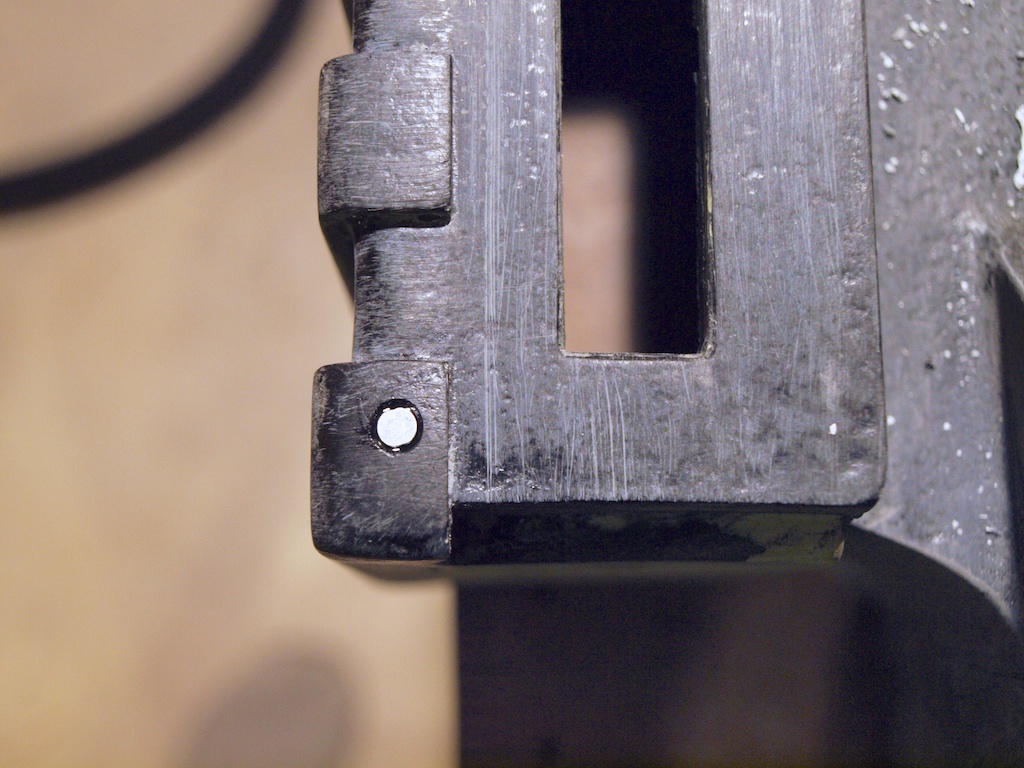
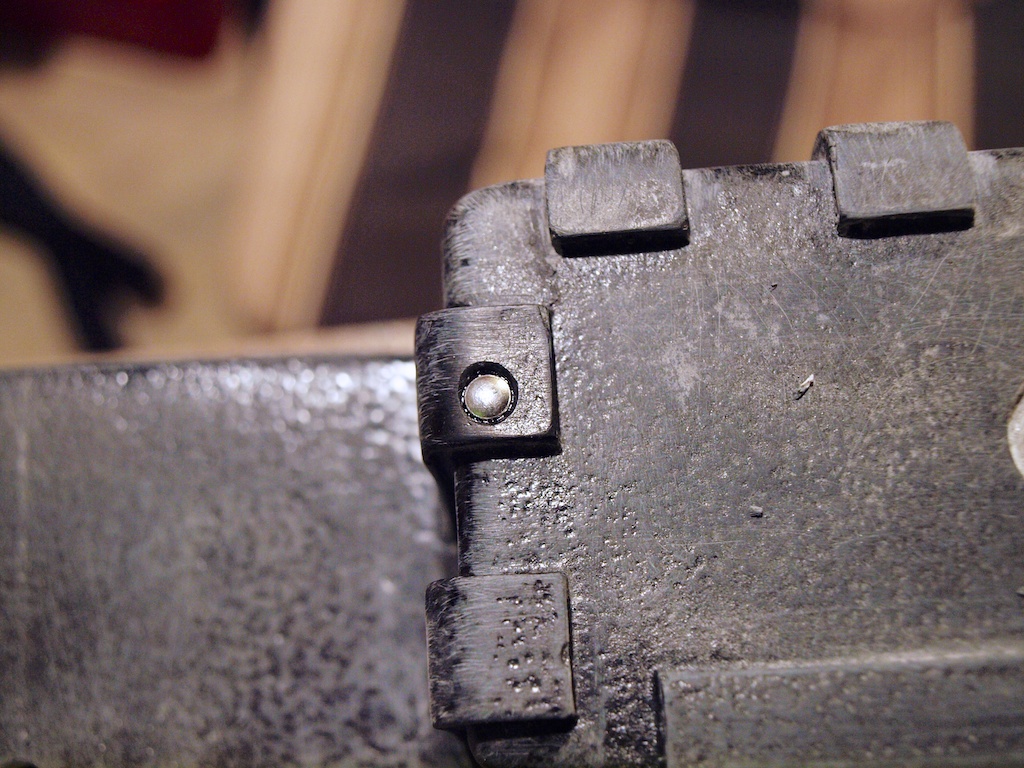
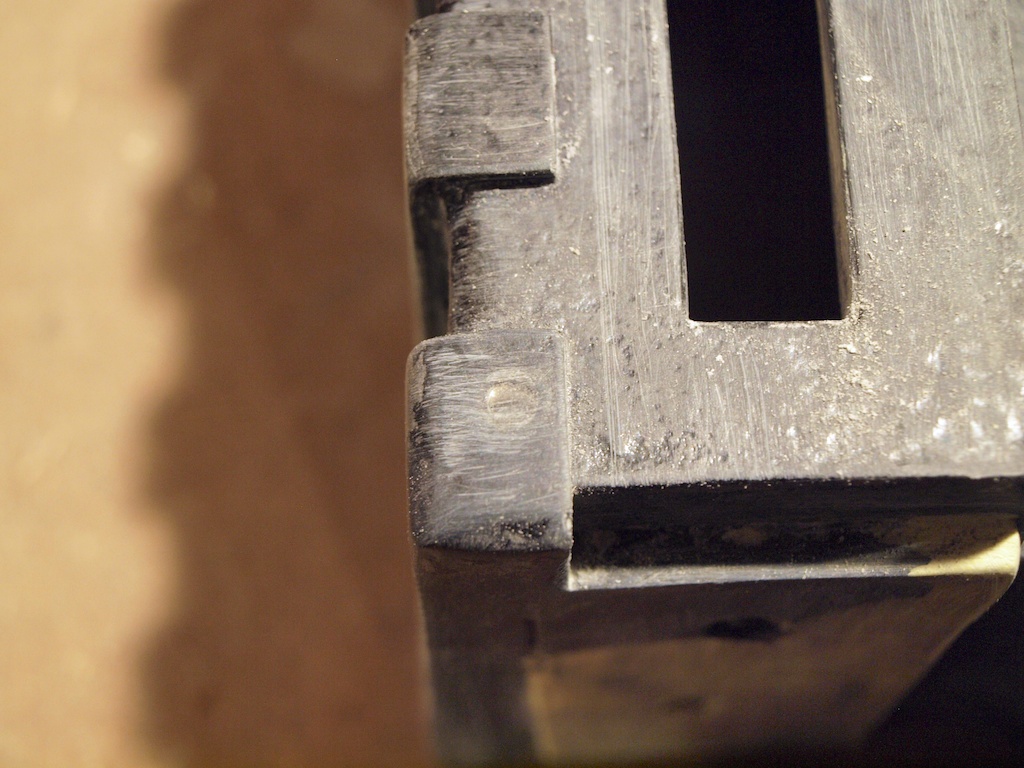
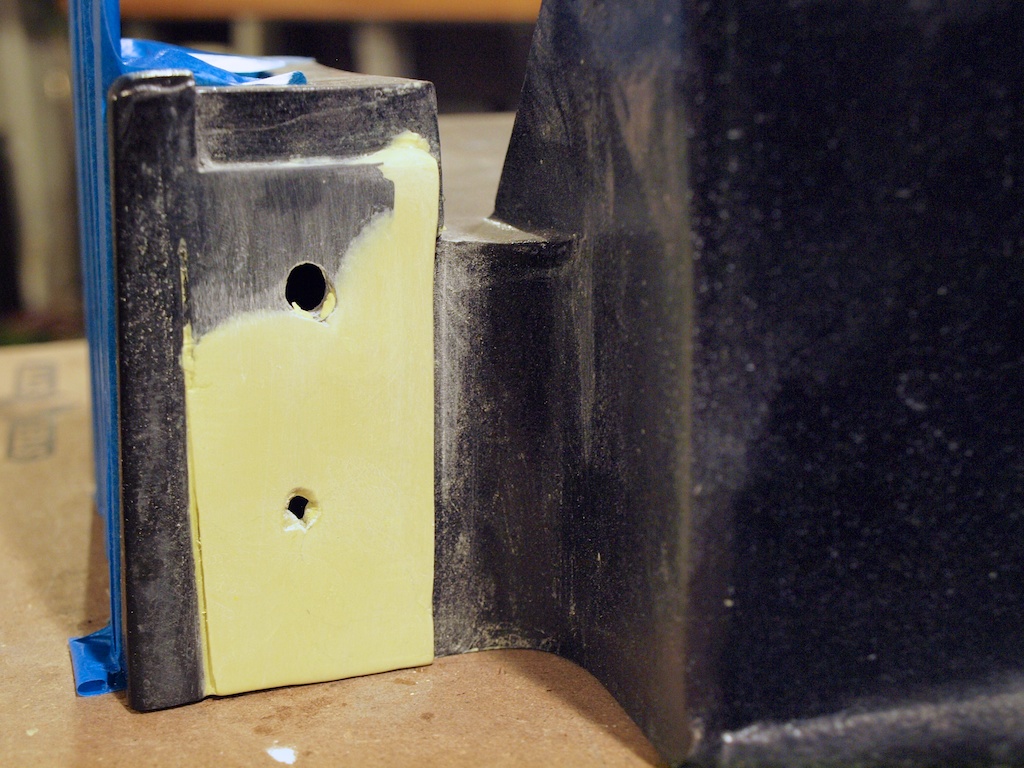
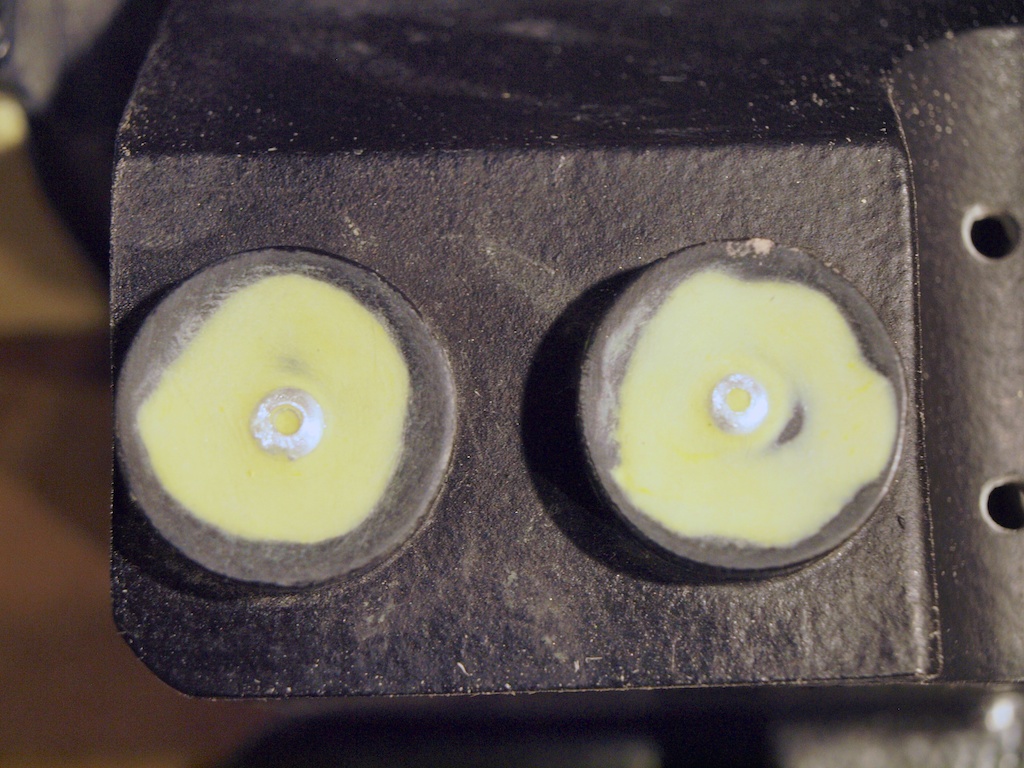
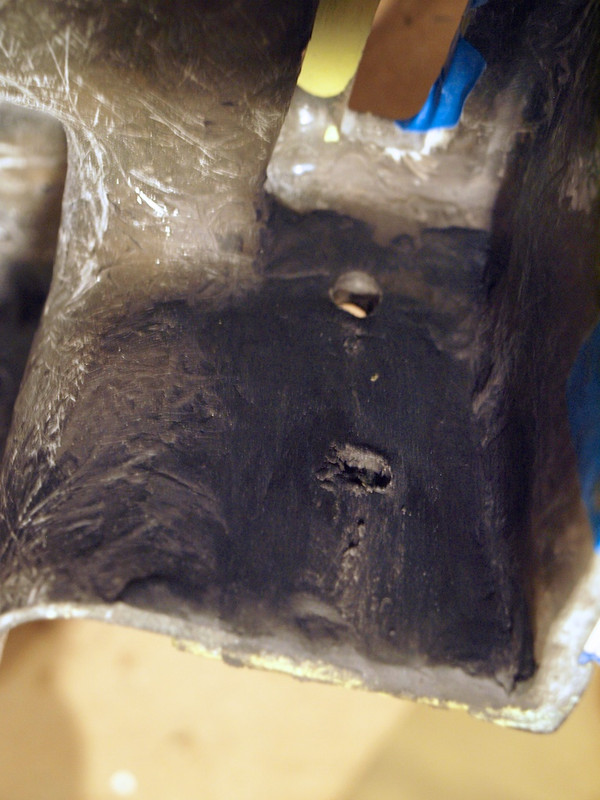
The Injectors were not aligning well with the bottom of the Power Cell. With the addition of the L-bracket connected to the pack, this probably would have been fine but I wanted a nice connection here so I mixed up some more green Milliput.
While I was at it, I hit the Attenuator Discs to smooth the rivets into the shell. I was at this point I realized I would rather use black Milliput instead of the green, so I put a hold on the effort and placed an Amazon Prime order.
Re: Bishopdonmiguel's all-fired plain-vanilla pack build
Posted: August 12th, 2014, 6:59 pm
by 35FT_TWINKIE
It's cool to see what you're doing with the EDA discs. I want to do some rivets on mine but I'm curious as to how they'll turn out. Looking forward to seeing yours.
Re: Bishopdonmiguel's all-fired plain-vanilla pack build
Posted: August 12th, 2014, 7:36 pm
by bishopdonmiguel
35FT_TWINKIE wrote:I'm curious as to how they'll turn out.
That makes two of us!

I really have no idea what I'm doing, just experimenting and hoping for the best.
Re: Bishopdonmiguel's all-fired plain-vanilla pack build
Posted: August 13th, 2014, 5:39 am
by bishopdonmiguel
Re: Bishopdonmiguel's all-fired plain-vanilla pack build
Posted: August 13th, 2014, 6:23 am
by 35FT_TWINKIE
Good idea!
Re: Bishopdonmiguel's all-fired plain-vanilla pack build
Posted: August 13th, 2014, 6:43 am
by Hijacker
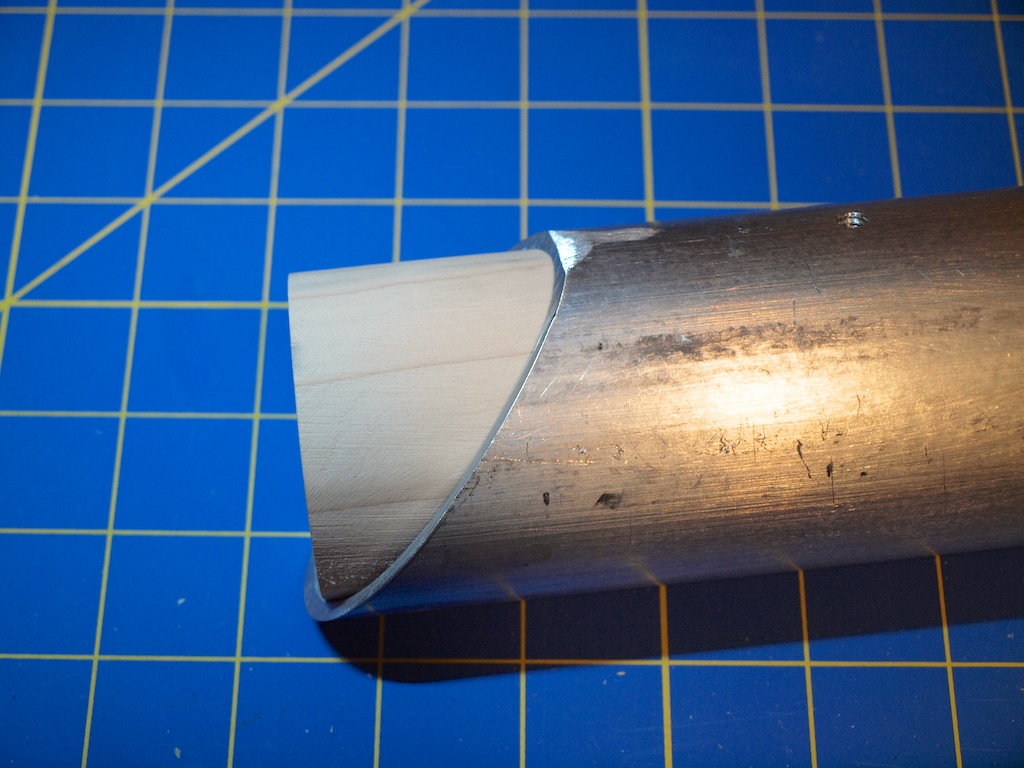
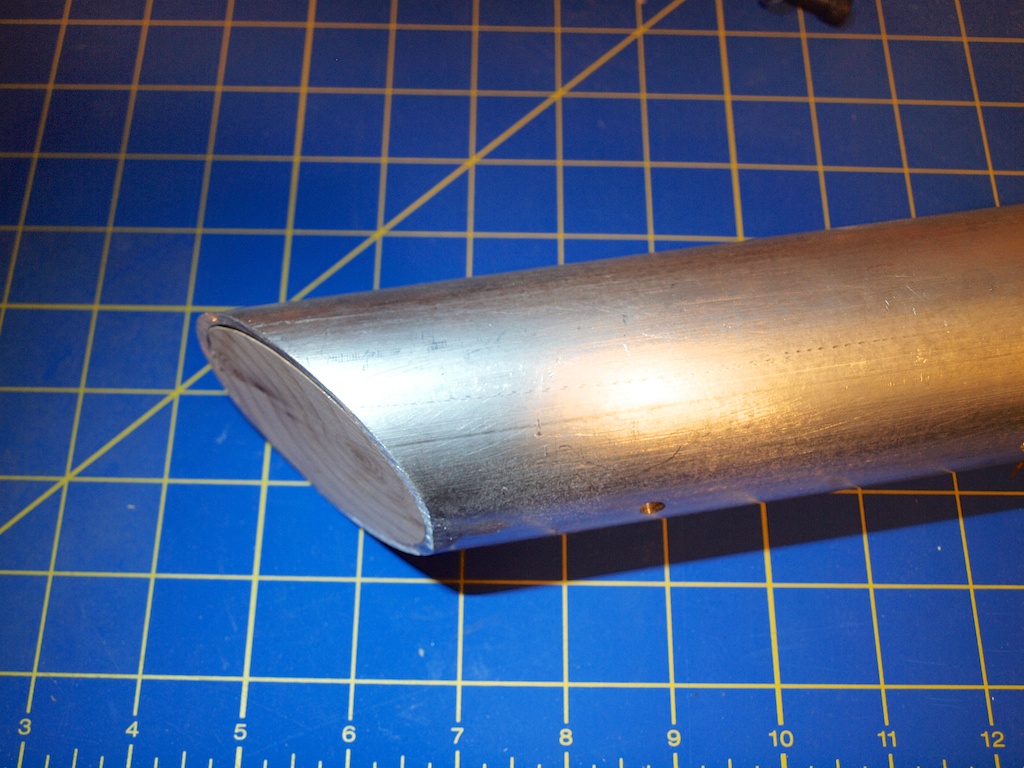
I'll be stealing that idea for my booster tube when I finally get around to making my pack

Re: Bishopdonmiguel's all-fired plain-vanilla pack build
Posted: August 13th, 2014, 10:21 am
by pyhasanon
Heh, pretty damn smart right there...
Re: Bishopdonmiguel's all-fired plain-vanilla pack build
Posted: August 14th, 2014, 7:23 pm
by bishopdonmiguel
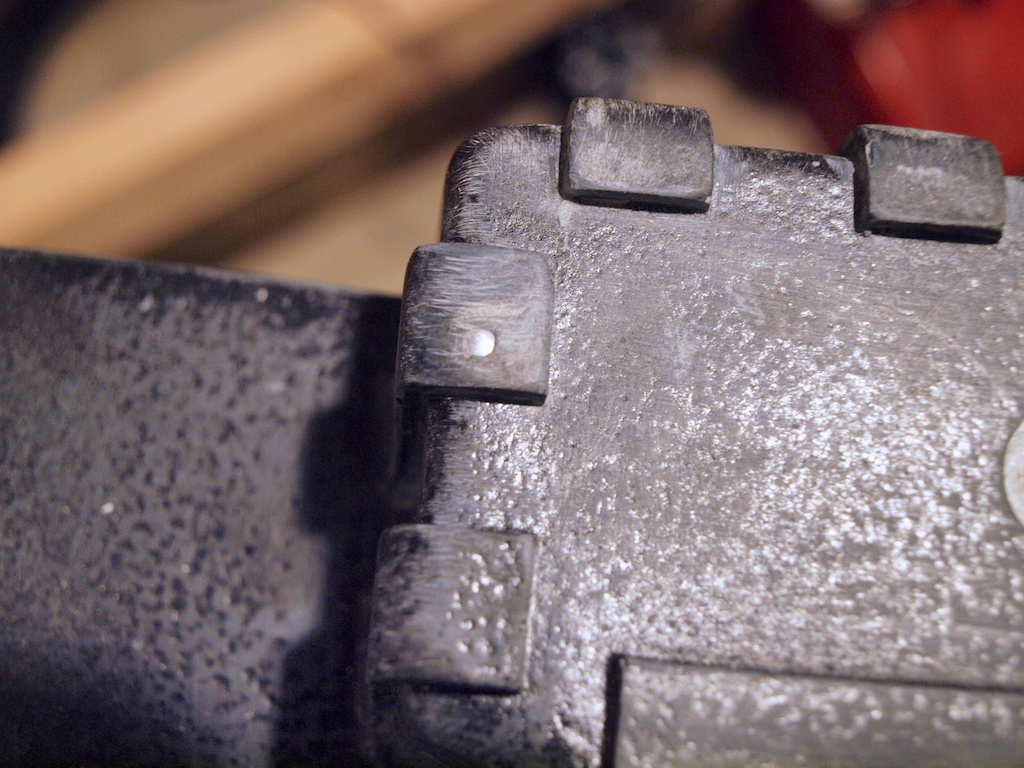
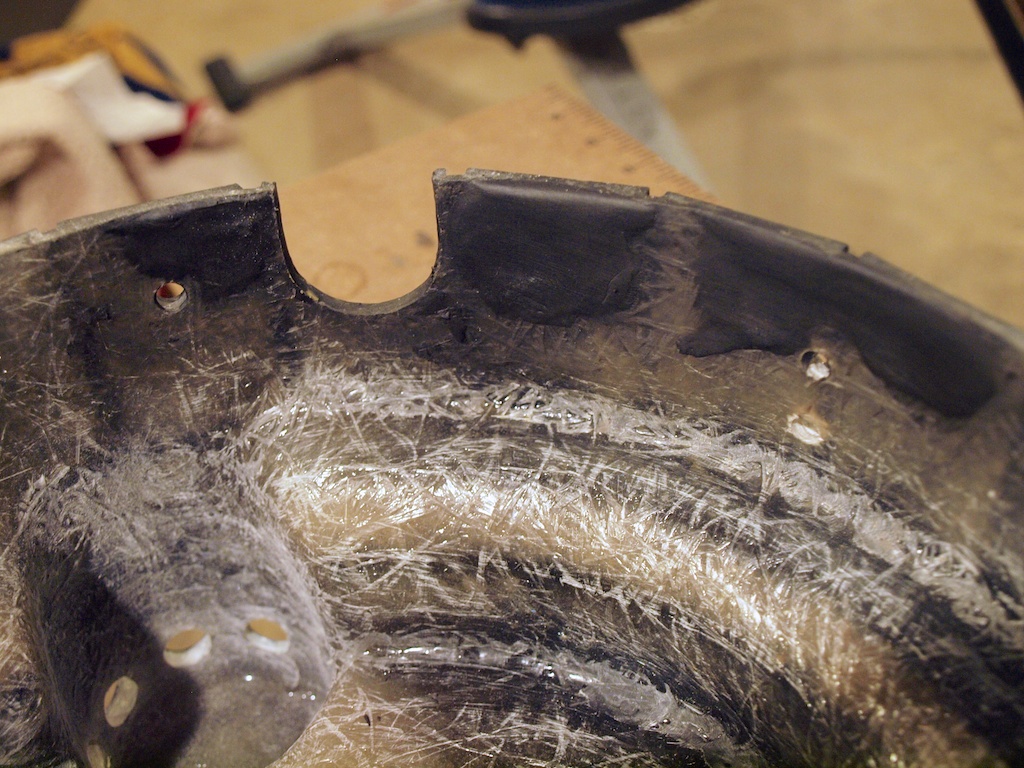
The black Milliput arrived and I reinforced a few thin areas inside the shell. Milliput is easy to work with and is tough stuff once cured. This may not be the proper way to strengthen the thin spots, but it was easy and I hope it will be effective. Will use the Milliput again to even out the Power Cell window and to fix a few cosmetic areas on the outside.
Around the Tube Clamp opening and L-brackets mount points...
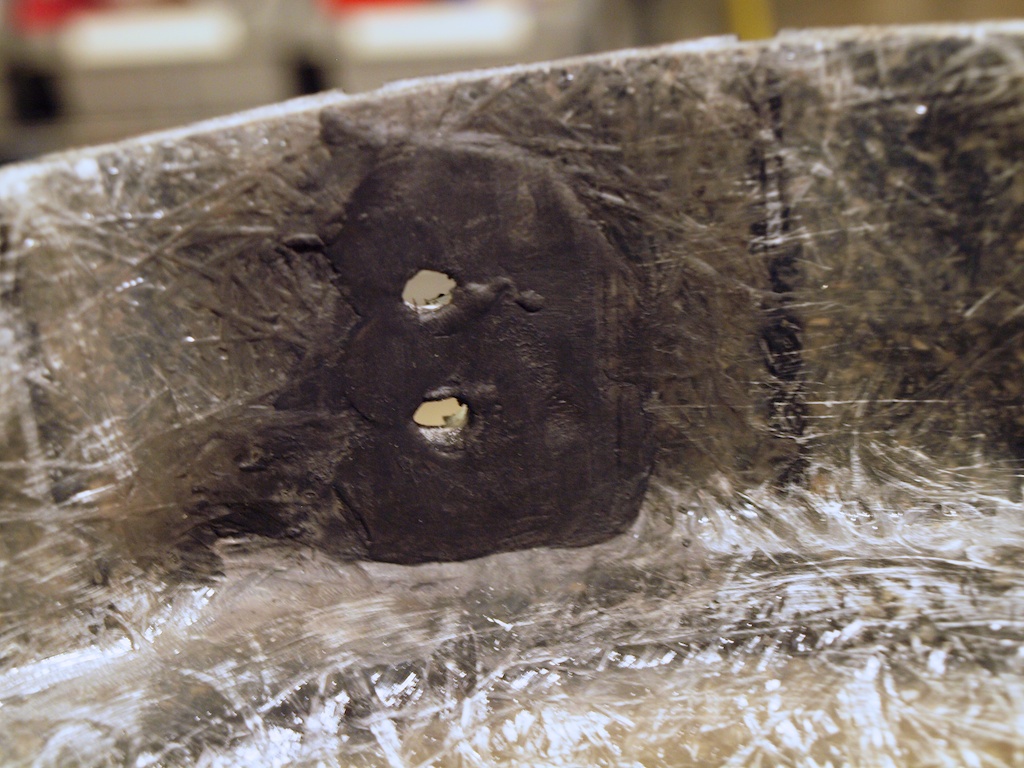
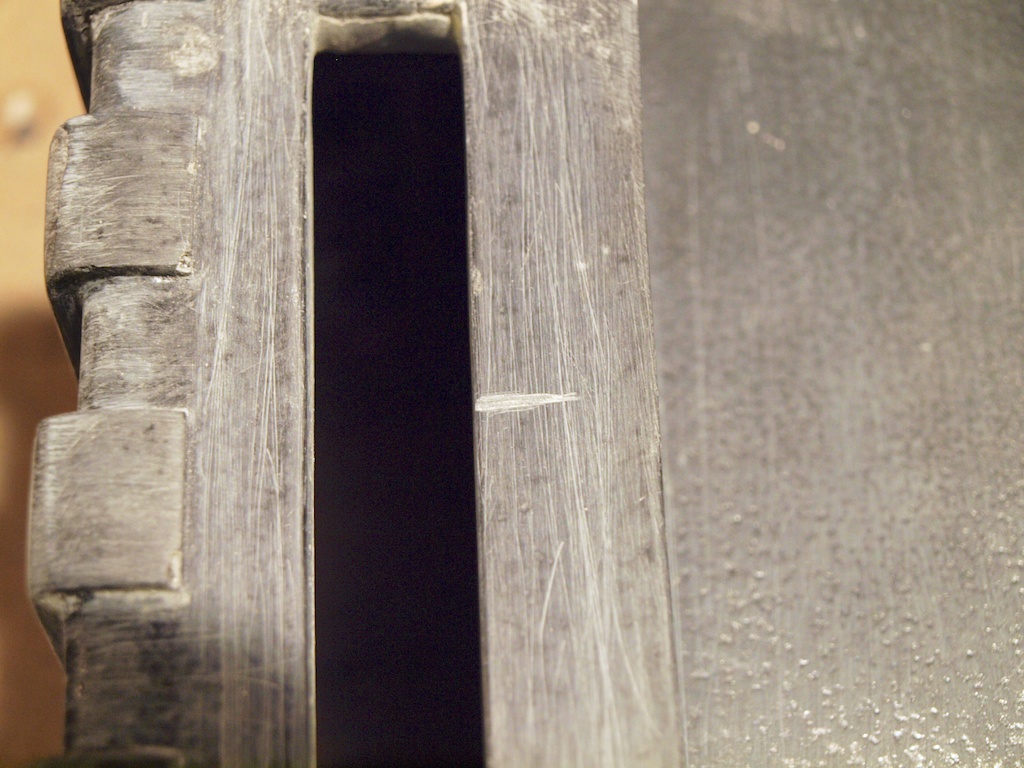
The Synchronous Generator where the tubes enter was very thin...
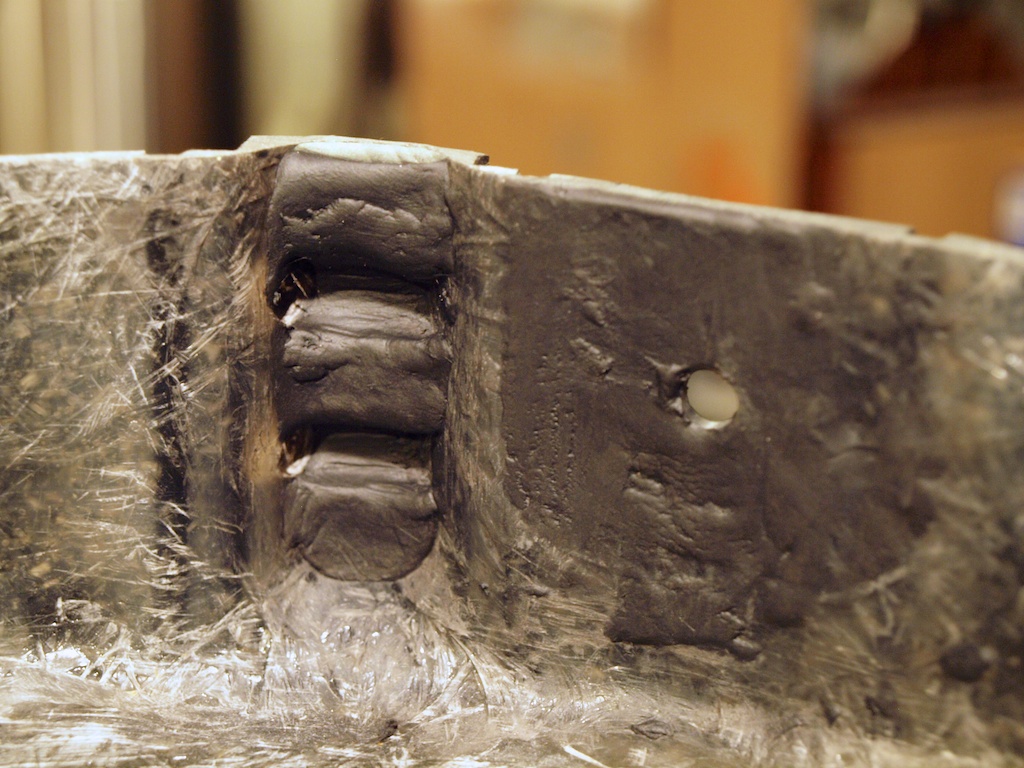
Additional reinforcement for the Injector mount under the Power Cell...
Re: Bishopdonmiguel's all-fired plain-vanilla pack build
Posted: August 15th, 2014, 8:45 pm
by bishopdonmiguel
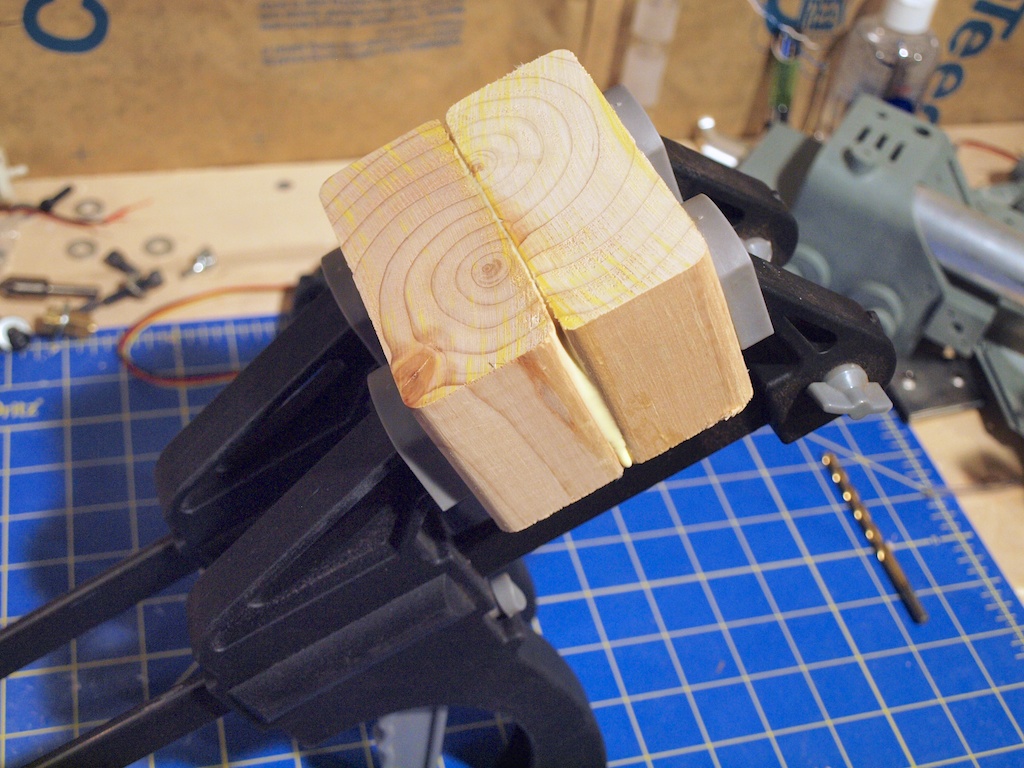
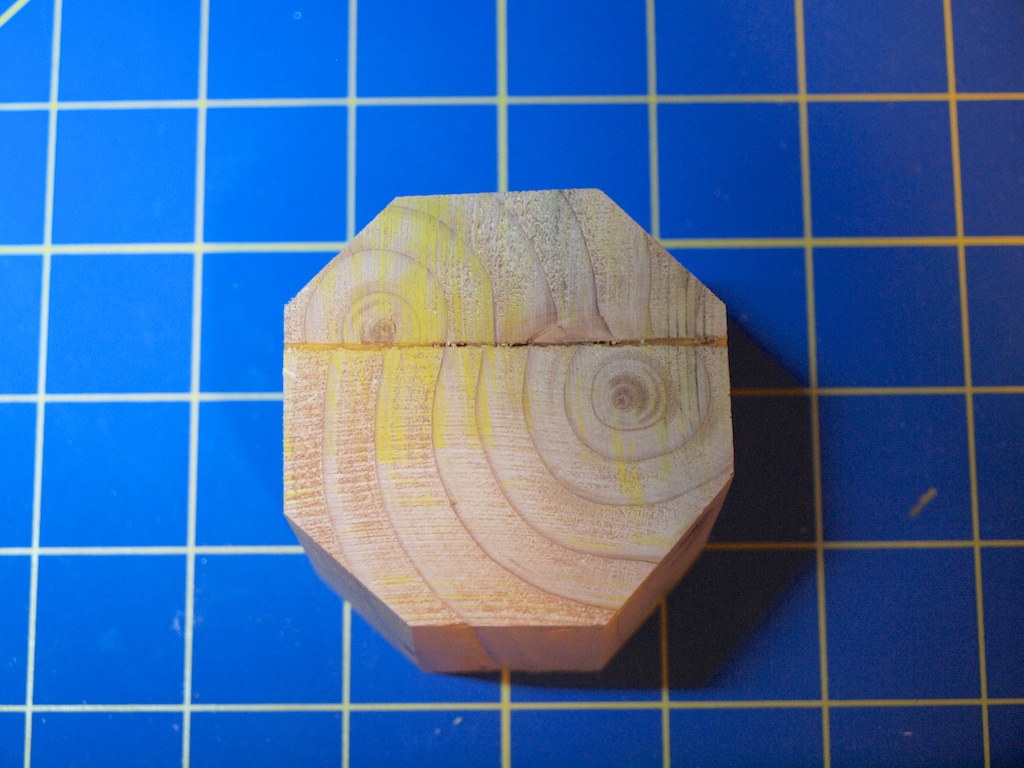
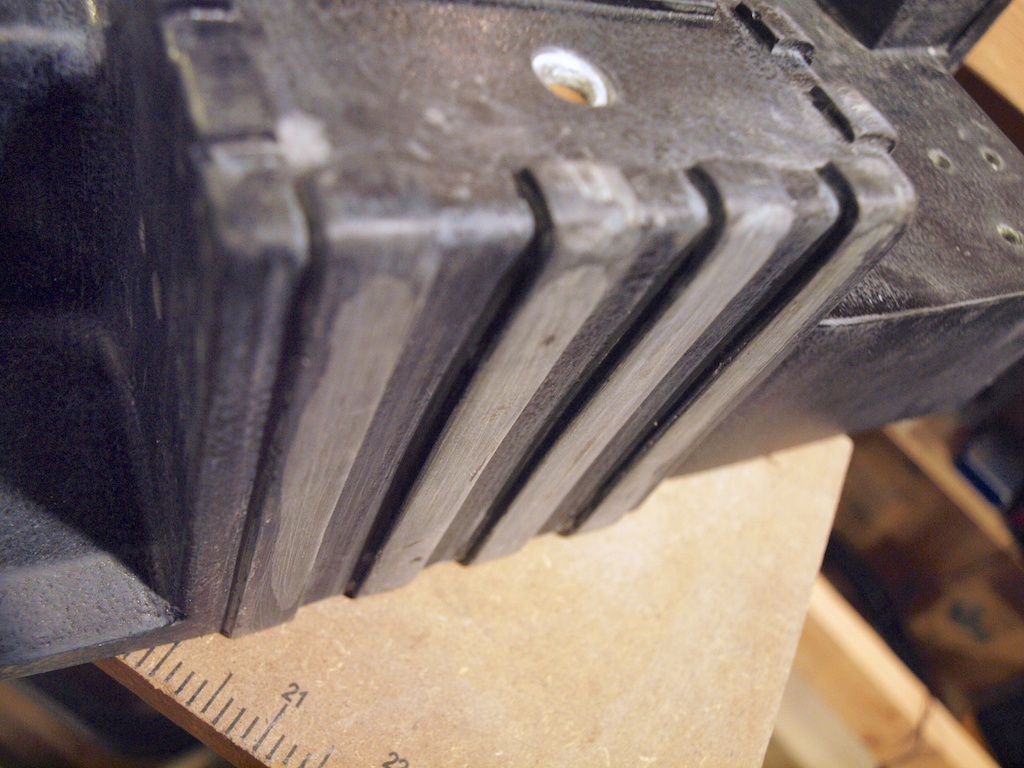
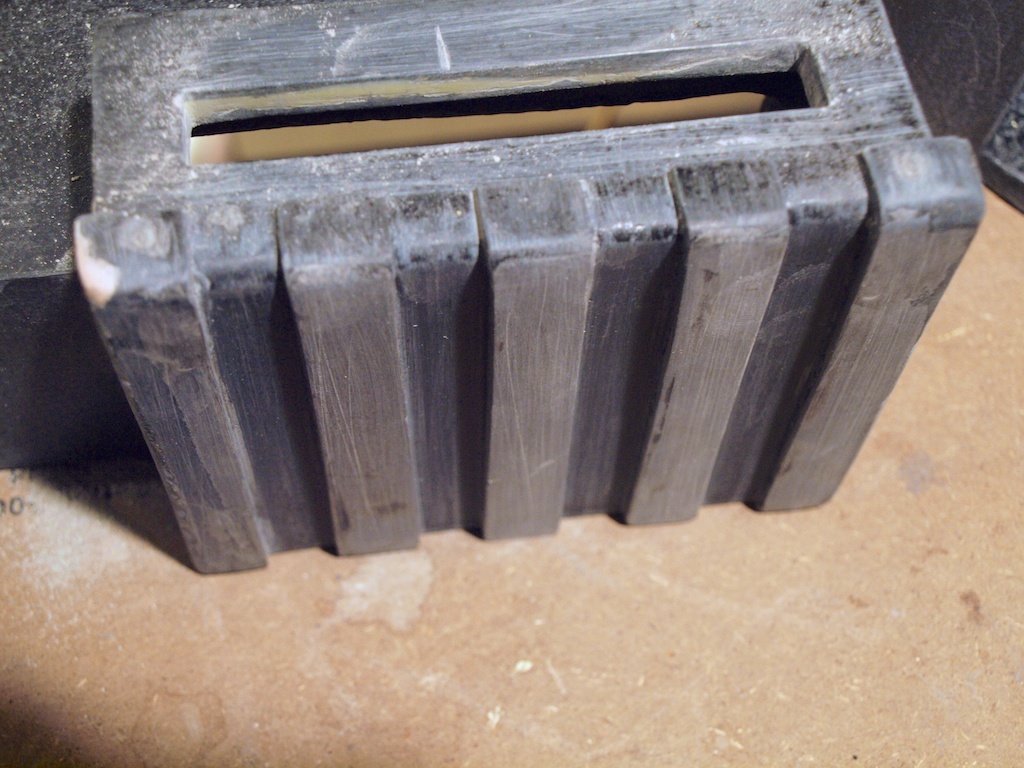
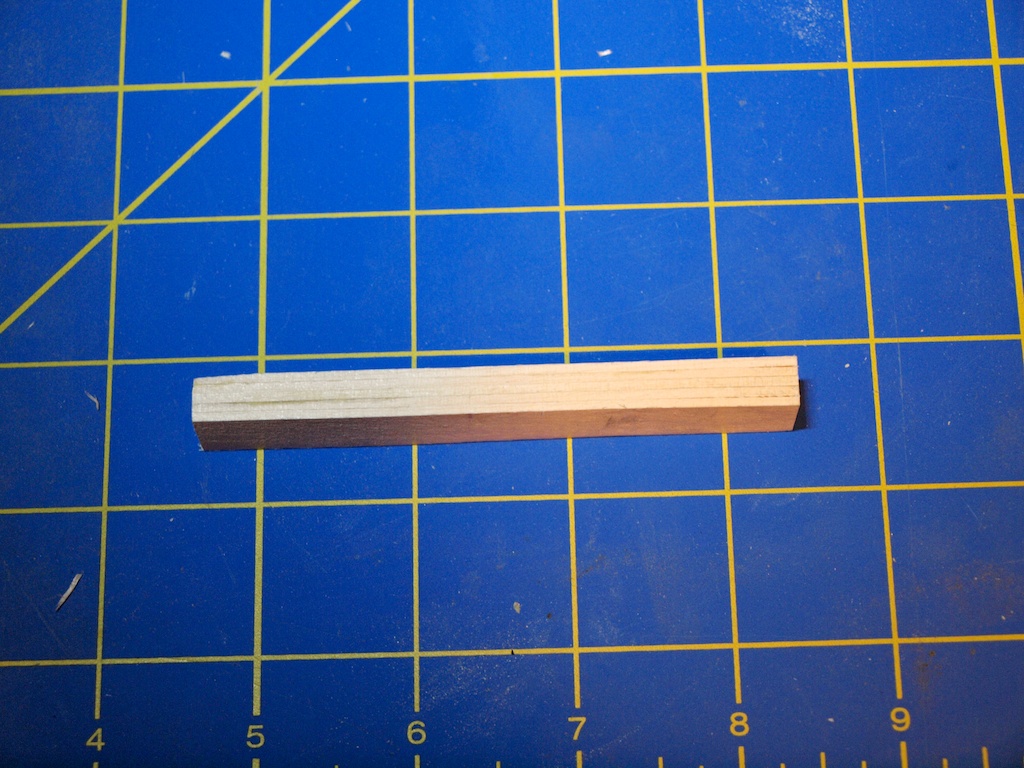
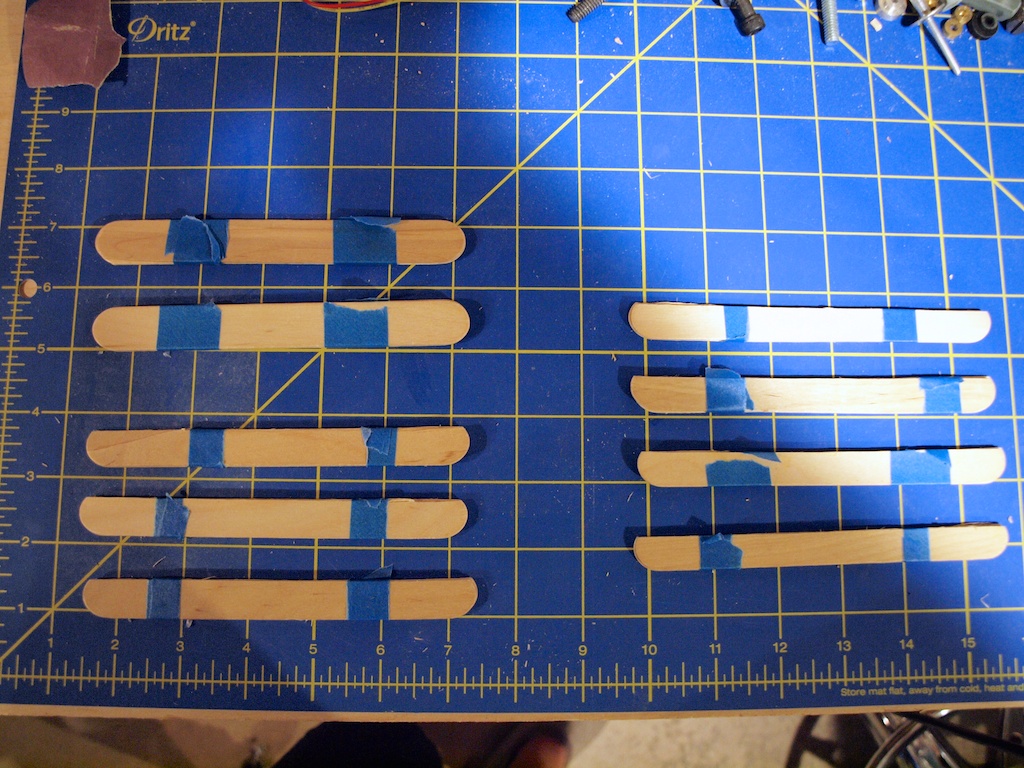
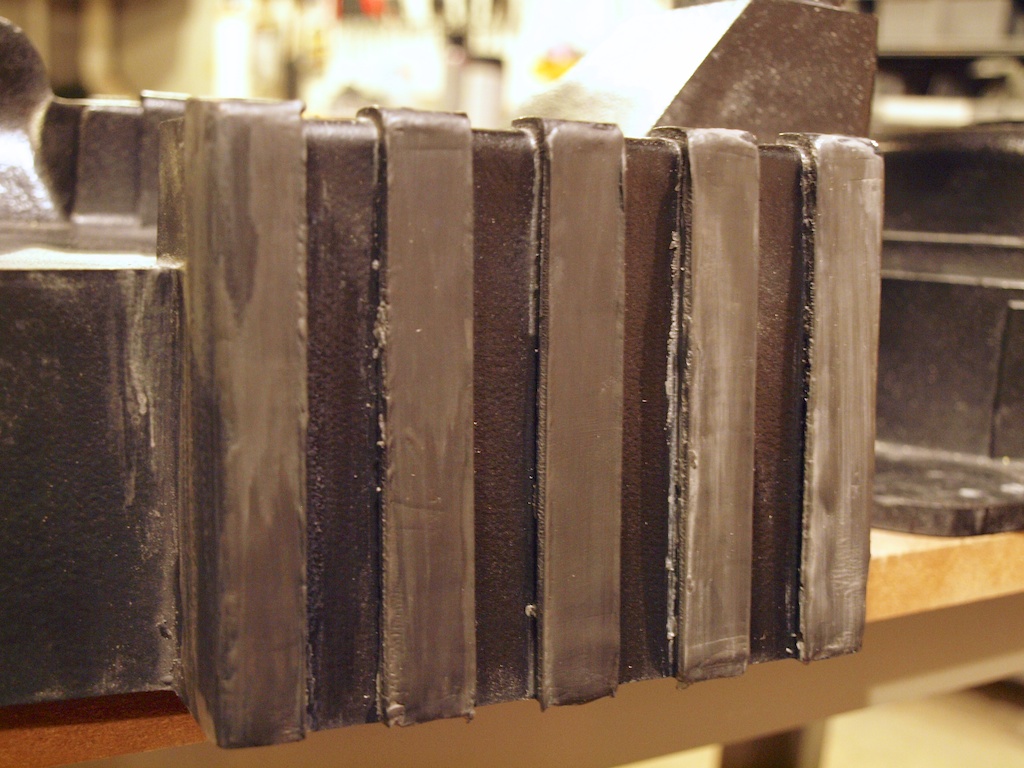
I have been very happy with the GBFans shell. It's a great piece and I highly recommend it. One cosmetic issue has been bothering me, however. The raised "fins" around the Power Cell, Crank Generator and Gun Mount all have a slight but noticeable concave dip. To fix this to my satisfaction, something which is completely unnecessary and me just being... well, just being me I suppose... I needed to build a few guides that will shape a Milliput topcoat. I fashioned these from the tree known as popsicle stick. Each is double thick and then sanded down to size...
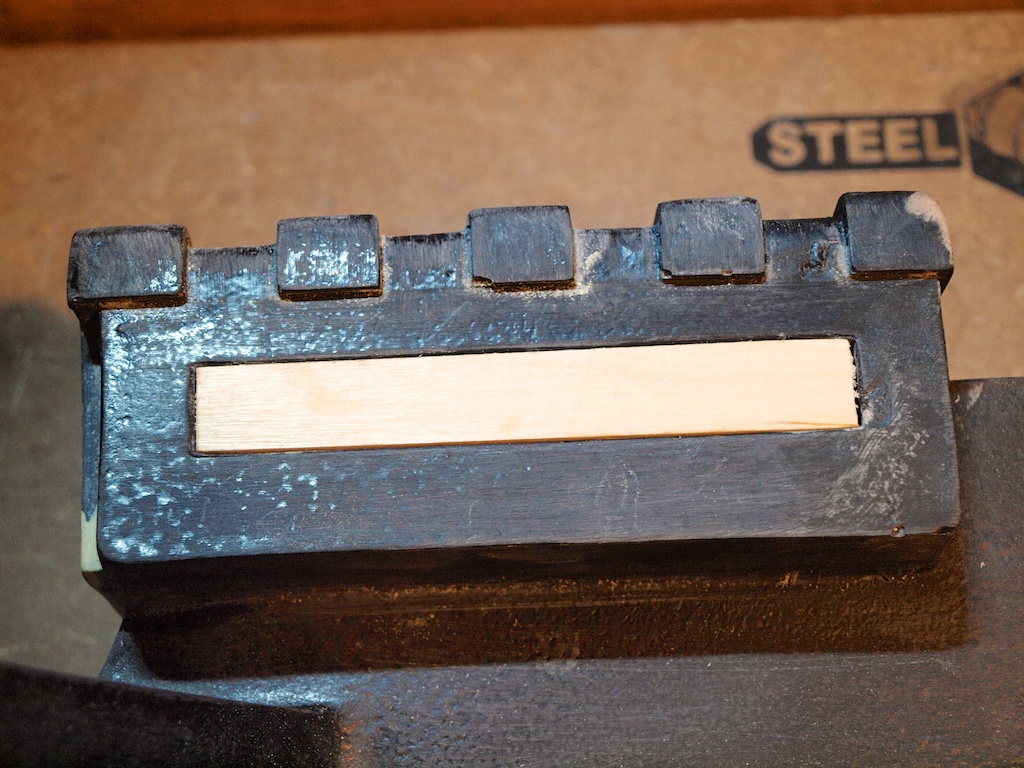
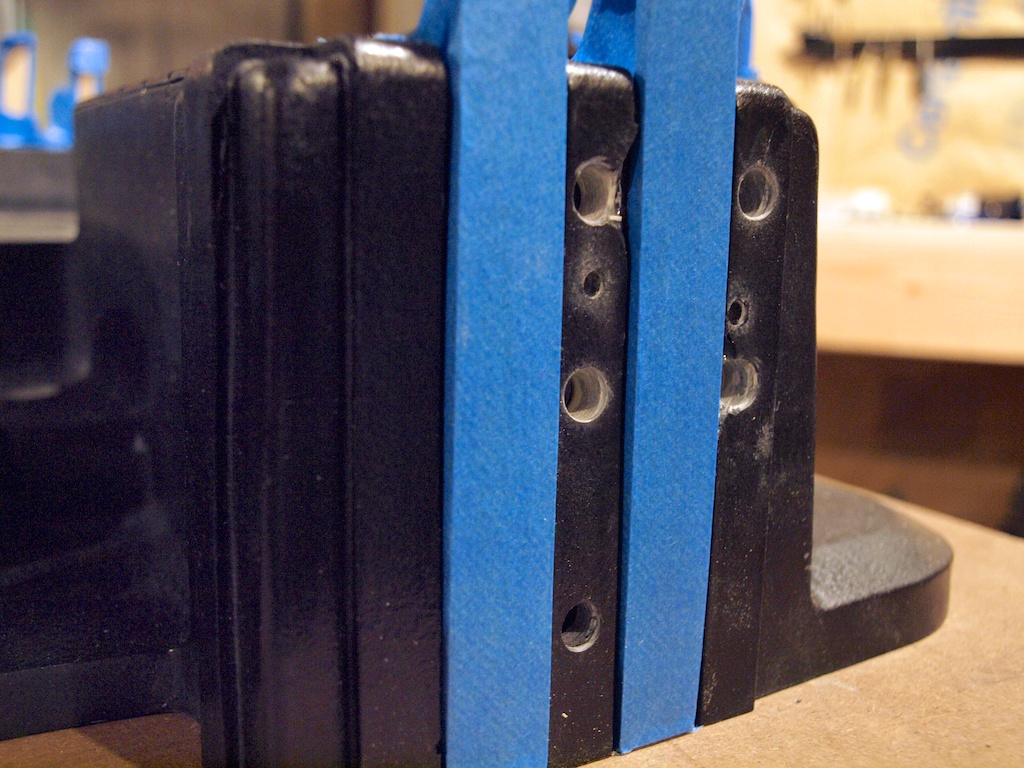
I wrapped & positioned the guides using painters tape so I could easily remove before the Milliput set...

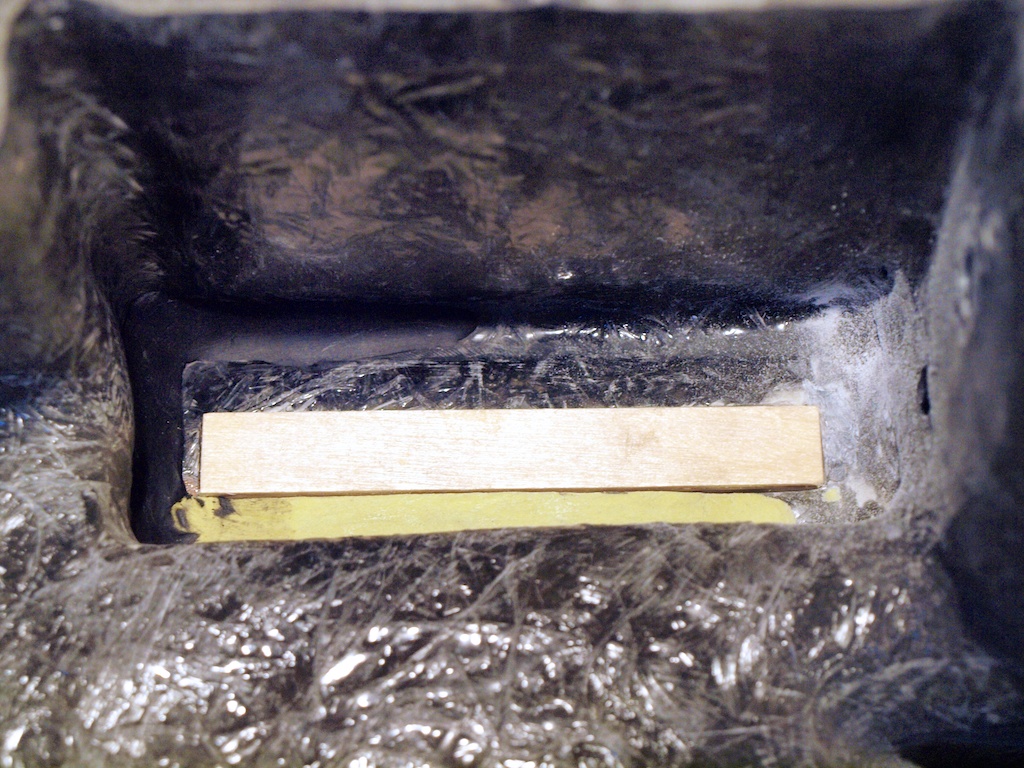
I worked the Milliput until it was reasonably smooth & flat. One trick with Milliput, a little water and a flat tool really help with final shaping. Another helpful tool... patience...
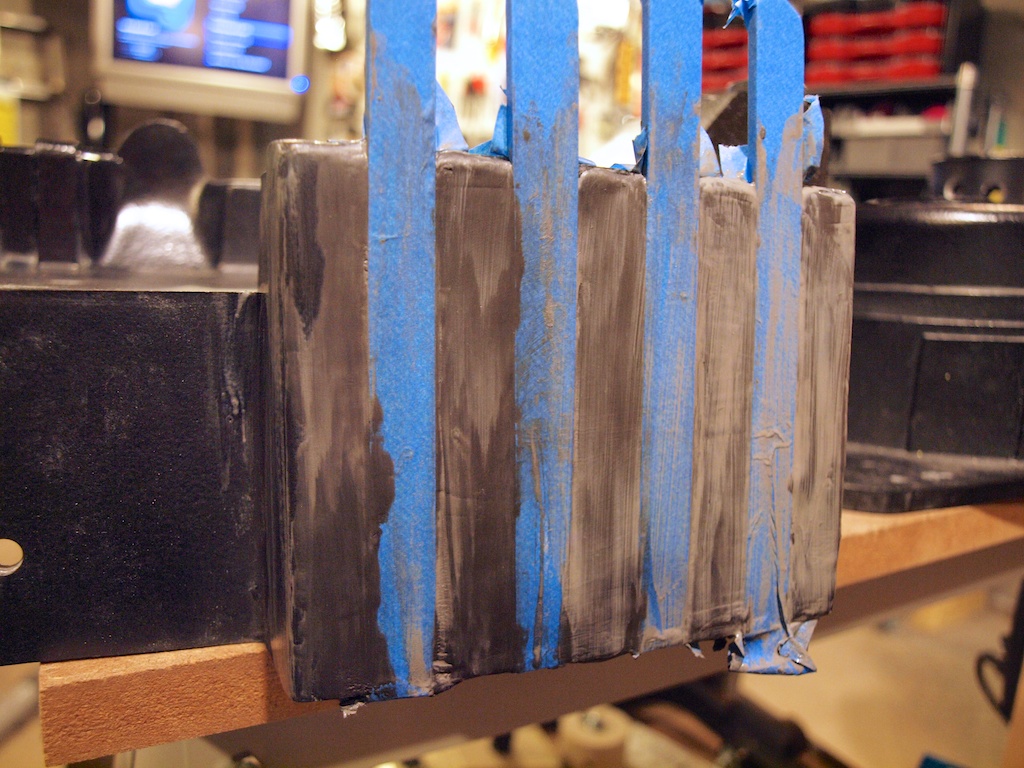
To remove the guides, a razor knife dipped in water easily breaks the bond. Once this cures overnight, will follow-up with sanding...
Re: Bishopdonmiguel's all-fired plain-vanilla pack build
Posted: August 15th, 2014, 9:39 pm
by 35FT_TWINKIE
Another fantastic idea. This build is shaping up to be a master class for the gbfans shell. Keep it up!
Re: Bishopdonmiguel's all-fired plain-vanilla pack build
Posted: August 17th, 2014, 6:07 pm
by bishopdonmiguel
35FT_TWINKIE wrote:Another fantastic idea. This build is shaping up to be a master class for the gbfans shell. Keep it up!
Thanks. I'm following a lot of others original ideas but trying to be open minded at each step. Hope I don't screw it all up!
Re: Bishopdonmiguel's all-fired plain-vanilla pack build
Posted: August 17th, 2014, 6:16 pm
by bishopdonmiguel
Re: Bishopdonmiguel's all-fired plain-vanilla pack build
Posted: August 17th, 2014, 6:28 pm
by PssdffJay
Looks good! Where were you when I was at this stage! Haha! I would have done that too, my fins chipped out a lot on the edges and had to do a lot of repair work to it.
Re: Bishopdonmiguel's all-fired plain-vanilla pack build
Posted: August 17th, 2014, 6:33 pm
by bishopdonmiguel
PssdffJay wrote:Looks good! Where were you when I was at this stage! Haha! I would have done that too, my fins chipped out a lot on the edges and had to do a lot of repair work to it.
Thanks, Jay. You are much younger and more energetic. I just can't keep up with the pace you and the other builders set!
Re: Bishopdonmiguel's all-fired plain-vanilla pack build
Posted: August 17th, 2014, 6:35 pm
by bishopdonmiguel
Re: Bishopdonmiguel's all-fired plain-vanilla pack build
Posted: August 17th, 2014, 7:13 pm
by bishopdonmiguel
Re: Bishopdonmiguel's all-fired plain-vanilla pack build
Posted: August 17th, 2014, 7:20 pm
by pyhasanon
Aw, man, that's pretty cool right there! Love the technique!
Re: Bishopdonmiguel's all-fired plain-vanilla pack build
Posted: August 17th, 2014, 7:37 pm
by bishopdonmiguel
pyhasanon wrote:Aw, man, that's pretty cool right there! Love the technique!
Thanks Phil. This is a fun stage in the build. Lots of opportunities to experiment & customize.
Re: Bishopdonmiguel's all-fired plain-vanilla pack build
Posted: August 18th, 2014, 4:49 am
by bishopdonmiguel
Re: Bishopdonmiguel's all-fired plain-vanilla pack build
Posted: August 18th, 2014, 5:08 am
by Hijacker
Looks great! So many notes to take for when I start on my pack shell.
Bishopdonmiguel's all-fired plain-vanilla pack build
Posted: August 18th, 2014, 9:26 am
by PssdffJay
What method are you going to use for the texture?
Something I forgot that I'm kicking myself for not doing is the holes in the cyclotron rings.
Re: Bishopdonmiguel's all-fired plain-vanilla pack build
Posted: August 18th, 2014, 1:59 pm
by bishopdonmiguel
Hijacker wrote:Looks great! So many notes to take for when I start on my pack shell.
Thanks! I know what you mean about taking notes. If you find an efficient method, let me know cause I seem to lose track of most of the notes I took. I keep saying to myself, "now I know I saw someone do this thingy but can't find the damn post now that I need it!"

Re: Bishopdonmiguel's all-fired plain-vanilla pack build
Posted: August 18th, 2014, 2:07 pm
by bishopdonmiguel
PssdffJay wrote:What method are you going to use for the texture?
Still undecided on texture. Hammered seems hit-and-miss. I'm not sure I trust the durability of the ceiling texture, really just wall paste in a spray can. I have another idea I am going to test shortly but it's unproven.
PssdffJay wrote:Something I forgot that I'm kicking myself for not doing is the holes in the cyclotron rings.
Not sure I noticed that before. Can you point me to a reference?
Re: Bishopdonmiguel's all-fired plain-vanilla pack build
Posted: August 18th, 2014, 2:54 pm
by PssdffJay
bishopdonmiguel wrote:PssdffJay wrote:Something I forgot that I'm kicking myself for not doing is the holes in the cyclotron rings.
Not sure I noticed that before. Can you point me to a reference?
Julz has it in his thread on page 3.
http://www.gbfans.com/community/viewtop ... 7&start=60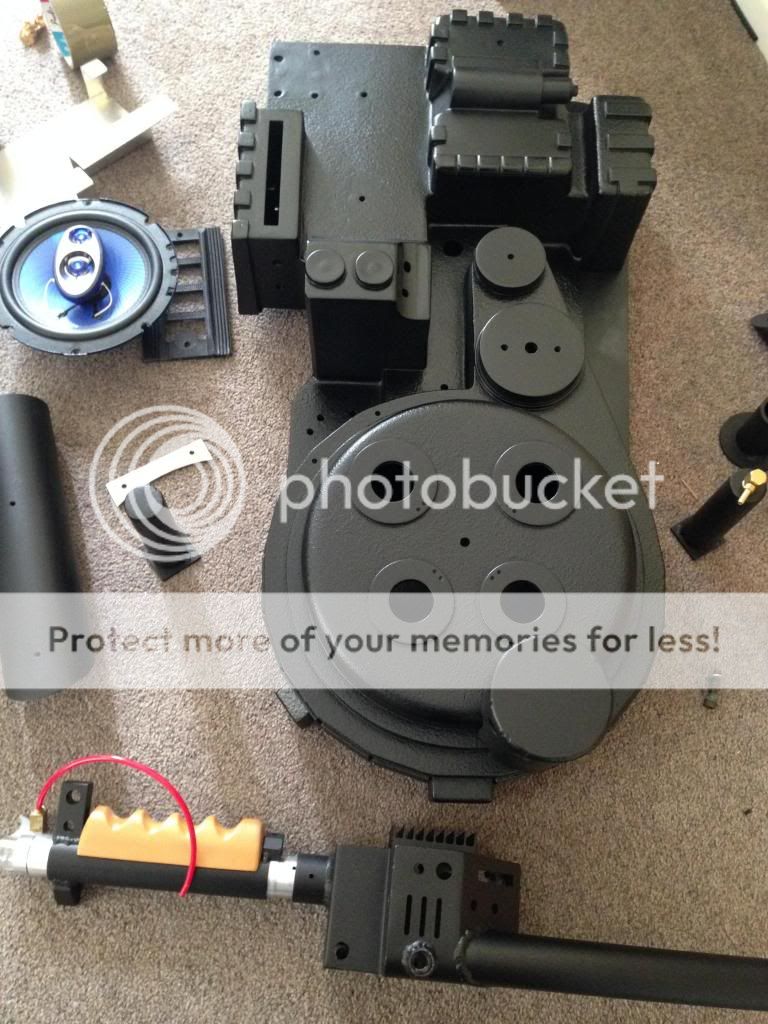
Letmebleed's build on page 2.
http://www.gbfans.com/community/viewtop ... 2&start=30
And one more thread.
http://www.gbfans.com/community/viewtop ... =2&t=36515 I know I've seen more builds with them and I'm smacking my forehead for forgetting to put them on mine.
Re: Bishopdonmiguel's all-fired plain-vanilla pack build
Posted: August 18th, 2014, 3:06 pm
by bishopdonmiguel
PssdffJay wrote:I know I've seen more builds with them and I'm smacking my forehead for forgetting to put them on mine.
Well hot damn. Never seen that before. Those are going on for sure. If for no other reason than to further delay my texture decision!
Also noticed something else I had not seen previously. A hole in the bottom of the PPD.
Re: Bishopdonmiguel's all-fired plain-vanilla pack build
Posted: August 18th, 2014, 5:30 pm
by PssdffJay
If you want, look at Krenzy's Spengler pack. That'll drive you nuts with all the minute details he put in.
Re: Bishopdonmiguel's all-fired plain-vanilla pack build
Posted: August 19th, 2014, 9:17 am
by bishopdonmiguel
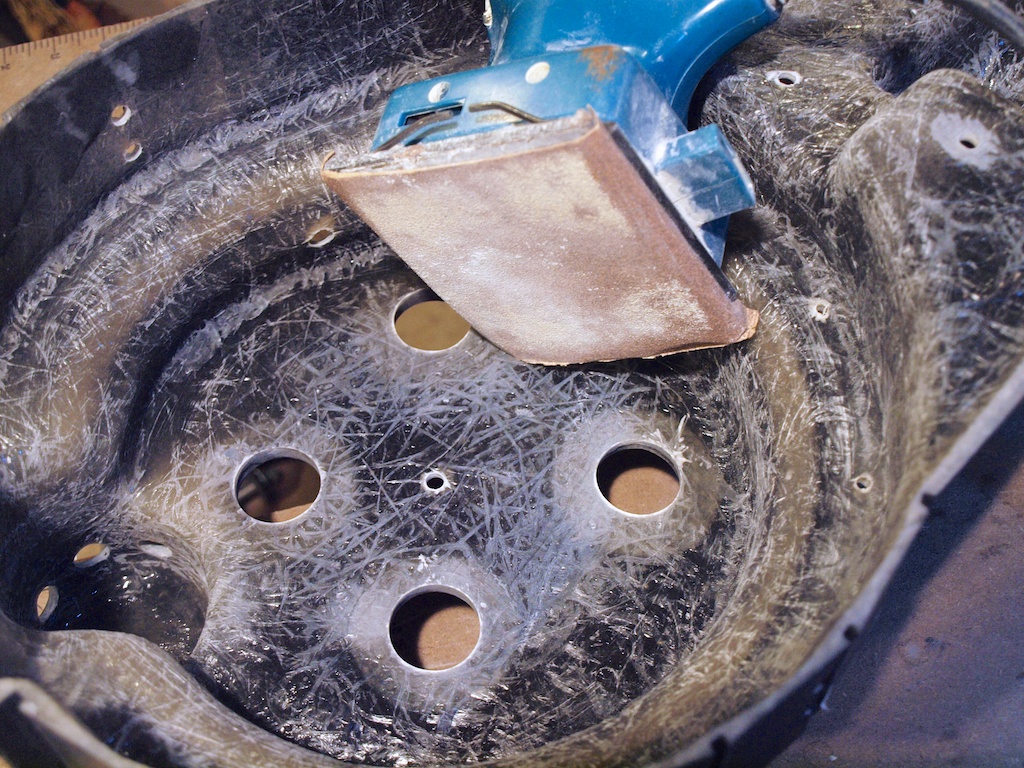
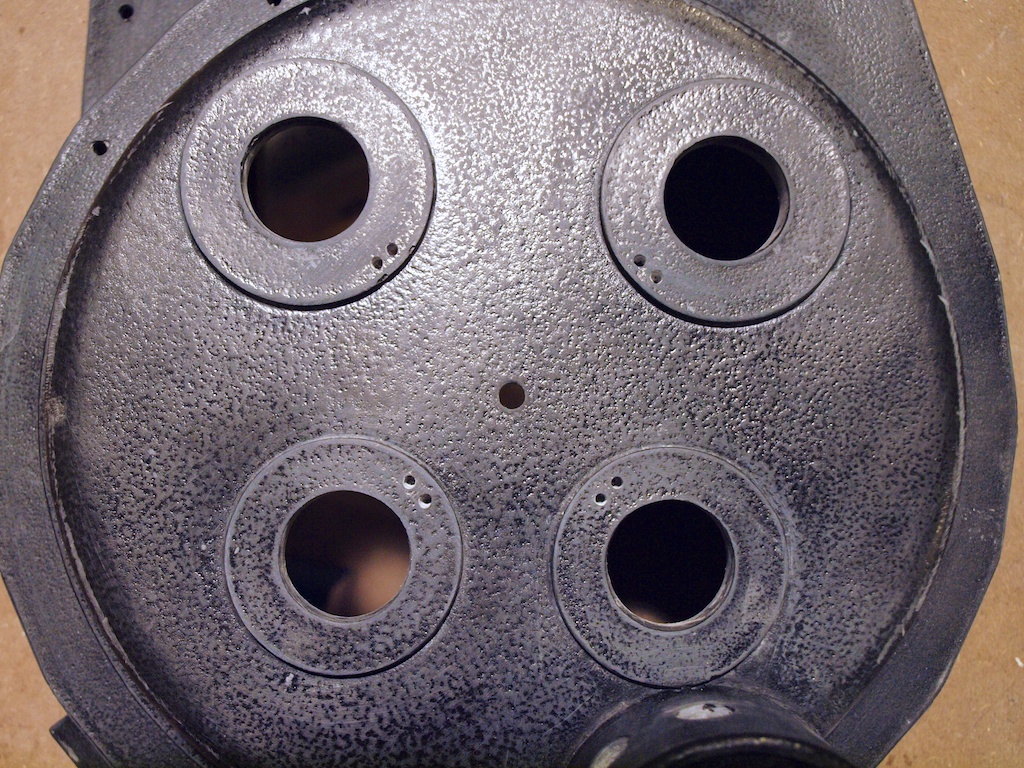
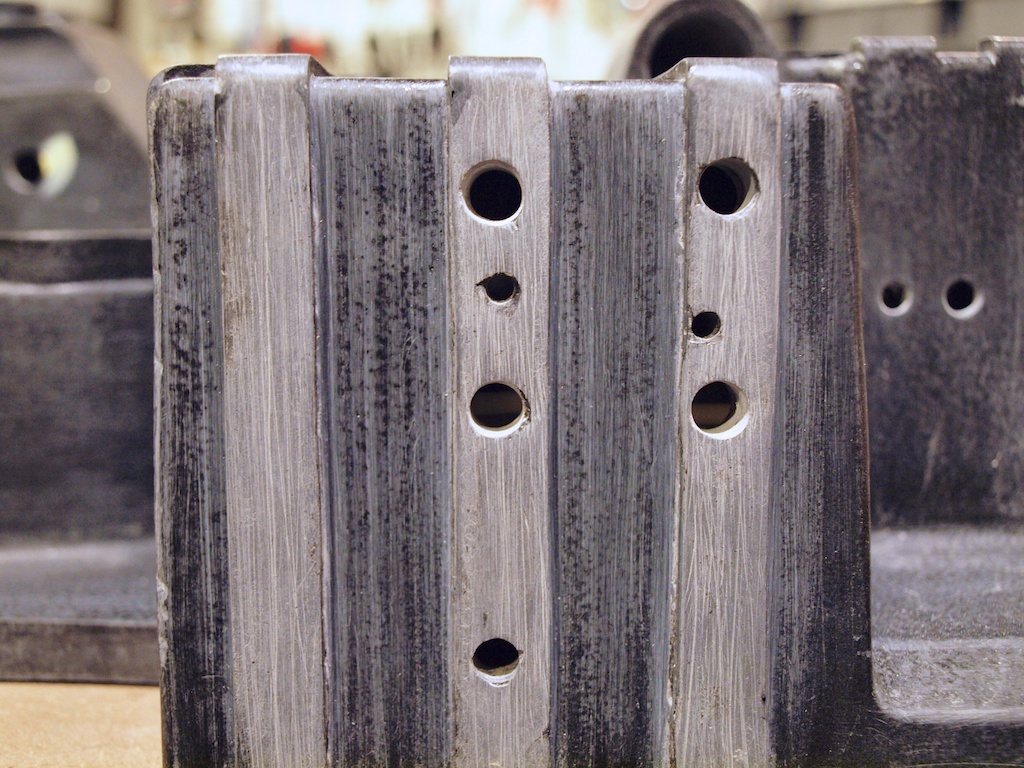
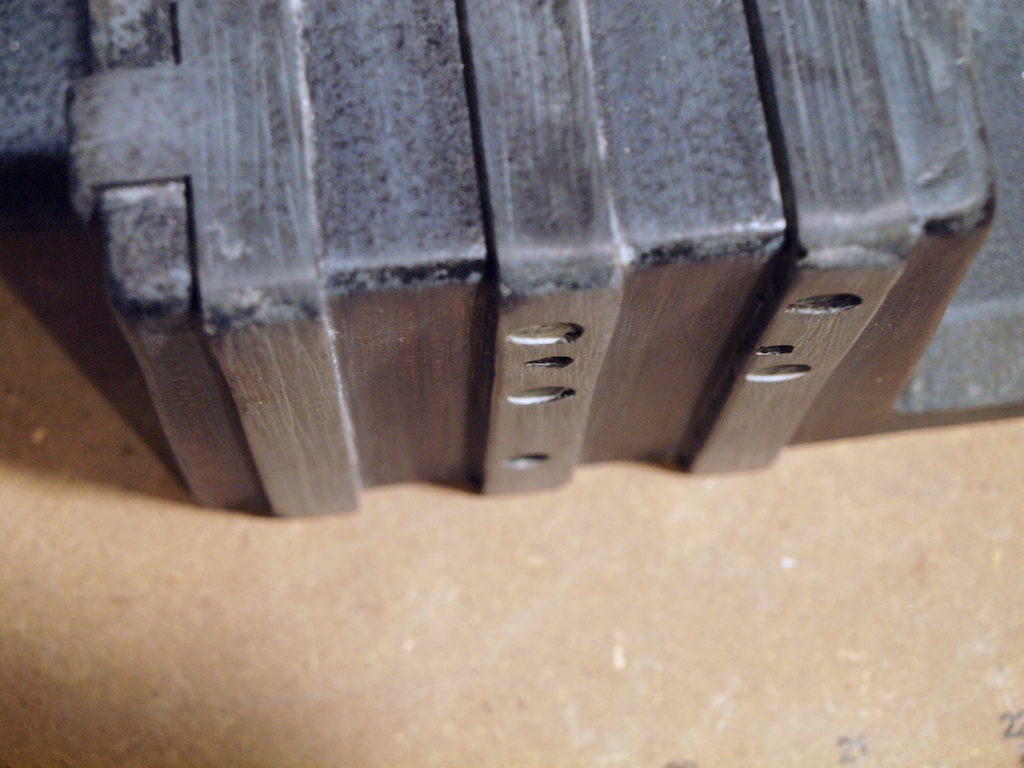
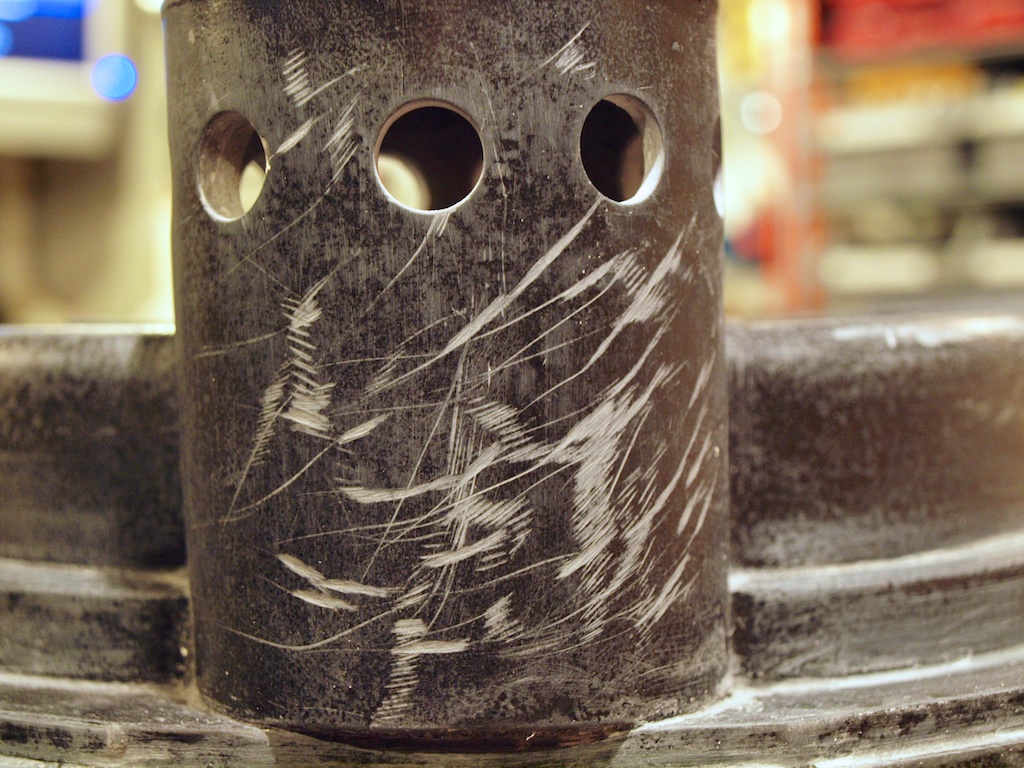
Big thanks to Jay for helping me out here by recommending that I drill the Cyclotron holes. First, I cleaned up the inside using a power sander to ensure the Cyclotron lenses would sit flush. For the holes, I wasn't sure of the accepted measurements and I ended up just drilling freestyle after drawing a few grid lines. Not perfect but I am pleased.
These are just under 1/8-inch. Do you think these look okay or should I go a tad larger?