Page 2 of 18
Re: GohstTarp'sProtonPackBuild
Posted: November 17th, 2014, 6:30 pm
by GohstTarp
After experimenting with some practice materials, I was able to get all the L-brackets attached to the motherboard using large-head rivets. This was all done using
Ejgunth87's excellent
'L Bracket Mounting Set' and, of course,
kind2311's fantastic shell/motherboard mounting
tutorial. Also, a big
THANK YOU to all of you who wisely told me to keep the brackets in their proven locations

Here is a shot of the "top"...
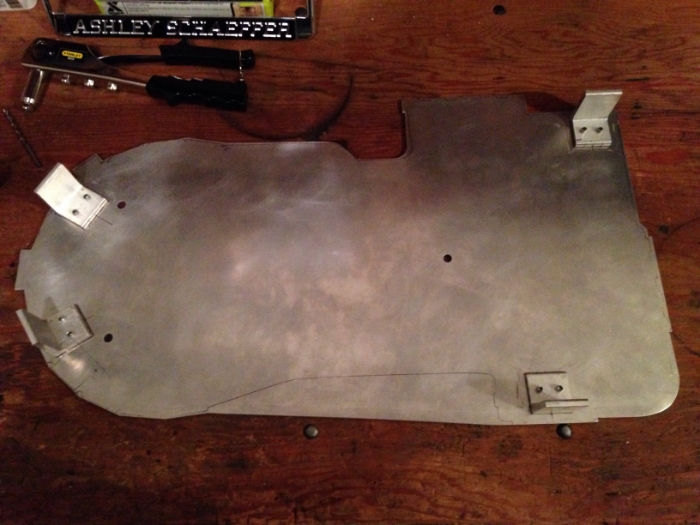
You can see that I placed the bracket that will be near the wire loom clamp in its ideal position, and will just modify the clamp to fit.
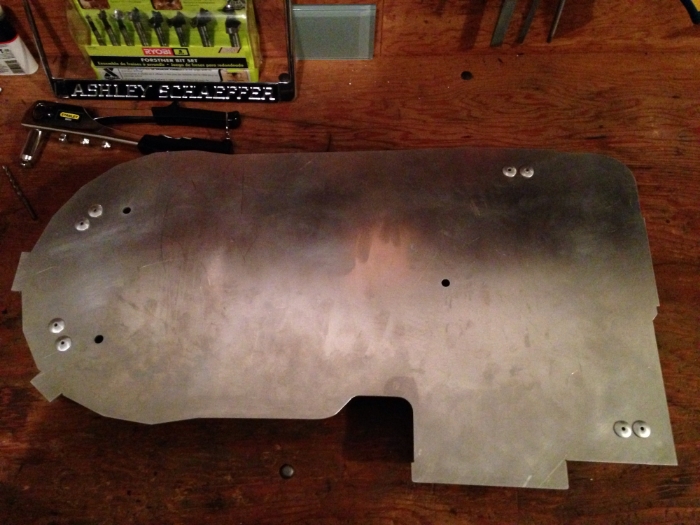
Here is a shot of the "bottom", showing the lovely large-head rivets...
The shells has a nice, snug fit, so the next step will be marking the 4 holes to drill and tap. I believe I will have to be most careful with the hole placed near the gun mount, since I don't want to two to interfere. Now, I'm off to look at hold placement reference photos!
Re: GohstTarp'sProtonPackBuild
Posted: November 17th, 2014, 6:36 pm
by Grimmy GB
EXCELLENT! This has been my favorite progress while building my
pack. You know what it means? You can wear your
pack once you tap the holes

Re: GohstTarp'sProtonPackBuild
Posted: November 18th, 2014, 5:03 am
by bishopdonmiguel
Looks great. Can't wait to see that shell attached!
Carefully evaluate your gun mount attachment plan. I hastily mounted mine and then later decided to add a reinforcement plate. After I did that, the L-bracket interfered and I had to cut 1/4-inch off the top. I did double up my L-bracket thread walls and that added a bit of height... certainly contributed to my problem.
Re: GohstTarp'sProtonPackBuild
Posted: January 18th, 2015, 1:05 pm
by GohstTarp
Grimmy GB wrote:EXCELLENT! This has been my favorite progress while building my pack. You know what it means? You can wear your pack once you tap the holes
Thanks, Grim! Really looking forward to getting to that point. So close...
Re: GohstTarp'sProtonPackBuild
Posted: January 18th, 2015, 1:13 pm
by GohstTarp
bishopdonmiguel wrote:Looks great. Can't wait to see that shell attached!.
Thank you, Bishop! I'll be adding an update with pics here very soon
bishopdonmiguel wrote:Carefully evaluate your gun mount attachment plan. I hastily mounted mine and then later decided to add a reinforcement plate. After I did that, the L-bracket interfered and I had to cut 1/4-inch off the top. I did double up my L-bracket thread walls and that added a bit of height... certainly contributed to my problem.
Appreciate the heads up. I think I'm in good shape with my bracket, but my vhook gun mount is by CPU64 and didn't come with a reinforcment plate... so I might have to make one like you did. Seems like it would be worth the effort.
Re: GohstTarp'sProtonPackBuild
Posted: January 18th, 2015, 2:13 pm
by GohstTarp
Happy New Year, everyone! I decided it was time to get back to my
build after a long holiday break. Too much longer and I was worried I would lose some momentum...
Anyway, let's get back to it!
Since, I was a bit nervous to drill and tap the shell and brackets, I brought some (1 inch?) aluminum bar from HD to practice with. I also used the material to practice riveting and ended up with these two "demo" pieces...
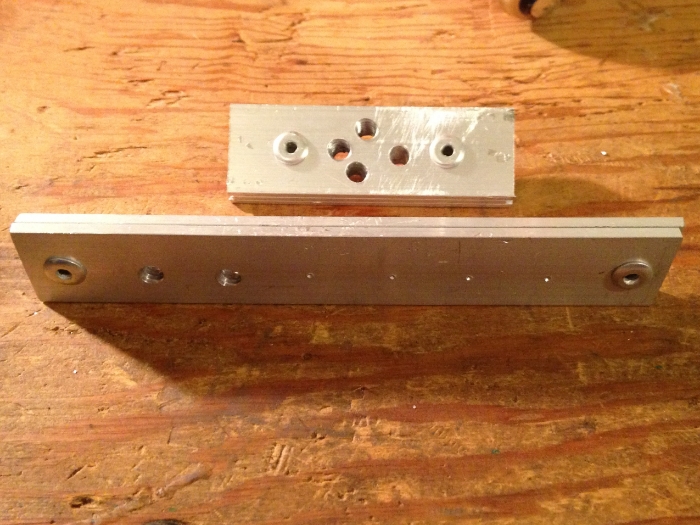
I highly recommend trying your skills on practice material when you are trying something new. Definitely makes the actual work on the
pack more fun and less stressful

I basically just stuck to the advice in kind2311's shell/motherboard mounting tutorial, drilling and tapping both the shell and motherboard together. Using the "drill in reverse" technique worked great for getting past the gel coat. Once I clearly got to the fiberglass layer, I drilled "normally" and slowly. The result was 4 clean holes in need of tapping. I found using a little 3-in-1 oil really helped the tap turn easier. After ensuring the newly tapped holes were clear of debris, I had this...
I'm very happy with the placement and feel a lot more confident with working with the shell. Looking forward to the next step - mounting the LC-1 Alice frame!
Re: GohstTarp'sProtonPackBuild
Posted: January 18th, 2015, 3:39 pm
by bishopdonmiguel
The most challenging step is now behind you. Nice work.
Re: GohstTarp'sProtonPackBuild
Posted: January 18th, 2015, 6:25 pm
by Grimmy GB
So good to see you back, bro! Nice work on the mount job. Looks spot on.
Re: GohstTarp'sProtonPackBuild
Posted: January 19th, 2015, 2:25 am
by Venkman's Swagger
Well done buddy. Looks great
Re: GohstTarp'sProtonPackBuild
Posted: January 22nd, 2015, 10:10 pm
by GohstTarp
bishopdonmiguel wrote:The most challenging step is now behind you. Nice work.
Thanks, Bish. I'll do my best to not make things more difficult than they need be

Re: GohstTarp'sProtonPackBuild
Posted: January 22nd, 2015, 10:12 pm
by GohstTarp
Grimmy GB wrote:So good to see you back, bro! Nice work on the mount job. Looks spot on.
Venkman's Swagger wrote:Well done buddy. Looks great
Thank you, both! It's great to be back.
Re: GohstTarp'sProtonPackBuild
Posted: January 22nd, 2015, 10:35 pm
by GohstTarp
I've got most everything figured out for attaching the motherboard to the ALICE frame and drew a little diagram (based on an aluminum spacer version
here)...

As long as that is correct, then the only other things I need to figure out is...
* the length of the 1/4-20 philips round head bolt
* size of the washer
Any recommendations there? For the bolt, I was thinking 1.5 or 2in. Not so sure about the washers.
I didn't draw a diagram for the ALICE vertical bar mount point, the only differences being a hole needs drilling at the proper point and a half-moon spacer is used.
Looking forward to wearing it soon and fear I'm already making things more complicated then they need to be.. LOL
Re: GohstTarp'sProtonPackBuild
Posted: January 23rd, 2015, 6:26 am
by Grimmy GB
I bought the 2" bolts and there's about 3/4" left over for thread bite. And for washers, I bought the 5/8" outer diameter. They are the most common at The Home Depot.
Re: GohstTarp'sProtonPackBuild
Posted: January 25th, 2015, 1:48 pm
by GohstTarp
Grimmy GB wrote:I bought the 2" bolts and there's about 3/4" left over for thread bite. And for washers, I bought the 5/8" outer diameter. They are the most common at The Home Depot.
Thanks, Grim! Gonna try to make it there today to pick some up.
Re: GohstTarp'sProtonPackBuild
Posted: January 27th, 2015, 6:21 pm
by GohstTarp
I was able to get to HD and pick up the hardware based on my diagram and Grimmy's suggestions. After trying everything out, I thought I might have something wrong. I expected the head of the bolt to be larger, like the carriage bolts some people have used. So I did a little more research and re-discovered a couple of excellent posts by
Julz concerning this topic...
http://www.gbfans.com/community/viewtop ... 0#p4786838http://www.gbfans.com/community/viewtop ... 0#p4783805 Thanks a lot,
Julz, for figuring out all this GB1 spacer stuff and sharing the information is such a clear and clean manner!
Now that I've properly researched the topic (what a concept!), I was really ready to tackle this. Here is what I used to attach the vintage LC-1 ALICE frame to the GBfans motherboard...
3x 2" 1/4-20 round head philips bolts/screws (Home Depot)
5x 5/8" OD, 1/4" ID washers (Home Depot)
3x 1/4" wingnuts or 1/4" nylon lock nuts (Home Depot)
GB1 rubber spacers (
Nick-A-Tron)
To find the spot to drill the top/third mounting hole in the vertical ALICE frame bar, I bolted the motherboard directly (no spacers) to the frame using the two bottom slots. Then I marked the spot to drill using the center of the pre-drilled hole in the motherboard. After drilling the 1/4" hole, I starting assembling everything.
Bottom two slots... bolt --> washer --> alice frame slot --> rectangular rubber spacer --> motherboard --> washer --> wing nut
Top connection... bolt --> alice frame vertical bar --> half-moon rubber spacer --> motherboard --> washer --> wing nut
Now that I've way over-explained that, here are some pictures of the results...
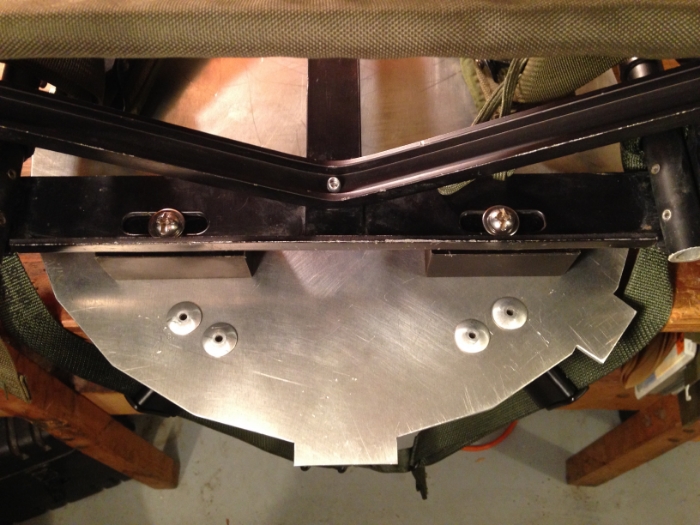 Bottom two connection points
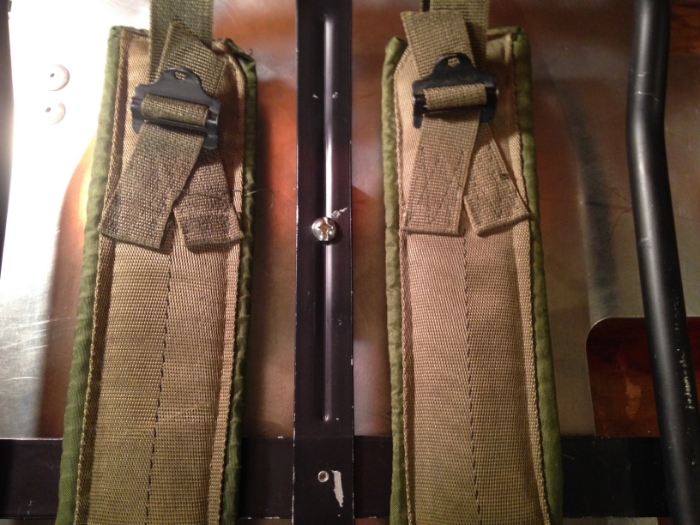 Top connection point
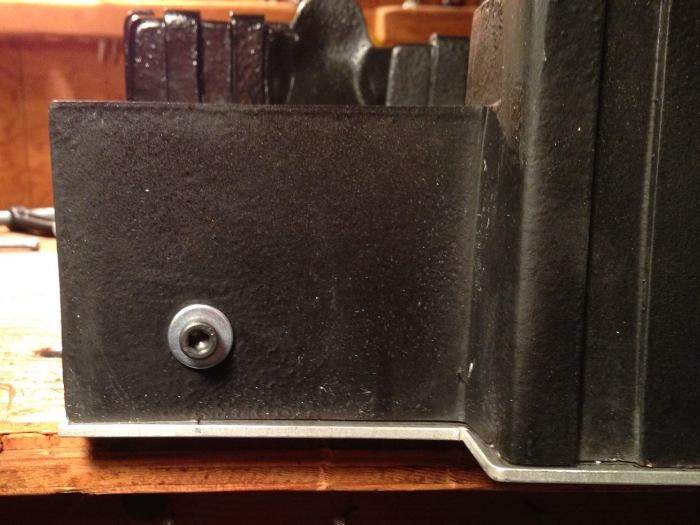
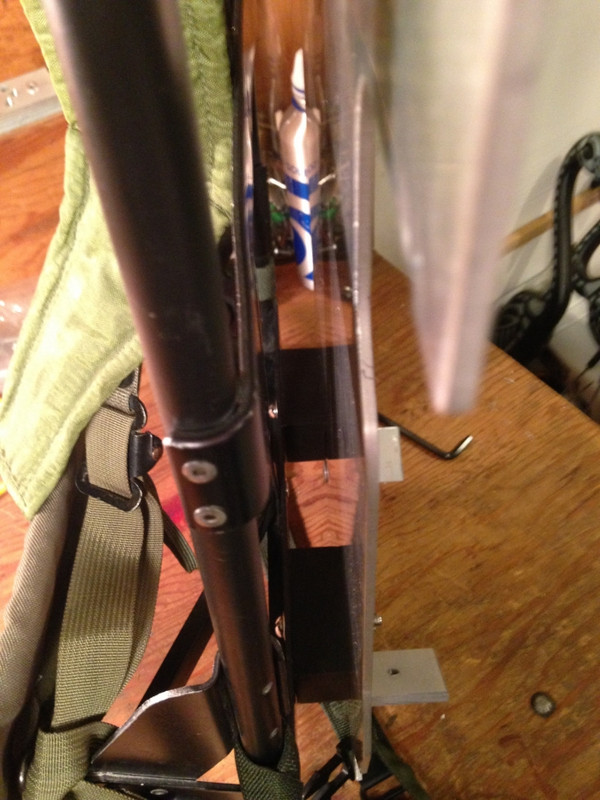 Side view - Bottom two connection points
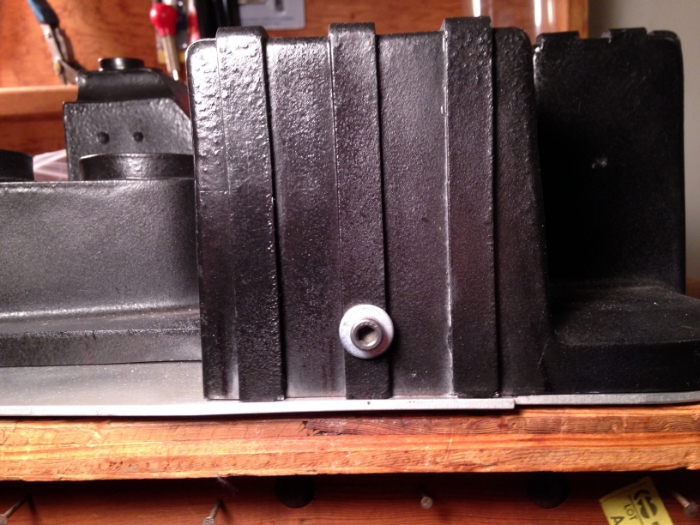
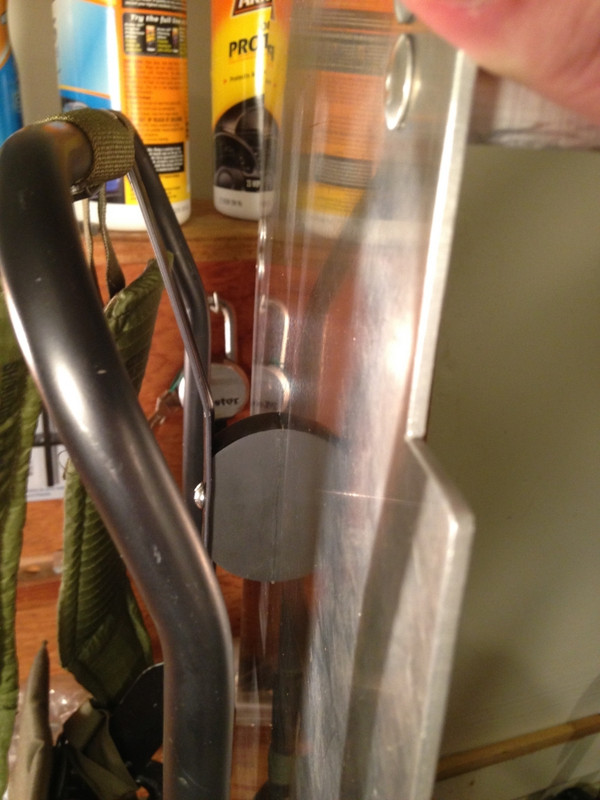 Side view - Top connection point
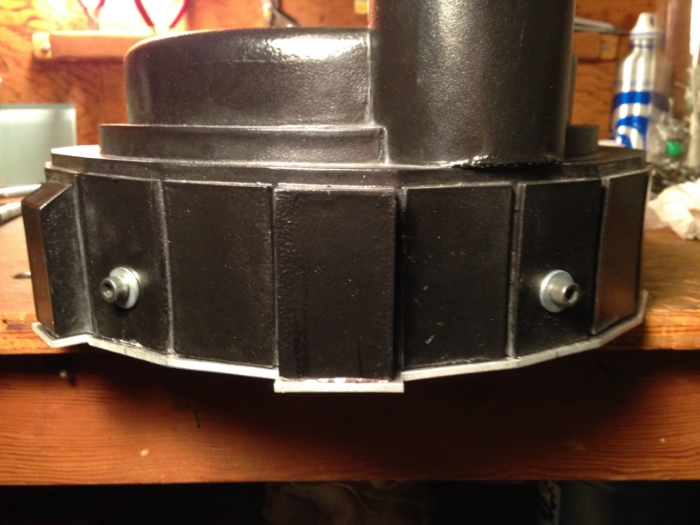
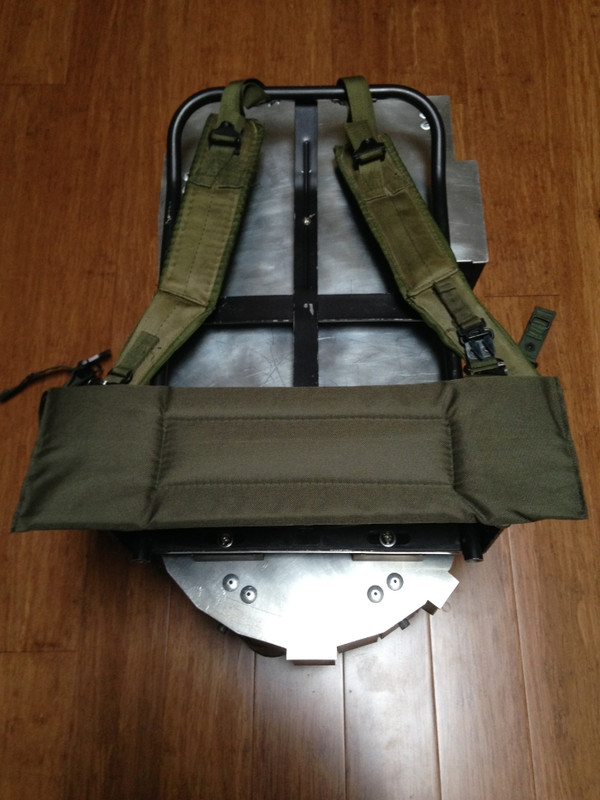 Back of pack with shell attached
 (ignore the obscenely large LC-2 type kidney pad... I plan to replace it)
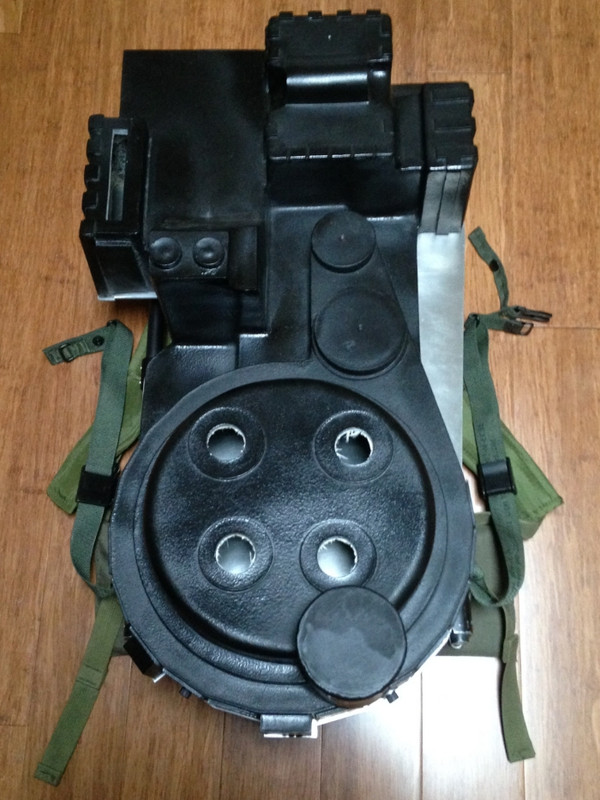 Front of pack with shell attached
 And of course, now that I've reached this milestone...
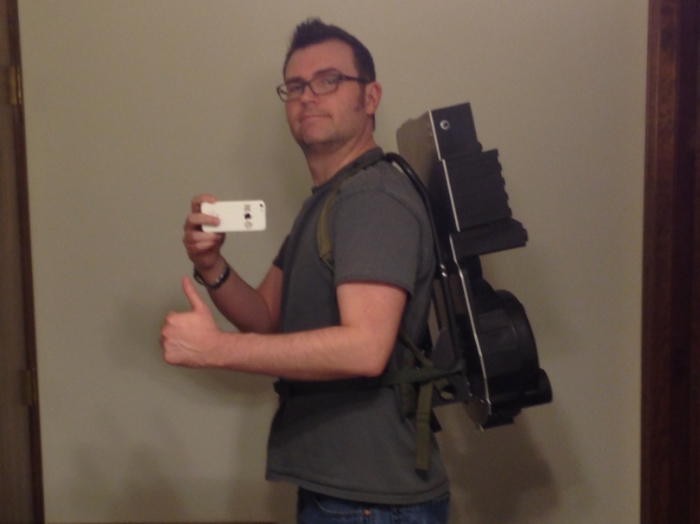 HAPPY DAY!!!
 I'm considering giving the LC-1 a fresh coat of flat black, so I haven't added the pipe insulation and tape to the top of the frame yet.
For my next step, I'm thinking I will install the Wire Loop Clamp that I fussed about so much in the beginning of this thread. Lots of good example of installing the clamp in various
build threads, so I better start re-reading them now
Re: GohstTarp'sProtonPackBuild
Posted: January 27th, 2015, 6:24 pm
by Grimmy GB
That's a beautiful thing!
Re: GohstTarp'sProtonPackBuild
Posted: January 27th, 2015, 6:58 pm
by bishopdonmiguel
Over-explaining is always appreciated. Everything looks fantastic. I'd wager you walked around with the pack on for 30 minutes grinning ear-to-ear... or am I the only one who did that?
Re: GohstTarp'sProtonPackBuild
Posted: January 27th, 2015, 8:40 pm
by GohstTarp
Grimmy GB wrote:That's a beautiful thing!
Thanks! And the
ProtonPack ain't too bad either.
Re: GohstTarp'sProtonPackBuild
Posted: January 27th, 2015, 9:22 pm
by GohstTarp
bishopdonmiguel wrote:Over-explaining is always appreciated.
I try to shed light on the areas that were mysterious or unclear to me at the various stages of the project. The process of turning those areas into something that is fully understood is a rewarding one.
bishopdonmiguel wrote:Everything looks fantastic. I'd wager you walked around with the pack on for 30 minutes grinning ear-to-ear... or am I the only one who did that?
Thanks, Bishop. Thirty minutes at least... it was really inspiring. I've got a ways to go with finishing this
pack, but I feel confident I can handle each challenge, hoop and hurdle by being patient and asking for help when I need it
Re: GohstTarp'sProtonPackBuild
Posted: January 28th, 2015, 1:52 am
by Venkman's Swagger
Yes dude!! Rocking it
Re: GohstTarp'sProtonPackBuild
Posted: January 28th, 2015, 11:18 am
by thelegendofvix
I love that you have an Ashley Sscheffer license plate frame.
Re: GohstTarp'sProtonPackBuild
Posted: January 29th, 2015, 4:44 pm
by nick-a-tron
Looks great! You got the height just right.
Re: GohstTarp'sProtonPackBuild
Posted: January 29th, 2015, 5:41 pm
by Hammer
The foundation is solid....the rest should go great!
Re: GohstTarp'sProtonPackBuild
Posted: February 1st, 2015, 5:58 pm
by GohstTarp
Venkman's Swagger wrote:Yes dude!! Rocking it
Thanks, VS! Rocking it old school, for sure.
Re: GohstTarp'sProtonPackBuild
Posted: February 1st, 2015, 6:00 pm
by ecto85
Looking good
Re: GohstTarp'sProtonPackBuild
Posted: February 1st, 2015, 6:07 pm
by GohstTarp
thelegendofvix wrote:I love that you have an Ashley Sscheffer license plate frame.
Ha ha ha! Good eye! I was wondering if someone was going to notice that thing. Unfortunely, it's not compatible with the OR license plates becuase of the renewal sticker location. Now it just sits in our garage and amuses us.

Re: GohstTarp'sProtonPackBuild
Posted: February 1st, 2015, 6:09 pm
by GohstTarp
nick-a-tron wrote:Looks great! You got the height just right.
Thanks, Nick! The GBFans motherboard with the pre-drilled ALICE frame holes helped quite a bit.
Re: GohstTarp'sProtonPackBuild
Posted: February 1st, 2015, 6:13 pm
by GohstTarp
Hammer wrote:The foundation is solid....the rest should go great!
Thanks, Hammer! Appreciate your confidence and that is exactly what I'm going for... a good starting foundation
Re: GohstTarp'sProtonPackBuild
Posted: February 1st, 2015, 6:15 pm
by GohstTarp
ecto85 wrote:Looking good
Thanks, Dr. Frisby. Always great to hear from another Portland Ghostbuster!
Re: GohstTarp'sProtonPackBuild
Posted: February 1st, 2015, 6:37 pm
by GohstTarp
I performed my first "dado" (gotta love that word) and my Wiz Loom Clamp is now L-bracket friendly. Thanks for the suggestion, Bishop!
I started by marking off the area I wanted remove from the clamp and then placed in the vice...
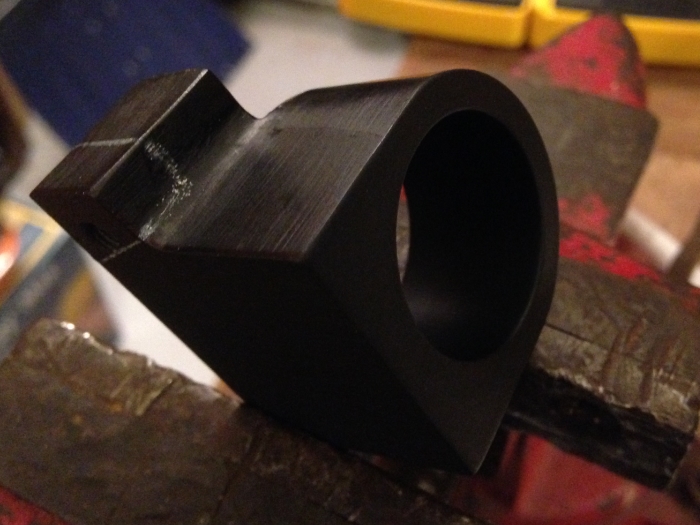
The dremel worked really well with removing the material. It was the first time I used one, but it was quite easy.
Below is the dadoed clamp, alone with some templates I made out of card stock to mark off the area of the shell to remove...
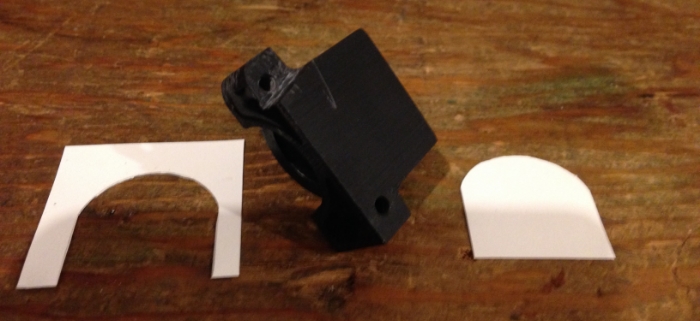
My plan is to cut out the mouse hole, then attach the clamp properly aligned with the shell. Looking forward to a nicely installed, removable wire loom attachment solution!